
Project of the Week:
Dec 26th - still La Pax Mx - Feliz Navidad!
picking up on getting here; So after the BaHaHa parties in Cabo, we lifted anchor, added a bit of fuel, and headed towards La Paz. Plan was to take 2-3 days, anchor in a couple recommended spots, go swimming - just take it easy and enjoy the time before our crew flew away. (did I mention we picked up May Geach to break up the night shifts? She was great) - that was the plan. Some one has since stated that "cruisers plans are written low in the sand, where they get washed away twice a day by the tide" - well that was true for us. We motorsailed into variable winds east, and were just getting around the tip of baja and turning north up into the Sea of Cortez, when we heard a distress call on the radio. It was a fellow BaHaHa'er that had broken their boom on the way down, and had now developed engine problems, leaving them drifting in light winds they couldn't point their way up in. We were about 35nm out of Cabo, and neither boat wanted to head back that way......so we tossed them a tow line (Good Ole Dad had given us a roll of 5/8" poly, saying it was perfect for towing, just the right amount of spring - he was right), and pointed north towards La Paz, about 140nm away. We'd love to have stopped at at least one anchorage, but the wind and wave conditions were perfect for towing (almost no waves), and our timing was working out perfectly for a mid-morning, full light, incoming tide arrival.....so we towed steady for a day and a bit. Kept the speed down to 5 knots so as to not overload the transmission, engine was humming along real nicely (except when the engine died - nothing obvious, flipped over fuel filters, re-primed and restarted - \think it's time to change out the secondary fuel filter on the motor too)
We did chafe through the tow line once (poly is lousy for chafe), and improved the run by adding a bridle on the their end - ended up with bridles on both ends, and about 120ft between boats - not bad, but more length would be nice if we were dealing with any wave action. They also towed a bucket just to keep steady tension on the towline - worked well.
It was a pain to lose the slow trip to La Paz, 'cause that was our chance for a break before going back into project mode - lots to do before we're ready to head offshore into big waves for three weeks at a shot - but the other boat's crew was so happy to arrive where they'd planned safely, we were glad to have helped - besides, it makes for a great story!
And - they got us into Marina de La Paz, where we had no reservation. Best located, equipped and maintained marina in La Paz, and FULL due to 50 odd BaHaHa'ers arriving at about the same time the Sea of Cortez snow bird cruisers started migrating back also - but once we in for a day, they found space for 4 days - and ultimately 4 months. More expensive than we'd expected, but once we saw a Northerly blow through the anchorage (not dangerous, just rough getting back & forth for 4 days, plus derelict boats dragging daily), we knew we didn't want to be attempting to do projects in those conditions.
So that's where we've been since arriving - local cruising community is amazing in organizing daily coffee, stretching, tennis, dominos, cards, holiday pot lucks, and cruiser assistance - marina is very centrally located - we've found material supply stores, and even a cabinet maker who is starting to help out with complex bits. After spending a couple days cleaning inside and out (amazing how much cleaning and polishing is required after an offshore cruise - and 4 months of NO RAIN. Project list is starting to shrink...relocated autopilot control head out into cockpit, figured out why radar has been DOA (bad factory ethernet cable...sheesh), installed water maker, main cabin doors, several drawer fronts with push locks, reworked a bit of holding tank vent plumbing (finally found a wisp of a leak in the vent line at a step down adapter..), ran plumbing to tie in hot water heater to engine, plumbed forward toilet (Dad's arriving in 2 weeks, and will get his own head), got started on cedar planking the trunk cabin ceiling, and have bunging screw holes + oiling surfaces everywhere. Need to get aft cabin wood pile down enough to finish some wire runs under the bed....and move in! So looking forward to getting back to a Norm(king)size bed.
Have signed up for 2015 Puddle Jump (North America to South Pacific), which brings like minded cruisers togetherhttp://www.pacificpuddlejump.com/fleet.html
- have met a terrific group of cruisers planning to follow a similar path so we're forming a convoy (squadron?) to communicate/travel/support & enjoy one another. Have already learnt how to blow a conch! Now just have to go buy our own, so we can do duets....
Dad coming to visit Jan 10th, good buddy Joe Feb 1st, so we're looking forward to that - both are worker bees, so we'll get a hand with a couple projects then untie from the dock, and spend some time cruising/swimming in beautiful local islands - then come back and do some more project work. If everything goes really well, we might just head to Puerto Vallarta for the jump, just to see a bit more of Mexico, and get closer to our buddy boats for departure.
Forgot to mention we were also the cover boat for the Dec/2014 edition of Latitude 38, a westcoast cruising magazine.....pic taken while we were off baja with BaHaHa group. Love it.

So far, cruising has been great - boat floats, moves really nicely, people are awesome, and time absolutely evaporates while we're living large. Terrific life!
Dec 9th 2014 - La Paz Mexico We're Cruising! (= doing boat maintenance in Exotic locales)
What happened to Oct/Nov??
- cruising - we harbour hopped down to San Luis, then cautiously left at 10pm to ensure a 2 am rounding for the calmest conditions......well it was calm alright, glassy seas and zero wind the whole way round, but with a gorgeous big moon - absolutely beautiful night passage. Light winds late morning let us get some sail out........only challenge was from a US Navy exercise well offshore that demanded a 25 mi buffer zone that cut across shipping lanes, and onto shore!! Freighters, fishing boats, cruisers all piled up waiting for an air drop on the other side of the Channel Islands. Everyone was polite despite it being a touch extreme, and we were allowed by just in time to arrive in Ventura before dark.
- Ventura was a stand out amongst a number of excellent harbours we bounced through (including Catalina Island aboard our own boat, another check mark off the bucket list) getting down to San Diego. We pulled into SD 10 days in advance of the BaHaHa, looking to get a few key projects and a whack of paperwork done - found it a terrific place for boat parts/expertise, but probably the worst place we encountered for a transient cruiser to have a boat in - unless you could figure out how to get into one of the private marinas, the toilet/shower facilities were pretty dismal. Upside was the growing number of BaHaHa'ers we were meeting, and the great support/seminars organized - our favourite supporter was DownWind Marine, who went way beyond the call of duty in helping us out. We also enjoyed our much loved old friend May Geach

coming to join us in San Diego for the run into Mexico - just to break up night shifts. Everything was coming together just in time - until the new Mexican online system for Temporary Import Permits (a critical piece of paper for the boat) very efficiently sent our TIP to our home in Campbell River BC. We missed the rally start waiting to get that document back.....good news is that there was no wind for the start, and we motor pretty well, so we actually arrived in Turtle Bay Mx with the back of the fleet We got to stay in Turtle Bay a couple more days than planned, as hurricane Vance was not following it's predicted path

away from Cabo.......when it finally curved away, we headed out for the best sailing leg of the trip - 15+kt winds aft the beam through the day, climbing to 25knots on the beam that night - unfortunately along with cross seas, so everyone was getting about 6ft waves from the side and behind. A few boats blew sails, two boats broke booms in unintended gybes - and we had an awesome ride. Wasn't comfortable throwing up the spinnaker in predicted climbing winds, so we played with various configurations (wing on wing, cutter, poled and un-poled) and went to the first reef and a roll in the genoa on a broad reach at nightfall in about 18kt - moving nicely. Wili got me up about 10pm as the wind hit 25kt - and we were flying! Regular bursts of 11kts by gps had the ladies feeling like we were on the ragged edge. The boat still felt great, and the autopilot wasn't struggling....but it was their shift, so we threw in a 2nd reef, another roll or two of genoa, she settled down to 8 kt - and I went back to bed. Come morning, we'd moved well up in the fleet - DreamCatcher loves wind,

- Bahia Santa Maria was awesome - visually never ending curved sand beach, big bluff to hide behind, plus party on - the view out over 150 odd cruising boats was amazing. Hundreds of offshore cruisers telling sailing tales, beach vollyball, endless cold beer, conga dancing to a rock and roll band, our party day there was one of the highlights of the trip.


- Last leg was almost anti climatic, as wind was again mostly non-existent, and most everyone motorsailed to the finish line. Was great to finally arrive in Cabo - highlight there was a crazy after party at night club 'Squid Roe' We just took the place over, danced everywhere you could stand, congo'd out into the street & back, drank too much, laughed continuously, and made it home safely.
 Norm diving anchor in Cabo anchorage - in water as warm as the air.
Sept 29th 2014 - Monterey Harbour California - DreamCatcher Unleashed
A fair bit has happened.....
- we got away from the dock in Campbell River, and went all the way (40 miles) to the Beach Gardens in Powell River, where we sat for several days and just shuffled, organized and got some critical projects done with the aid of my good friend Jim Rae. Boat was still a mess, but at least we could move.

Gear stacked to the gunnels below, and rail to rail on the stern above - we were loaded.

DreamCatcher painting by daughter Allison - mounted in pilothouse
Love you Ali!

stacked to gunnels!! but secured too.

- overnighted at Newcastle island in Naniamo, then onto Canoe Cove in Sydney, tied up close to my sis Adele + Ian in their beautiful boat 'No Regrets' - and attended a great family wedding for nephew Josh & Gen = awesome young couple. Hung in Canoe Cove (who were great in finding us space to stay during a busy period) for a week waiting for some key parts - mainly smart 24v regulator and Garmin system extension cables (Thx Ocean Pacific!).
- all parts aboard, we went to Friday Harbour, mostly to go thru US Customs in a place that was used to handling boats.....discovered that there is a US westcoast cruising licence, $19, saves multiple re-enteries, though reporting in by phone can be challenging in finding an officer to talk to sometimes,
- shifted to Port Angeles as we positioned for run past Columbia River....and discovered our smart regulator had corrupted programming, overcharging batteries on long runs. Unplugged, and started working thru problem, brought in a tech to ensure it wasn't my wiring (Thor's Electronics (360)417-2908) who was great, quickly pointing to reg and giving call to Balmar to support warranty replacement. Balmar was good, new unit worked perfectly.
We were also talking with a weather router Byrnn at Commander's Weather, who wanted us to hold for a couple days while an offshore system went by.....but it was great inside Juan DeFuca Strait, so we made a beautiful smooth moonlit tide boosted overnight run up to Neah Bay, just inside Cape Flattery. Hung 2 nights waiting for our weather window - glad that we gjot the parts issues straight in Port Angeles, 'cause Neah Bay is a small fishing village - good grocery, but no parts.

Byrnn gave us the go, and out we went - very low winds, almost no seas for first 24hrs had us motoring steady - nice easy break in for us! Next morning brought some light north wind - and we launched our spinnaker for the first time, then left it up all day long - on autopilot. Another beautiful day
Wili on bow with her favorite sail
 Kept moving further offshore to both ensure the smoothest possible passing of the Columbia River, and in search or a bit more wind. Got past Coos Bay in a timely manner, then wind swung, and we started beating our way upwind for the night - some confused seas, boat got tossed a wee bit - some drawers opened and needed to be jammed closed, but major items were all nicely secured. Wind was still from south next day, so we headed into Crescent City, had showers, and waited for the wind to swing our way again.
Meet an interesting young couple, Jake and Aleshia, in Crescent City - a very young couple just getting their feet wet living aboard and bouncing down the coast - they became our first international dinner guests (LOL - it was a bake yourself pizza)

Couple nights later we pulled out in no wind, motored, then spinnakered our way down to San Fransisco. Most traffic of the entire trip was dodging the Saturday morning recreational fishermen off the navigation buoys leading into the Golden Gate.
SF entrance lighthouse
 Bridge itself was half shrouded in fog as we slid underneath, in the midst of a herd of racing sailboats. Leg 1 done with no major weather challenges, thanks goes to Commander's Weather for guidance on this sometimes trip killing westcoast section.

Our son Nick became our first cruising visitor, as he joined us in San Fransisco. We enjoyed 3 days of showering, people seeing and nice restaurants hanging off Pier 39 downtown SF
Surge at this dock was worse than most of the offshore time we'd spent getting here.....but nightlife was hard to beat.

Nick was with us as we left San Fran on a much nicer day - headed to Halfmoon Bay

and then enjoyed another daysail to Santa Cruz - where we entered the harbour during their Wed race day - sailboats everywhere, lots of laughter - this was a very enjoyable place to stay.
And it was here we meet an engaging Chilean couple Maria and Ben (Americianized versions of much more exotic spanish names) - exchanged boat visits, bottles of wine, and addresses - sad we were cruising in opposite directions. Ben was awesome in offering guidance down to Cape Conception, a trip he'd done multiple times.
Today we're in Monterey, another nice cruising location - and yep, we found Trader Joe's and some dark rum Ben! Watching weather for our midnight start run to San Simeon, followed by a day sail to San Luis positioning us for another key rounding --- this time Cape Conception. stay tuned!

August 23rd - entering loading day 4...
- All floor teak, framing teak, a bit of teak plywood and a teak door (extra story there), plus chop saw and aft mattress secured in aft cabin (can't tell how badly we've buried the stern 'cause there's still significant un-stored material on the aft deck)
- All major cushions delivered and onboard
- everything we're playing to carry - tools, spares, yet to be installed radios, desalinator, etc are either onboard or on dock waiting for their turn to be stored.
Reasonably happy with how stowage is going - lots of repacking from big boxes to cubby hole sized tupperware, but so far it's all fitting, and we're not yet into the really prime pilothouse space. Figure we'll load the deck tomorrow morning, and if the weather is once again beautiful (it's been sunny and dry all week), depart our home dock on the tide - first destination is Powell River - we'll motor over, sorting all the way.
Last minute pieces are almost under control...
- the LED cabin lights arrived in plenty of time (thx Marinebeam!)
- Charlie's Charts guide for US west coast (have US charts, but wanted more detailed port entry info north of San Francisco) is being couriered to my sis in Victoria....nicely downwind of here
BUT - the emergency tiller I jobbed out is going to be a couple days late; son is going to drive it down for when we meet Friday for family wedding in Victoria - and the 24v Balmar reg was a total no show for the last courier shipment till next Tues - hopefully we can capture it in Victoria too. So far it's coming together.
The story of the week - one of our friends saw me wrestling to get a couple last minute cabinetry jobs done, and asked if he could help - so I told him "I have a simple door planned and partially cut - how about that?" He took it on - I'd cut and fitted a chunk of 1/2" teak ply for the forward head door, it needed a inner acrylic liner glued & trimmed, a 1/2" teak frame cut & glued, and a mortise door latch(!!) fitted. I did have all parts/glues in hand - Del was amazing - he dug right in, and less than 24 hrs after taking parts, handed me back a completed door - including the fitted latch! No way I could have done that. I'll need a quiet day to fit it to the forward head, but it'll make our forward living quarters much more wife friendly - thanks Super Del.
So looking forward to slipping the lines and starting to move......
August 20th - bushed
living in total chaos getting boat to safe unfinished stage.

- all pre-fabbed teak frames installed
- installed first bit of interior teak finish flooring in foreberth (which will be our bedroom while we use the aft cabin as a workshop). Looks awesome.
- installed diesel stove stack, gravity tank and all plumbing - so I can keep Wili warm from here to Mexico

- finally installed proper cockpit winches - Lewmar 64ST primaries and Barient 28ST (equivalent to Lewmar 54). Drilling/tapping the SS winch plates was a joy.
- did final tweaks to adapt Selden spinnaker toggle to Forespar pole - now residing in vertical storage in front of mast (nice not to have the pole blocking the fore deck any more)
- sheathed inside of transom just to get rid of the massive ugly foam expanse + give us an attachment base for the next set of side cabinets + allow installation of protected propane hose run port to starboard.
- resolved masthead light working - by changing bulbs. Now have working LED tri and anchor lights at masthead.
- prepped teak boards for transit - planed and split. How does that make boat safer? Means we're done with planer, and don't have to carry the beast!
- finished plumbing tub sump pump (keeping Wili warm & clean; happy wife = happy life - keep repeating...)
Shifting over to offloading 90% of what's on boat, deciding what we really need, and reloading just that in an organized manner, weight forward as possible - plus our clothes. Will follow that with cushions, then bodies...then depart!
August 12th -
.jpg)
Buddy George L dropped by with refreshments and advice that we're taking to heart....
- Inside steering plumbed, filled and bled - we're mobile again. Shadow drive in place to service cockpit helm when we activate the autopilot
- Washer/dryer loaded, placed - Wili is busy templating retaining bulkheads
- helm cabinetry started.....playing with dash layout vs available space behind - the chart plotter has some large cabling requirements, not sure we're going to be able to surface mount as originally planned.
- SS tube frame for future stern bimini done, along with a motor crane modification to increase the lifting block clearance.
- started stocking up on spares - have all pumps covered.
photo by C Mallard via Nuno/Ocean Metals
DreamCatcher at Comox BC

August 6th - moving times...
Limited boat progress - even for a retired guy, life gets in the way once in a while. Having rented out the house, we finally had to move - downstairs. Awesome renters on a two year lease, with interest in more ( :) ) Total chaos as we condensed 14 yrs in one place. Good news was that our son bought a house in town - so there is a home for decent furniture we no longer needed - and a place for the remaining interior wood and tools!
- Wili did complete the fwd head floor, fairing in the corners, sanding, fairing , final paint, and non-skid. A one piece waterproof floor that looks great.
- I did find time to install the fwd cabin framing for a chest of drawers, and most of the sliders for 8 more (angled front! grrrr) drawers.
- also plumbed the inside steering station, only to discover I screwed up on the initial plumbing run as far as the Garmin autopilot 'shadow drive' - which tuns out to be a sensitive flow switch that suspends autopilot control when it senses helm created flow. My plumbing runs, laid out so we could easily add the second helm to a working system, make it so the flow switch can't see both helms. So I'll have to cut into the exiting loop to set up the cockpit helm as the master - makes sense, given that the autopilot control head is at the inside helm.
and - I've been holding off on buying our interior LED lights, due to not being able to find low RF 24vdc dome lights in brass.....finally found a good source, complete with some 'illuminating' tech info on what LED's you want to avoid for marine applications +++
http://store.marinebeam.com/contolling-emi-in-led-bulbs.html
Site is worth visiting just for the tech info.
July 20th - coming clean...
Gave up trying to get good pics of the forward head, just did the best I could
 - Wili installed her shower and toilet base, and is working on the perimeter. Gotta love a woman that can custom mould fiberglass!
 - I glued and screwed the cabinet frame in (finally)
- we butchered a tub surround to seal the last bulkhead and both inside corners, then ran the shower plumbing up one. Needed to both seal the wall and lighten the room - it was getting pretty dark as we closed it up. Overall, it's a neat, clean install.


July 14th - 'project of the month'.....
I've spent a huge amount of time in the wiring corner, first setting up the back plane, then the chart table/panel face, and FINALLY the breaker panels (so I thought)....actually wiring the panels has been a whack of work to boot. Finally have working 12 & 24v panels plus essential service distribution - and the 110v is just awaiting tidying everything else - one tie in to.
 Starting point.....over 50 duplex cables pulled into corner by pilothouse helm
 a while later......back plane in with terminal strips for 12, 24 and 110v, plus 24-12v converter
also built chart table, and installed back half, so we could hinge panel face off the top (bolted pilothouse helm pump in too)
 here's the full panel folded down for wiring access to backside - there's enough space that I can juusst fit in my shoulders and arms to reach the back corners.


fussed around figuring out how to secure the hinged panel closed; needed something solid but of very small footprint, due to the lack of space. Finally glued backstops into the upper corners, then drilled thru the inside upper corners, and screwed in a small bolt from the backside, thru the wood....and simply use a knurled nut on the panel face to hold it closed. Simple, strong, and not bad looking.
panels powered up, and mostly wired - still lots of ceiling light/fan terminations to make - but we can start powering up as needed.
- labels are back lit, which is nice at night, but a waste of valuable power otherwise...have all back lights on a common switched circuit, so we can kill that
- both the 12 & 24v sections have multi meters & shunts, so we can see volts/amps and set up hi/lo alarms. Pretty easy to set up.
 Meanwhile Wili finished building the fiberglass toilet and shower bases - I cleaned up beneath the fwd head counter, including installing a large accumulator, plumbed thru to the shower corner, and installed the counter teak frame - before we glued and screwed in the shower/toilet bases. No decent pics - finding it hard to get a good perspective in such a small room. Will try with a different camera...

picked up the smallest accumulator available at our local plumbing store - 4x the size of the normal marine accumulator, and 1/3 the price. Our freshwater system runs at 45-60 psi, so I set up the accumulator at 50 psi.
 And on the contractor side, our upholster delivered some more cushions - forward mattress done, everything else except aft mattress patterned and in progress, or done. They look great in place, but we're checking the fit, and taking them home to save from dust/glue/paint.
And here's what we'll be flying as we head south of the border - really looking forward to joining the fleet of people as crazy as ourselves!!!!

June 14th - Happy Father's Day
A diverse collection of work...

Finally have both stoves in & secured

 The propane stove is up on the new custom made offshore gimbals - nice fit.

And - knowing that we won't be using the Dickinson stove in Mexico or the South Pacific - we made a cutting board that fits over the diesel stove fiddle, level with the adjacent counter. Its' a great add to the working counter space, at a height Wili prefers.
Also pulled another couple hundred feet of dc cable, finishing up the forward runs - figure we're at about 2300ft, with another couple hundred to go

Meanwhile on the outside - we finally finished filling/sanding/painting/non-skidding and permanently installing the hatch and turtleback.
- used awlgrip paint in order to match the rest of the deck, but tried out International Interdeck for the non-skid. Turned out to be really easy to work, and a near perfect colour match for the Awlgrip non-skid initially applied - so now we know what we're going to use when we touch up the deck.

hatch looks good, slides well, and has good clearance (phew!)
And - it was Norm proofed (means I got on top and jumped up & down - fine load test)

happy with remaining opening - still have to get the washer/dryer inside, and we'll have lots of space. Do need to keep an eye on how we trim out the sides, in order to maintain the ability to pull the motor complete with tranny straight out

on the hatch underside, we added firring strips, painted/poured expanding foam for condensation control, and then lined with cedar strip. Still need to trim out the perimeter - and install the permanent doors, jobs that we'll hold off on till all the appliances/mattresses are on board.


Back at the house, Wili has been building up a fiberglass shower pan - here's about 1/3 of it, with the first filler coat on.
 Our dock neighbors were out, giving me the opportunity for a full side shot - best we can do till we're away from the dock - looking forward to that day.
June 5th - committed
http://www.baja-haha.com/Alumni/2014Roster.html
We're #63!
June 1st - a proper hangin'
 Well, it's not too often I'm disappointed with locally sourced marine products - and I love many of the details built into our Force 10 propane stove (beautiful SS construction, 4 burners, oven with grill, came with 4 reasonable pot holders) - but the supplied gimbal support bracket is a known POS that has a history of grinding through the gimbal pin in18-24 months offshore.....

one look and it's obvious that it doesn't match the stove. So like several others, we threw the factory supplied gimbal brackets away, and had beefer aluminum units, with screw down retaining caps, machined up.

I've attached a sketch of the dimensions we used for our brackets - note we also used two shims on each side (1/8" and 1/16") to center the stove inside the cabinet built per the install instructions. You could avoid shims by going to 5/8" thick brackets, but expect it to cost more.
It's sad that Force 10 doesn't offer an offshore upgrade - or at least supply the drawing needed to get the offshore mount machined up.
May 28th - out/in and back at it...
Updated delayed by Blogger 'upgrade' (don't you love it when they do system improvements and you can't upload any more??)

Mid-May boat lift - Dream Catcher has been in the water for 6 months(!) so we wanted to do an early hull inspection, mostly to see how the zincs were doing, but also anti-fouling adherence, thru-hull conditions etc - she's a new boat, and we want to avoid surprises. So back to Ocean Pacific, up and out. Great gear and yard crew, so bringing her is a no stress event.

- general hull/paint - no issues. You could hand wipe the slime off, and everything under water looked good.
- zincs - all active (which is perfect - you want to know they're grounded and working). We're targeting a minimum 18 month life per zinc, on the basis that we'll inspect replace annually.


Dec 26th - still La Pax Mx - Feliz Navidad!
picking up on getting here; So after the BaHaHa parties in Cabo, we lifted anchor, added a bit of fuel, and headed towards La Paz. Plan was to take 2-3 days, anchor in a couple recommended spots, go swimming - just take it easy and enjoy the time before our crew flew away. (did I mention we picked up May Geach to break up the night shifts? She was great) - that was the plan. Some one has since stated that "cruisers plans are written low in the sand, where they get washed away twice a day by the tide" - well that was true for us. We motorsailed into variable winds east, and were just getting around the tip of baja and turning north up into the Sea of Cortez, when we heard a distress call on the radio. It was a fellow BaHaHa'er that had broken their boom on the way down, and had now developed engine problems, leaving them drifting in light winds they couldn't point their way up in. We were about 35nm out of Cabo, and neither boat wanted to head back that way......so we tossed them a tow line (Good Ole Dad had given us a roll of 5/8" poly, saying it was perfect for towing, just the right amount of spring - he was right), and pointed north towards La Paz, about 140nm away. We'd love to have stopped at at least one anchorage, but the wind and wave conditions were perfect for towing (almost no waves), and our timing was working out perfectly for a mid-morning, full light, incoming tide arrival.....so we towed steady for a day and a bit. Kept the speed down to 5 knots so as to not overload the transmission, engine was humming along real nicely (except when the engine died - nothing obvious, flipped over fuel filters, re-primed and restarted - \think it's time to change out the secondary fuel filter on the motor too)
We did chafe through the tow line once (poly is lousy for chafe), and improved the run by adding a bridle on the their end - ended up with bridles on both ends, and about 120ft between boats - not bad, but more length would be nice if we were dealing with any wave action. They also towed a bucket just to keep steady tension on the towline - worked well.
It was a pain to lose the slow trip to La Paz, 'cause that was our chance for a break before going back into project mode - lots to do before we're ready to head offshore into big waves for three weeks at a shot - but the other boat's crew was so happy to arrive where they'd planned safely, we were glad to have helped - besides, it makes for a great story!
And - they got us into Marina de La Paz, where we had no reservation. Best located, equipped and maintained marina in La Paz, and FULL due to 50 odd BaHaHa'ers arriving at about the same time the Sea of Cortez snow bird cruisers started migrating back also - but once we in for a day, they found space for 4 days - and ultimately 4 months. More expensive than we'd expected, but once we saw a Northerly blow through the anchorage (not dangerous, just rough getting back & forth for 4 days, plus derelict boats dragging daily), we knew we didn't want to be attempting to do projects in those conditions.
So that's where we've been since arriving - local cruising community is amazing in organizing daily coffee, stretching, tennis, dominos, cards, holiday pot lucks, and cruiser assistance - marina is very centrally located - we've found material supply stores, and even a cabinet maker who is starting to help out with complex bits. After spending a couple days cleaning inside and out (amazing how much cleaning and polishing is required after an offshore cruise - and 4 months of NO RAIN. Project list is starting to shrink...relocated autopilot control head out into cockpit, figured out why radar has been DOA (bad factory ethernet cable...sheesh), installed water maker, main cabin doors, several drawer fronts with push locks, reworked a bit of holding tank vent plumbing (finally found a wisp of a leak in the vent line at a step down adapter..), ran plumbing to tie in hot water heater to engine, plumbed forward toilet (Dad's arriving in 2 weeks, and will get his own head), got started on cedar planking the trunk cabin ceiling, and have bunging screw holes + oiling surfaces everywhere. Need to get aft cabin wood pile down enough to finish some wire runs under the bed....and move in! So looking forward to getting back to a Norm(king)size bed.
Have signed up for 2015 Puddle Jump (North America to South Pacific), which brings like minded cruisers togetherhttp://www.pacificpuddlejump.com/fleet.html
- have met a terrific group of cruisers planning to follow a similar path so we're forming a convoy (squadron?) to communicate/travel/support & enjoy one another. Have already learnt how to blow a conch! Now just have to go buy our own, so we can do duets....
Dad coming to visit Jan 10th, good buddy Joe Feb 1st, so we're looking forward to that - both are worker bees, so we'll get a hand with a couple projects then untie from the dock, and spend some time cruising/swimming in beautiful local islands - then come back and do some more project work. If everything goes really well, we might just head to Puerto Vallarta for the jump, just to see a bit more of Mexico, and get closer to our buddy boats for departure.
Forgot to mention we were also the cover boat for the Dec/2014 edition of Latitude 38, a westcoast cruising magazine.....pic taken while we were off baja with BaHaHa group. Love it.
So far, cruising has been great - boat floats, moves really nicely, people are awesome, and time absolutely evaporates while we're living large. Terrific life!
Dec 9th 2014 - La Paz Mexico We're Cruising! (= doing boat maintenance in Exotic locales)
What happened to Oct/Nov??
- cruising - we harbour hopped down to San Luis, then cautiously left at 10pm to ensure a 2 am rounding for the calmest conditions......well it was calm alright, glassy seas and zero wind the whole way round, but with a gorgeous big moon - absolutely beautiful night passage. Light winds late morning let us get some sail out........only challenge was from a US Navy exercise well offshore that demanded a 25 mi buffer zone that cut across shipping lanes, and onto shore!! Freighters, fishing boats, cruisers all piled up waiting for an air drop on the other side of the Channel Islands. Everyone was polite despite it being a touch extreme, and we were allowed by just in time to arrive in Ventura before dark.
- Ventura was a stand out amongst a number of excellent harbours we bounced through (including Catalina Island aboard our own boat, another check mark off the bucket list) getting down to San Diego. We pulled into SD 10 days in advance of the BaHaHa, looking to get a few key projects and a whack of paperwork done - found it a terrific place for boat parts/expertise, but probably the worst place we encountered for a transient cruiser to have a boat in - unless you could figure out how to get into one of the private marinas, the toilet/shower facilities were pretty dismal. Upside was the growing number of BaHaHa'ers we were meeting, and the great support/seminars organized - our favourite supporter was DownWind Marine, who went way beyond the call of duty in helping us out. We also enjoyed our much loved old friend May Geach
coming to join us in San Diego for the run into Mexico - just to break up night shifts. Everything was coming together just in time - until the new Mexican online system for Temporary Import Permits (a critical piece of paper for the boat) very efficiently sent our TIP to our home in Campbell River BC. We missed the rally start waiting to get that document back.....good news is that there was no wind for the start, and we motor pretty well, so we actually arrived in Turtle Bay Mx with the back of the fleet We got to stay in Turtle Bay a couple more days than planned, as hurricane Vance was not following it's predicted path
away from Cabo.......when it finally curved away, we headed out for the best sailing leg of the trip - 15+kt winds aft the beam through the day, climbing to 25knots on the beam that night - unfortunately along with cross seas, so everyone was getting about 6ft waves from the side and behind. A few boats blew sails, two boats broke booms in unintended gybes - and we had an awesome ride. Wasn't comfortable throwing up the spinnaker in predicted climbing winds, so we played with various configurations (wing on wing, cutter, poled and un-poled) and went to the first reef and a roll in the genoa on a broad reach at nightfall in about 18kt - moving nicely. Wili got me up about 10pm as the wind hit 25kt - and we were flying! Regular bursts of 11kts by gps had the ladies feeling like we were on the ragged edge. The boat still felt great, and the autopilot wasn't struggling....but it was their shift, so we threw in a 2nd reef, another roll or two of genoa, she settled down to 8 kt - and I went back to bed. Come morning, we'd moved well up in the fleet - DreamCatcher loves wind,
- Bahia Santa Maria was awesome - visually never ending curved sand beach, big bluff to hide behind, plus party on - the view out over 150 odd cruising boats was amazing. Hundreds of offshore cruisers telling sailing tales, beach vollyball, endless cold beer, conga dancing to a rock and roll band, our party day there was one of the highlights of the trip.
- Last leg was almost anti climatic, as wind was again mostly non-existent, and most everyone motorsailed to the finish line. Was great to finally arrive in Cabo - highlight there was a crazy after party at night club 'Squid Roe' We just took the place over, danced everywhere you could stand, congo'd out into the street & back, drank too much, laughed continuously, and made it home safely.
Sept 29th 2014 - Monterey Harbour California - DreamCatcher Unleashed
A fair bit has happened.....
- we got away from the dock in Campbell River, and went all the way (40 miles) to the Beach Gardens in Powell River, where we sat for several days and just shuffled, organized and got some critical projects done with the aid of my good friend Jim Rae. Boat was still a mess, but at least we could move.
Gear stacked to the gunnels below, and rail to rail on the stern above - we were loaded.
DreamCatcher painting by daughter Allison - mounted in pilothouse
Love you Ali!
stacked to gunnels!! but secured too.
- overnighted at Newcastle island in Naniamo, then onto Canoe Cove in Sydney, tied up close to my sis Adele + Ian in their beautiful boat 'No Regrets' - and attended a great family wedding for nephew Josh & Gen = awesome young couple. Hung in Canoe Cove (who were great in finding us space to stay during a busy period) for a week waiting for some key parts - mainly smart 24v regulator and Garmin system extension cables (Thx Ocean Pacific!).
- all parts aboard, we went to Friday Harbour, mostly to go thru US Customs in a place that was used to handling boats.....discovered that there is a US westcoast cruising licence, $19, saves multiple re-enteries, though reporting in by phone can be challenging in finding an officer to talk to sometimes,
- shifted to Port Angeles as we positioned for run past Columbia River....and discovered our smart regulator had corrupted programming, overcharging batteries on long runs. Unplugged, and started working thru problem, brought in a tech to ensure it wasn't my wiring (Thor's Electronics (360)417-2908) who was great, quickly pointing to reg and giving call to Balmar to support warranty replacement. Balmar was good, new unit worked perfectly.
We were also talking with a weather router Byrnn at Commander's Weather, who wanted us to hold for a couple days while an offshore system went by.....but it was great inside Juan DeFuca Strait, so we made a beautiful smooth moonlit tide boosted overnight run up to Neah Bay, just inside Cape Flattery. Hung 2 nights waiting for our weather window - glad that we gjot the parts issues straight in Port Angeles, 'cause Neah Bay is a small fishing village - good grocery, but no parts.
Byrnn gave us the go, and out we went - very low winds, almost no seas for first 24hrs had us motoring steady - nice easy break in for us! Next morning brought some light north wind - and we launched our spinnaker for the first time, then left it up all day long - on autopilot. Another beautiful day
Wili on bow with her favorite sail
Meet an interesting young couple, Jake and Aleshia, in Crescent City - a very young couple just getting their feet wet living aboard and bouncing down the coast - they became our first international dinner guests (LOL - it was a bake yourself pizza)
Couple nights later we pulled out in no wind, motored, then spinnakered our way down to San Fransisco. Most traffic of the entire trip was dodging the Saturday morning recreational fishermen off the navigation buoys leading into the Golden Gate.
SF entrance lighthouse
Our son Nick became our first cruising visitor, as he joined us in San Fransisco. We enjoyed 3 days of showering, people seeing and nice restaurants hanging off Pier 39 downtown SF
Surge at this dock was worse than most of the offshore time we'd spent getting here.....but nightlife was hard to beat.
Nick was with us as we left San Fran on a much nicer day - headed to Halfmoon Bay
and then enjoyed another daysail to Santa Cruz - where we entered the harbour during their Wed race day - sailboats everywhere, lots of laughter - this was a very enjoyable place to stay.
And it was here we meet an engaging Chilean couple Maria and Ben (Americianized versions of much more exotic spanish names) - exchanged boat visits, bottles of wine, and addresses - sad we were cruising in opposite directions. Ben was awesome in offering guidance down to Cape Conception, a trip he'd done multiple times.
Today we're in Monterey, another nice cruising location - and yep, we found Trader Joe's and some dark rum Ben! Watching weather for our midnight start run to San Simeon, followed by a day sail to San Luis positioning us for another key rounding --- this time Cape Conception. stay tuned!
August 23rd - entering loading day 4...
- All floor teak, framing teak, a bit of teak plywood and a teak door (extra story there), plus chop saw and aft mattress secured in aft cabin (can't tell how badly we've buried the stern 'cause there's still significant un-stored material on the aft deck)
- All major cushions delivered and onboard
- everything we're playing to carry - tools, spares, yet to be installed radios, desalinator, etc are either onboard or on dock waiting for their turn to be stored.
Reasonably happy with how stowage is going - lots of repacking from big boxes to cubby hole sized tupperware, but so far it's all fitting, and we're not yet into the really prime pilothouse space. Figure we'll load the deck tomorrow morning, and if the weather is once again beautiful (it's been sunny and dry all week), depart our home dock on the tide - first destination is Powell River - we'll motor over, sorting all the way.
Last minute pieces are almost under control...
- the LED cabin lights arrived in plenty of time (thx Marinebeam!)
- Charlie's Charts guide for US west coast (have US charts, but wanted more detailed port entry info north of San Francisco) is being couriered to my sis in Victoria....nicely downwind of here
BUT - the emergency tiller I jobbed out is going to be a couple days late; son is going to drive it down for when we meet Friday for family wedding in Victoria - and the 24v Balmar reg was a total no show for the last courier shipment till next Tues - hopefully we can capture it in Victoria too. So far it's coming together.
The story of the week - one of our friends saw me wrestling to get a couple last minute cabinetry jobs done, and asked if he could help - so I told him "I have a simple door planned and partially cut - how about that?" He took it on - I'd cut and fitted a chunk of 1/2" teak ply for the forward head door, it needed a inner acrylic liner glued & trimmed, a 1/2" teak frame cut & glued, and a mortise door latch(!!) fitted. I did have all parts/glues in hand - Del was amazing - he dug right in, and less than 24 hrs after taking parts, handed me back a completed door - including the fitted latch! No way I could have done that. I'll need a quiet day to fit it to the forward head, but it'll make our forward living quarters much more wife friendly - thanks Super Del.
So looking forward to slipping the lines and starting to move......
August 20th - bushed
living in total chaos getting boat to safe unfinished stage.
- all pre-fabbed teak frames installed
- installed first bit of interior teak finish flooring in foreberth (which will be our bedroom while we use the aft cabin as a workshop). Looks awesome.
- installed diesel stove stack, gravity tank and all plumbing - so I can keep Wili warm from here to Mexico
- finally installed proper cockpit winches - Lewmar 64ST primaries and Barient 28ST (equivalent to Lewmar 54). Drilling/tapping the SS winch plates was a joy.
- did final tweaks to adapt Selden spinnaker toggle to Forespar pole - now residing in vertical storage in front of mast (nice not to have the pole blocking the fore deck any more)
- sheathed inside of transom just to get rid of the massive ugly foam expanse + give us an attachment base for the next set of side cabinets + allow installation of protected propane hose run port to starboard.
- resolved masthead light working - by changing bulbs. Now have working LED tri and anchor lights at masthead.
- prepped teak boards for transit - planed and split. How does that make boat safer? Means we're done with planer, and don't have to carry the beast!
- finished plumbing tub sump pump (keeping Wili warm & clean; happy wife = happy life - keep repeating...)
Shifting over to offloading 90% of what's on boat, deciding what we really need, and reloading just that in an organized manner, weight forward as possible - plus our clothes. Will follow that with cushions, then bodies...then depart!
August 12th -
Buddy George L dropped by with refreshments and advice that we're taking to heart....
- Inside steering plumbed, filled and bled - we're mobile again. Shadow drive in place to service cockpit helm when we activate the autopilot
- Washer/dryer loaded, placed - Wili is busy templating retaining bulkheads
- helm cabinetry started.....playing with dash layout vs available space behind - the chart plotter has some large cabling requirements, not sure we're going to be able to surface mount as originally planned.
- SS tube frame for future stern bimini done, along with a motor crane modification to increase the lifting block clearance.
- started stocking up on spares - have all pumps covered.
photo by C Mallard via Nuno/Ocean Metals
DreamCatcher at Comox BC
August 6th - moving times...
Limited boat progress - even for a retired guy, life gets in the way once in a while. Having rented out the house, we finally had to move - downstairs. Awesome renters on a two year lease, with interest in more ( :) ) Total chaos as we condensed 14 yrs in one place. Good news was that our son bought a house in town - so there is a home for decent furniture we no longer needed - and a place for the remaining interior wood and tools!
- Wili did complete the fwd head floor, fairing in the corners, sanding, fairing , final paint, and non-skid. A one piece waterproof floor that looks great.
- I did find time to install the fwd cabin framing for a chest of drawers, and most of the sliders for 8 more (angled front! grrrr) drawers.
- also plumbed the inside steering station, only to discover I screwed up on the initial plumbing run as far as the Garmin autopilot 'shadow drive' - which tuns out to be a sensitive flow switch that suspends autopilot control when it senses helm created flow. My plumbing runs, laid out so we could easily add the second helm to a working system, make it so the flow switch can't see both helms. So I'll have to cut into the exiting loop to set up the cockpit helm as the master - makes sense, given that the autopilot control head is at the inside helm.
and - I've been holding off on buying our interior LED lights, due to not being able to find low RF 24vdc dome lights in brass.....finally found a good source, complete with some 'illuminating' tech info on what LED's you want to avoid for marine applications +++
http://store.marinebeam.com/contolling-emi-in-led-bulbs.html
Site is worth visiting just for the tech info.
July 20th - coming clean...
Gave up trying to get good pics of the forward head, just did the best I could
- Wili installed her shower and toilet base, and is working on the perimeter. Gotta love a woman that can custom mould fiberglass!- we butchered a tub surround to seal the last bulkhead and both inside corners, then ran the shower plumbing up one. Needed to both seal the wall and lighten the room - it was getting pretty dark as we closed it up. Overall, it's a neat, clean install.
July 14th - 'project of the month'.....
I've spent a huge amount of time in the wiring corner, first setting up the back plane, then the chart table/panel face, and FINALLY the breaker panels (so I thought)....actually wiring the panels has been a whack of work to boot. Finally have working 12 & 24v panels plus essential service distribution - and the 110v is just awaiting tidying everything else - one tie in to.
a while later......back plane in with terminal strips for 12, 24 and 110v, plus 24-12v converteralso built chart table, and installed back half, so we could hinge panel face off the top (bolted pilothouse helm pump in too)
here's the full panel folded down for wiring access to backside - there's enough space that I can juusst fit in my shoulders and arms to reach the back corners.fussed around figuring out how to secure the hinged panel closed; needed something solid but of very small footprint, due to the lack of space. Finally glued backstops into the upper corners, then drilled thru the inside upper corners, and screwed in a small bolt from the backside, thru the wood....and simply use a knurled nut on the panel face to hold it closed. Simple, strong, and not bad looking.
panels powered up, and mostly wired - still lots of ceiling light/fan terminations to make - but we can start powering up as needed.
- labels are back lit, which is nice at night, but a waste of valuable power otherwise...have all back lights on a common switched circuit, so we can kill that
- both the 12 & 24v sections have multi meters & shunts, so we can see volts/amps and set up hi/lo alarms. Pretty easy to set up.
Meanwhile Wili finished building the fiberglass toilet and shower bases - I cleaned up beneath the fwd head counter, including installing a large accumulator, plumbed thru to the shower corner, and installed the counter teak frame - before we glued and screwed in the shower/toilet bases. No decent pics - finding it hard to get a good perspective in such a small room. Will try with a different camera...picked up the smallest accumulator available at our local plumbing store - 4x the size of the normal marine accumulator, and 1/3 the price. Our freshwater system runs at 45-60 psi, so I set up the accumulator at 50 psi.
And here's what we'll be flying as we head south of the border - really looking forward to joining the fleet of people as crazy as ourselves!!!!
June 14th - Happy Father's Day
A diverse collection of work...
Finally have both stoves in & secured
The propane stove is up on the new custom made offshore gimbals - nice fit.And - knowing that we won't be using the Dickinson stove in Mexico or the South Pacific - we made a cutting board that fits over the diesel stove fiddle, level with the adjacent counter. Its' a great add to the working counter space, at a height Wili prefers.
Also pulled another couple hundred feet of dc cable, finishing up the forward runs - figure we're at about 2300ft, with another couple hundred to go
Meanwhile on the outside - we finally finished filling/sanding/painting/non-skidding and permanently installing the hatch and turtleback.
- used awlgrip paint in order to match the rest of the deck, but tried out International Interdeck for the non-skid. Turned out to be really easy to work, and a near perfect colour match for the Awlgrip non-skid initially applied - so now we know what we're going to use when we touch up the deck.
hatch looks good, slides well, and has good clearance (phew!)
And - it was Norm proofed (means I got on top and jumped up & down - fine load test)
happy with remaining opening - still have to get the washer/dryer inside, and we'll have lots of space. Do need to keep an eye on how we trim out the sides, in order to maintain the ability to pull the motor complete with tranny straight out
on the hatch underside, we added firring strips, painted/poured expanding foam for condensation control, and then lined with cedar strip. Still need to trim out the perimeter - and install the permanent doors, jobs that we'll hold off on till all the appliances/mattresses are on board.
still on the exterior - made a nice space gain in the house garage by fabbing a dinghy motor mount out of leftover starboard, then hanging the outboard off it.
Back at the house, Wili has been building up a fiberglass shower pan - here's about 1/3 of it, with the first filler coat on.
June 5th - committed
http://www.baja-haha.com/Alumni/2014Roster.html
We're #63!
June 1st - a proper hangin'
one look and it's obvious that it doesn't match the stove. So like several others, we threw the factory supplied gimbal brackets away, and had beefer aluminum units, with screw down retaining caps, machined up.
I've attached a sketch of the dimensions we used for our brackets - note we also used two shims on each side (1/8" and 1/16") to center the stove inside the cabinet built per the install instructions. You could avoid shims by going to 5/8" thick brackets, but expect it to cost more.
It's sad that Force 10 doesn't offer an offshore upgrade - or at least supply the drawing needed to get the offshore mount machined up.
May 28th - out/in and back at it...
Updated delayed by Blogger 'upgrade' (don't you love it when they do system improvements and you can't upload any more??)
Mid-May boat lift - Dream Catcher has been in the water for 6 months(!) so we wanted to do an early hull inspection, mostly to see how the zincs were doing, but also anti-fouling adherence, thru-hull conditions etc - she's a new boat, and we want to avoid surprises. So back to Ocean Pacific, up and out. Great gear and yard crew, so bringing her is a no stress event.
- general hull/paint - no issues. You could hand wipe the slime off, and everything under water looked good.
- zincs - all active (which is perfect - you want to know they're grounded and working). We're targeting a minimum 18 month life per zinc, on the basis that we'll inspect replace annually.
- main keel zincs - these are big 4lb bars centrally located, and while active, might have been 10% consumed - so obviously good for multiple years.
- bow/rudder/skeg zincs - about 25% consumed, should be good for almost 2 years
- Prop hub zinc - 95% consumed!! Good thing we looked. Our prop is a large mostly bronze J-prop, prop shaft stainless, running in synthetic bearings with a synthetic shaft seal & synthetic shaft saver - so the shaft is isolated from the rest of the boat. I've never had a shaft brush before, but it looks like we need one this time, in order to get 1 yr+ anode life for the prop hub.
While we were out we also raised the aft waterline (we'll be wrestling to get more weight forward from here on) and touched up a docking boo-boo (I was backing down on the spring line and caught a dock cleat with the hull). Good news is that I did Awlgrip touch up painting myself. Awlgrip has a bad reputation for being hard to apply & blend, but it was no tougher than any other two part paint to mix & brush....which is good, 'cause while we're cruising, we are NOT going to stop and re-spray.....brush will do it for touch ups till we're back.


And back at cabinetry - SS sheet shields finally arrived for stoves - glued and screwed in place (shop told me they use PL400 to glue SS to SS in their installs)
- here I've cross braced to glue side shields in place behind propane stove alcove

we ran a center shield overhead of the diesel stove, basically to guard the stove pipe
- note the nicely fitted cedar strip ceiling - by Wili
- wires are for a ceiling light and fan

heat shields behind and beside diesel stove

And finally, a stove in place (almost)!
- trial fit the propane stove, but we're holding off bolting in the gimbals 'cause the factory bits are junk. Having some hefty aluminum supports made, will share specs and pics when they come out of machine shop.

And - the first of the boat cushions were fitted - pilothouse settee and nav station. Wili went with psudeo suede for wear & feel, in a rich wine colour where we have lots of natural light, and a lighter blue for the darker spaces. Look and feel awesome.
Wili's moved on to building a fiberglass floor pan for the forward head, while I'm doing just enough finishing in the galley to get the propane and diesel stoves bolted down....we need to get start emptying the garage!
May 4th - back from Comox

Nuno of Ocean Metals built a skookum frame of 1-1/4" SS, with both side and aft handholds. I love how we now have solid handholds from the moment we climb up into the cockpit, and out to wards the stern or down to the foredeck.
I provided the perimeter, built out of Star board, a UV resistant HHW poly, screwed to the deck.

and Becky of Anchors Away hand fit a good looking dodger - Lexan winds w/removable sun shields, and a removable center panel.
this is the first time we've ever had a dodger - and enjoyed it from minute one.....it was dizzling when we left the dock, and I didn't have to worry about getting the hatch closed right away, left my GPS/Ipad out where they could be seen without getting wet - and kept my own head dry to boot.


Wili finished oiling the teak slats for the traveller seat, and installed same - they look great.

Then she finished and installed the slats in both corners of the stern rail seat - hand carving around the back stays. Still need to fill in till the center, but this is an awesome place to helm from.

here you can also see how the davit arch becomes a big wrap around hand rail when you're getting in and out of the dinghy.
Need to thank Keegan of Ocean Pacific for making up the stern wire yoke for the dinghy - friendly and capable crew.

This was an interesting shot over the stern (as we pull into Campbell River) - compare it with our launch day shot over a bare stern motoring to Vancouver - sure it nice to have something to hang on to back there.

This trip started as a cold drizzling fog - and as you can see here, finished up as a brilliant, warm, glass calm day - Dodger to duck under early on, a working gps system on the Ipad, shedding clothing layers for the last couple hours - truly enjoyable.
April 28th - building in aluminum - a nice change of pace
I was driven to flip over from interior carpentry to finally building the permanent main hatch (and turtleback) in order to fit a dodger fitting date committed to months ago.......seems capable dodger makers get booked out months in advance, and the little sailing we'd done sure showed us why we needed one (had debated going without prior to doing a little wet into the wind wave bashing....the boat doesn't move too much going thru a wave - but the wave spray gets blown back all the way to the cockpit in winds much past 30 knots).
Our 'temporary' raw plywood hatch lasted over 10 years, and did an amazing job of keeping wind and rain out, especially given the 15 minute hatchet job done putting it together - but with the dodger commitment imminent, it was simply time.
I've had the design in my head for years, so there wasn't too much fussing about that way - it was going to be constructed in aluminum (for both durability and weight), running on poly sliders over a SS angle that we'd built into the deck years ago - and it would slide into a deck mounted garage or turtleback, in order to prevent driving spray or breaking waves from coming in thru the front of the slider.


The sliders are continuous lengths of 3/4" Star board - UV resistant poly board with decent strength and self lubricant properties. Profile shown was easy to develop on the tablesaw.

Bored thru the slider from the under side - first a countersunk screw hole in the upper lip (having tapped the aluminum slider frame above to screw into) then an over sized hole in the lower lip - which allows us to fasten the sliders to the sliding hatch frame with machine screws in a way that will permit replacement if and when the sliders ever wear out.
We sheathed the sides and then top, checking that the frame/sliders fit on the boat at multiple stages of assembly. I'm showing the under side of the sliding hatch so you can see the supports ribbing. This was 'Norm proofed' - which means I got on top & jumped up & down, just to ensure it wasn't going to deform under load. Passed!

The turtleback was built up much the same way, but with a far more substantial leading edge - hard to see here, but the front is curved in 3 dimensions to make it match the lines of the pilothouse, and massively strong. Used the hatch as the initial jig, then fit to the deck to tack up the components.

and here it all is unpainted, but fitted to the deck. Slider is a touch snug for the last inch and a half when closing, but goes to forward limit almost too easily. We'll use it a bit before making any further adjustments - also plan on adding a spring loaded pin latch on the slider in the closed position, in order to keep it closed in a blow.

Here you can see the brilliant sunshine I left the dock in.....and the very black storm cloud I was hoping to stay ahead of.......didn't happen, despite catching the tide and ripping past Cape Mudge at 12 kts SOG (per GPS) - 50/50 boat speed and favourable current - about 1-1/2 hrs out, that black cloud caught up - and hailed on me! Came down so hard, I put a bucket on my head to stop the stinging hits - and of course the wind picked up against the current, creating some nice square waves - but the boat moved incredibly well thru that mess, with almost nothing inside shifting - and given the state of construction chaos inside, we really were not that well stowed. Cold, wet, hailed upon, I really wanted that inside steering helm (sitting in the shop at home), or the autopilot (sitting in the home office) or even a dodger (wait, that's why we're on the trip)......sailing half finished has it's drawbacks. Then the sun came back out, and the smiles came back......Comox is a great place to pull into.

Day 1 in Comox - and here's why the slider and turtleback had to be in place for the dodger work.......the dodger frame ties into the turtleback.
Framework done to point where the canvas pattern can be made - Becky Shilka of Anchors Away Tarps and Tops comes highly recommended, and will begin her magic tomorrow morning - expecting to fit the finished dodger Friday.
At least we'll have a dodger for the trip home!
April 12 - Good week - Hamish showed up with another cabinet and several key frames

The big cabinet is a combination microwave shelf & dish storage. We hung it off the pony wall over the galley counter. Shown here with the teak face frame removed (same with the cabinets behind) - at home being oiled/polished by Wili.

And on top of the suspended shelf, a nice sized arborite counter with fiddle - which will be perfect when serving a big meal at the main pilot house settee.

Drawers R Us - fit the last of seven nice long galley drawers.

An advantage of working with a truly skilled shipwright - I can build and install face frames and drawers, but my door jambs would never look like this. Hamish just works at a different level.

and while I know how he carves these fiddle corners, I won't pretend to being capable of duplicating one...
While Hamish was doing artwork door jambs, I was rolling around under the aft tub & sink, finishing up the drain lines, and plumbing in the sump pump that will service them; running the next layer of 120v wiring for the galley; and finishing up the finished face of the aft berth - which will allow me to fit the face frame at the base of the adjacent drawers/hanging locker. Pics to come.
Going to have to flip over to finishing the main hatch & turtle, as we have a dodger install booked at the end of the month....
April 2 - pressure's on......Wili rented out the house starting May 1st! Fortunately she kept the garage till June....
Mainly focused on getting galley to point where we can mount the stoves (mostly so we can get them out of the house!). Means finishing the cabinetry - along with the plumbing and wiring - around the propane stove, so we can install the SS heat shields.

- walled and finished underside of deck over the counter
- ran AC & DC wire trays
- ran portside wiring (about 1000 ft of AC & DC cable), protected, tied, neatly trayed - Wili did all the tough areas.
- fitted two levels of cabinets under the side deck, either side of the stove....none behind the propane stove itself
- installed teak finish on upper pilothouse wall while it was still easy to access - and because it feels soooo good to cover up the ugly foam!

One example of Wili's wiring - tray heads down below floor in this cubby hole, then cross ship to main panel. It's beautiful.

And here's the fridge/freezer pic I missed last time - a little dustier. You can see how little room for error there was fitting this beast in.
Had to resize drawer face to right to allow for thickness of fridge doors - missed that detail round 1

While I was doing cabinetry one evening, I tossed in a medicine chest for the aft head - let us us tidy up the last corner.
- still need to trim & secure the shelves

- can only handle so much finicky cabinet fitting before I need a change - enjoyed installing and wiring the freshwater and saltwater pressure pumps beneath the sink.
- put the saltwater pump here as a back up for the freshwater - if we have a hard to fix failure, we can flip a couple hoses and be right back in service.

The hot water heater finally arrived - 11 gal SS with double coils and an thermostatic mixer - Wili likes hot baths, and this babe will let her have one via AC, engine heat or the diesel fired boiler. (Happy wife = happy life)
- we had to empty the utility corner to do the portside wiring, so while it was still clear, I fired the heater in. It'll be nice to close it up and be able to use the storage space above - the interior is an absolute mess.
Need to spend a day just de-cluttering and reorganizing - tore everything apart for wiring access, time to put it away and regain some working space.
March 16th - bit more than a fortnight between updates...but we've had great fortune with friends showing up at exactly the right time....

The starting point - the galley area has been our main work bench for the last couple years, so it was a major upheaval (and effort on Wili's part) to clear it out
Hamish showed up with galley cabinets built to our sketches, and handed them over to Joe & I to fit them to the hull, while he worked on the foreberth and forward head door jambs, and trimmed out the coffee nook.

After fitting the cabinets, Joe and I made a countertop template, weaseled it out of the boat, and built the beast in one piece at home. It's about 7ft x 7ft - we jussst got it back in thru the central window/hatch over the galley - 5 bodies, down, in rotate sideways - whoops, no that don't work, back, back....we had zero to spare, but eventually slide her in place - and she is SOLID. One piece construct gave great strength to the overall assembly.
Joe and I stood back, looked at the dead corners - beautiful, inaccessible space - and couldn't stand it - so we built in two top opening ice boxes, one in each corner. Gasketed to underside of counter, foamed in place, they'll be useful.
Then we plumbed - pressure tested all the waterlines/joints running beneath the counter - plumbed and temporarily installed the fwd head to ensure there were no vacuum leaks and a pulled double armoured gas line to the propane stove cabinet.
Joe went home the day before we were ready to fit the fridge (undercounter fridge/freezer, this beast drove the size of everything else in the galley and gave me fits on clearance in every direction!!) So there I was rigging this bloody big cartoned fridge so I could tight line it thru the main hatch - and my dock neighbour Terry sticks his head out, and asks if I'd like a hand (gotta love a great neighbour). I took the load on the topping lift, Terry walked the box over to the hatch and worked it in from the outside, Wili guiding from below - voila, in was in.
- that afternoon my good buddy Jim showed up, an old time lineman - so we test fit the fridge (IT FIT!) then pulled it out again so we could pull cables - terminated AC and DC lines for the fridge, plus DC for the FW and saltwater pumps (which will live below the sink) - did a last bit of foaming that had to set overnight - losing Jim back to Powell River with the #%$# fridge sitting up on the counter (of course it does not fit past the sink peninsula at floor level, and takes two to lower it into the narrow space)......but my son Nick was in from Victoria, and dropped by to lend the final hand.....5 minutes and we had the beast in place, a few minutes more and she was bolted down and test running, plugged into shorepower. I'll be holding off installing the other galley appliances till we have the upper cabinets in place - just easier working access.


bit easier to see where the diesel stove goes in this shot - grey paneled area is cement board installed as a firebreak behind the stove. We'll sheath over top of that with SS sheeting on 1/2" stand offs from the wall - same on the drawers along side.

Here one of the two iceboxes Joe and I added to make use of the deadspace - just fits (including about 4" of insulation) and is in decent reach for top access.

Of course there are multiple systems hidden away - layers of work beneath the visible cabinetry
- here in the peninsula you can see the easily accessed fresh water manifold -120 gallons in 3 stages - forward wing tanks (30 gal), main tank (60 gal), fwd reserve tank (30 gal). There is also a terminal strip for 24v feeds to the fridge & 2 pressure pumps, the FW tank vents (we vent those internally to avoid saltwater contamination), hot & cold fresh water lines along with a pressure saltwater line (feeds anchor wash hose) what will become the sink drain - and running through the back, the raw water cooling line to the engine.
Just on the right you can see a dark panel - that's the freezer door (camera died when I turned on the flash to take a pic of the fridge itself....)

and whats to come.... the green tape on the partial bulkhead outlines the next cabinet - dish storage and an eye level home for the microwave.
- also rejigging the drawer front in that empty slot beside the propane stove cabinet - I had the fridge depth right, but didn't account for the 2" door stick out...
We'll be filling the space against the hull from countertop to underside of the deck with storage cabinets too
Feb 24th - still working underground

Framed up side to side in aluminum, ply bed base, ply dividers beneath - nice open area with several options on how we'll lay depending upon boat motion & tack. Will ad some pics once we're a little more trimmed out. Massive storage, though we'll be trying to keep storage weight down in the aft cabin.
We also ran a missing DC ground cable for the Magnum charger/inverter, so we can test that in next couple days
Systems beneath the galley floor/counter in & ready for cabinet install - water tanks & interconnecting hoses tested, one leak (level sensor fitting) fixed - and I finally dealt with a weeping raw water fitting while we still had decent access. Foamed wing tanks in place, completed big bore vacuum line to forward head run along hull, big bore water tank fill line in, propane + hot & cold water lines roughed in - everything else awaiting cabinets to complete runs. Floor beneath sink peninsula glued & screwed - not much picture worthy, but looking forward to a big change in the last major unfinished area over the next week.
Feb 15th - down in the bilge again
Welded up more of the aft berth frame, after fitting plywood storage dividers - which Wili pulled all out to finish at home, so no pics yet.

Added a couple more cabinets in the coffee nook area - playing with shape and size of table that will eventually be cantilevered off counter. This will become a computer work station as much as our kibitzing bench when we're cooking.

Was going to go with mechanical fittings on SS lifelines, but they wouldn't fit into the gate tubes, so we just relied on our local rigger, Jonathan Blanchard to do the job - came out great. Our perimeter system is complete, and Wili will breath easier now when I go forward.


Like every other area we'll never have access to again, we took the opportunity to put one last coat of epoxy in this critical bilge area (I think this was the seventh) - we were incredibly lucky with the weather - a polar high slipped over us, bringing beautifully bright, clear cold, but dry dry days. Stuck heaters down in the bilge to get warm 
enough for the paint to cure, but had zero water issues for the whole time (we continue to fight a leaky dam inside the mast - the only water getting into the bilge is coming down thru the friggin mast).
Then bedded the main tanks in their raised frames, fitted retaining channels plus braces (these babes ain't moving), and finally got to the plumbing. Spent days on my aching knees getting everything in and (hopefully) sealed. 3 rolls of tape and two tubes of pipe dope....Conall would be proud.
Will fill tanks tomorrow - wish us luck! I'll be happy just as long as any leak is reachable.
Jan 26th a great fortnight's progress...Wow, a lot got done.
Exterior - Nuno came thru with the Bow Rail, plus installed trunk cabin rails, dorade guard, granny bars, stanchions, side gates and a stern step - beautiful work, good pics.


Way out in front of everything else on the boat, is a seat - figure this is going to be a hell of a place to sit while we're sailing, some day

Stanchions and side gate bolted down - now you can see why we needed to get the toe rails installed

Dorade guard is the low wide bar with one red vent visible on right side.....awaiting delivery on other dorades.
Granny bars look spaced out pretty far - designed specifically to fit moi, with room to spin a two handed handle on the mast mounted halyard winches.
and a purty little transom step that fits right above the telescoping boarding ladder - easy access to sugar scoop thru stern rail with grab rails down both sides - another neat place to sit while sailing.
and Inside (yep got stuff done there too!)
while waiting for more cabinets, Wili sealed all exposed edges on the pilothouse settee, lined the floors of the lockers, and then repainted the bilge from the transom well into the aft cabin - thought we saw a chip, but it turned out to be a steel chip from some drilling - painted anyways, 'cause we're framing the area in, and will never have such easy access again....
I hacked and fitted up the aluminum support framing for our aft berth - full width of the hull, meaning I expect we'll sleep athwart ship in port - but there is enough depth to be able to sleep against the hull on either tack too. Still expect to use pilothouse settee on passage in rough weather.

Aft berth made for a great chop saw table while we were working on forward cabinets...
Hamish arrived with a truckload of cabinetry - he fitted the aft cabin chest of drawers, then trimmed the pilothouse settee, while I did the galley coffee nook base

aft cabin chest of drawers, with hanging locker between - I'll have to do a focus piece on how Hamish does drawer guides, because it is so simple yet solid, works with little lost space, easy to align, cheap.....I was looking at all sorts of expensive slides, and this is going o come out far better.

Hand carved edge trim applied to settee - and note the manual bilge pump beneath the cantilevered seat is now enclosed - door to let us service pump, slot in side for pump handle, and the dogleg in the base allows us to still lift out the center floor board for engine crawl space access

And here is the big new piece - coffee nook( cum nav station) across from galley. One nice deep drawer plus two top access lockers, and a wall of storage cabinets against the bulkhead under construction - once everything is in, Wili & I will mock up a table. We were playing with some folding ideas, but are working our way towards something fixed and sturdy.
Hamish is off to other projects, but the galley is in our sights! Wili spent several days dunging out the area that was our workbench for the past 3 years, and reorganizing the tools - I've spent a couple days measuring up all the appliances siting in our garage and detailing the cabinet drawings - not a lot of space to spare - wait till you see the final layout.
Jan 12 - "how tough can a couple seats be, said he..." the Pilothouse Settee
- I like how this came out; at first glance you'd never guess how many systems come together behind, underneath and THROUGH this settee. Heck of a lot of work for a few seats with storage...
Here's the starting point - hullside all nicely sheathed, cedar strip on the curve of the bilge, varnished ply where is was flat enough, all glued and screwed to the ribs for good load carrying ability. Valve on the right is an above waterline thruhull for bilge discharge (and the mess in the foreground is me working on the fuel transfer system below the floor)

There's two fuel tanks and a holding tank just below the floor on this side, plus the watermaker membranes mounted on the forward sub floor bulkhead beneath the major cross ship wireways, and just over the holding tank discharge thruhull (which was very accessible when we started all this....)

So when we started plumbing the holding tank & vacuflush vacuum generators, we had to keep an eye on keeping everything inside the settee footprint, given that we were using uniseals through the top of the tank for both discharge and suction lines. Green plywood is the pilothouse sub-floor (green paint was on sale the day we were prepping the floor...)
- square hole in the sub-floor was an access hatch I cut to allow installing the holding tank level sensor and a vacuum breaker valve, whose large bore opening also served as a clean out port.

Here we are with all the big bore septic pipes run - you can see the expected outline of the settee marked on the wall in blue masking tape (find that really helps me with visualization) and on the floor with a precut piece of vinyl flooring (needed to go in before I run the vertical pipes thru the uniseals in the top of the tank - hopefully never to be removed again)

Of course there's other pipes and hoses too - we used the portside for our main hose runs, starboard side for the main wire runs - so there's multiple big bore pipes running the length of the settee:
aft head suction
forward head suction
holding tank feed to the suction deck plate
holding tank feed to the overside discharge pump
plus the portside fuel tank manifold, feeding and venting two tanks via a splash stop surge tank
plus several small bore lines:
propane to galley
hot and cold freshwater to aft cabin

and a small wire way thrown in for good measure - mostly 24vdc to the vacuflush pumps.
So we're talking about a busy area.

Unfortunately I didn't take a photo of the settee base prior to this - actually came in thru the main hatch in 3 pre-fabbed sections - forward and aft seat boxes, and a center bridge. If it looks a bit tall, it is - we raised the settee by 6" so we can see out the pilothouse windows while seated. The assembly was complicated by the base design - we're fighting for all the foot space possible, and slanted the bottom in 2" from the top to help - which is indeed great for increased floor space, but meant we couldn't just trim & slip the bridge in - given that the aft seat box had to go in first to accommodate the head piping, I positioned that, then measured the bridge, trimmed the backside forward seat box to suit both the bridge and the irregularities of my previous work (the forward half bulkhead is a bit off square) - which simply means I fussed and measured and scribed about 3 times - and then cut and happily sighed when it all fit snug.
Fitting the seat top was comparatively easy - two precut L's, I just slipped each against it's bulkhead, cut out for hoses, and then scribed the center overlap to get a nice fit.

In the end we have the starter batteries in a battery box inside the seette right beside the engine - prime space, but I wanted the shortest possible cable runs to the starter, and a location up out of the bilge - if the bilge water level ever gets to the top of the starter batteries, we are in deep doo-doo - and probably headed for the liferaft. Just behind the battery box you can glimpse the remote battery switch - which will allow us to consolidate the battery isolation with the main switches at the inside helm while avoiding extraordinarily long cable runs.

Here's the aft portside corner with the settee seat top in place - you can see the cleats for a shelf over both the vacuum generators and the discharge pump - they slip in place snugly, protecting the pumps and providing quite large storage compartments behind the settee back
- the orange canister is the best of bunch rated 'Big Orange' holding tank filter - holds about a quart of activated charcoal, should be good for 2 years.

And here's the last compartment behind the seettee - it's big enough to climb into, and will easily house the hot water tank (that we're still waiting to be delivered - dual coil tanks aren't stocked locally)
- again, you can see the cleats for the shelf that will protect the hotwater tank after install. I even loadrated the shelf by climbing on top with it in place....250lb + proof loaded!

Just for fun here's a vertical shot down the forward bulkhead settee - kept a strip open to allow access to a pair of cross ship wiring trays (running along bulkhead) - we're looking down about 5ft from the seat top to the hull, past bilge and holding tank discharge hoses, some main bank battery cables, two watermaker membrane tubes - and right at the very bottom, can just glimpse the handle for a thruhull valve. We had to add an extension lever that comes up thru the base of the seat to reach the valve (or we go in beneath the floor via the engine room hatch - not fast access)
So here we are with the settee in and everything open:

And the semi-finished install (still lots of trimming to occur) all closed up:

That's why I couldn't just post a pic of the settee, and tell you it took a month to install! Looks way too simple.
Jan 5, 2014 - boat is an absolute mess inside, but figured it was time to update anyways.
Exterior
Installing the SS railings/radar arch/traveller arch made a huge change to the exterior of the boat - and it's all truly beautiful work.


Above you can see we got the railings on as far as the pilothouse roof - cabin trunk handrails, dorade guards & granny bars are all ready to go, will hopefully see those installed by end of month
The radar arch is multi-function to the nth degree - radar, solar panel and antenna mounts, with integrated transom ladder, bench seats, stern rails motor crane and dinghy davits. It's pure wow. Excuse the tie down straps - 4 part tackle is in transit.

The traveller arch is also awesome - cockpit crash bar(6'-6" clearance at top of bar), backrest for helmsman, liferaft holder, and another integrated benchseat - this is going to be an incredible lounging area when we're all done!
- this shot shows the end of boom sheeting - just enough boom clearance for the blocks straight up, and with boom full out to the side.
- You'll have to forgive the baggy sail cover too - we measured up without all the mainsail roller cars in place (we were short shipped several), and the furled head of the mainsail climbed more than expected.

And....a bare bow. The bowrail is still being welded/polished in the Ocean Metal shop - Nuno and Nico are artists, and great to work with.
Stanchions are all ready to boot - just wanted to get bowrail and mid ship gates in place, then we can space the stanchions evenly
So deck wise, we're not that far off - a month of rail work, another month of rigging furling lines/sheet runs and we're ready to really sail.
And then there is the Interior
Which is largely a rats' nest of parts and lumber and tools......
 messy fore berth - there's the dorade guard and trunk cabin handrails - and aluminum angle for the aft berth, cleat stock for the pilothouse cabinetry in process
and a messy bunk, with a plastic draped galley settee, trying to contain some of the chopsaw shavings.
- sliding chopsaw is a terrific tool to leave set up - cuts aluminum, plastic pipe, trim, and rips a surprising length when you're field fitting cabinetry.
Work in Progress
- well the whole bloody boat is really a work in progress, but the major interior projects we have on the go right now are:
 aft head
the sink, bathtub and toilet are in, and the vacuflush toilet works (yea!).
- counter trimmed out beautifully
- Hamish working on door jam & door

aft locker frames are roughed in - Norm working on divider, Wili fitting cedar strip ceiling over aft locker, Hamish building drawers/runners

The Pilothouse settee has been Wili & Norm's main focus for the past couple weeks - it's an amazing amount of work, with a half dozen major systems weaving through, another 3 jobs that had to be finished below while we could still reasonably easily reach them, and the desire for maximum free storage when we're all done.....it's coming together pretty nicely, and I'll do a more detailed update 'soon' :)
Dec 9th
Wili spent a day helping pull wires to the port side pilot house - another day doing terminations and testing the assorted septic pumps....and we have a working toilet! Happy wife. Also means we're one connection away from having a heavy duty charger, two from activating the inverter.....need the charger, but we'll hold off the inverter till we're doing the final panel work.
- also tossed in a bus heater working off the engine - you'll see why below
- main job right now is welding up the aft bunk framing, and setting up the storage beneath.
In between, we're off to Comox again to fit the finished railings, radar arch, traveller arch, etc.
Photo below was taken just after dawn.....working to catch the tail end of a favourable flood tide. Snow on deck is from previous day - We were delayed getting away from the dock by frozen dock lines.......with windchill, it was 15 below. Wili was very happy to come on deck as required and otherwise watch the scenery from the pilot house - and I was wondering how long it'd take to get the inside steering hooked up.
Aside from the cold, it was a beautiful day.

Nov 26st
Slow week - back down in the engine crawl space getting the second battery bank box secured - and it's getting tiiiight. Also processing teak for aft cabin cabinet work and teak slats to go into aft deck seats (love how those have been integrated into aft railings) - 'processing' = buying 1" think teak, grinding it down to 3/4", then slicing it into 2" wide strips - we're making garbage cans full of teak sawdust.....
Last sail (trysail) arrived Friday, along with snuffer for Gennaker - stuffed the spinnaker into it's snuffer, and packed it back into the sail bag - we'll want a beautiful light wind day the first time we're going to fly that monster.
Did grab the trysail, and hoist it on the boat to make sure it fit, measure up lines, and identify sheeting points.

Easy to pick out, due to it's brilliant orange color, and slipped onto it's own track nicely - dedicated trysail track runs from deck to mid way between spreaders, meaning we don't have to try removing the mainsail in a blow (that WOULD be a nightmare - it is huge and unwieldy). Was surprised by how well the trysail set, even in the relatively light breeze at the dock. Sheeting points are easy with a relatively small sail vs the wide aft deck, but the lazyjacks are going to be a pain - we'll have to slacken those off before raising the sail in order to fly both tacks. Figure we'll lash the boom to the traveller arch/boomkin too - there will be a defined sequence to dousing the reefed main and raising the trysail......bit of a pain given that we have never flown a trysail in a storm yet, and this is the third boat we've had one on.....but I figure it's there more as a spare, if we manage to tear the mainsail.


And here's the plumbing we had to run for the vacuflush heads - one generator for the aft head, other for yet to be installed forward, dropping into holding tank under the floor - and two pick ups, on to deck plate for dockside suck out, the other an underwater pump out (with the diaphragm pump mounted against the hull in the upper left of the picture)
- hard piped to avoid permeation problems
- using Uniseals in the top of the plastic holding tank made running the pipes in a very clean install.
Now we just need power for the pumps!
Nov 21st
Blown away by local weather - deep into November, which is normally our blustery wet storm season - and we've had 3 back to back days of beautiful clear. almost warm weather - 3 days of successful varnishing! In BC, in the winter!!

Here's Wili, complete with head warmer - but no coat! - varnishing Nov 21st at the dock in Campbell River. She's been getting a coat a day, with a nice hard set up by noon. We'll go for one more coat if the weather allows, then wait till summer to get the final finish - needed to install toerails in order to get the lifelines up

Very happy with how toerail joints came out - nice tight ship joint cut by professional shipwright Hamish of Cutwater Joinery. Thought I blew it during install by not thickening the epoxy glue enough, allowing it to sag out of the top corners; but after routering the top, all is good. The toe rails really finish the bulwarks nicely.
Took Wili & I a week to install the first rail - and a day for the second. Steep learning curve.
Back inside the boat, I've been doing plumbing, staying in step with Hamish, while Wili follows us both, cleaning and finishing up under the cabinets.

The aft toilet is bolted down and plumbed, as are the tub and sink, plus pressure system tested. The vacuflush system is complete to the holding tank - need a couple feet of piping to complete pump out connection, but also have to finish battery install and 24v charging connections in order to power pumps - and have a working toilet

Cabinets and counters look great, again thanks to Hamish.
Still camera simply cannot capture all of the head in one shot - it's compact, but still well lit (two opening ports) and has just enough room to move comfortably. When it's closer to complete, I'll have to try making a video summary.
Hamish is away on shop time, putting together a chest of drawers for the stbd side of the aft cabin, along with more trim for the head - and maybe even the pilothouse settee base. Wili has been going around teak plugging all the screw holes, and will be moving onto sanding the counter rails between rounds of varnishing the toerails - while I'm framing up the aft bed, and working below the pilothouse floor on the base for the second 24v battery bank plus associated wiring - towards powering up the septic system.
In our spare time, we're setting up the dinghy - an Achilles HB300FX with a Suzuki electric start (for Wili) - and moving it about, realized we need a set of dinghy wheels if I want to do that solo without damaging the RIB hull. After researching what's available plus the pros and cons of various designs, we've ordered a set of BeachMaster wheels http://www.beachmaster.co.nz/ Like their 400lb capacity - they look skookum enough to carry the dinghy, motor, fuel and Wili when we're beach landing with her in a dress :). Happy wife, happy life!
Oct 29th - still alive and building!
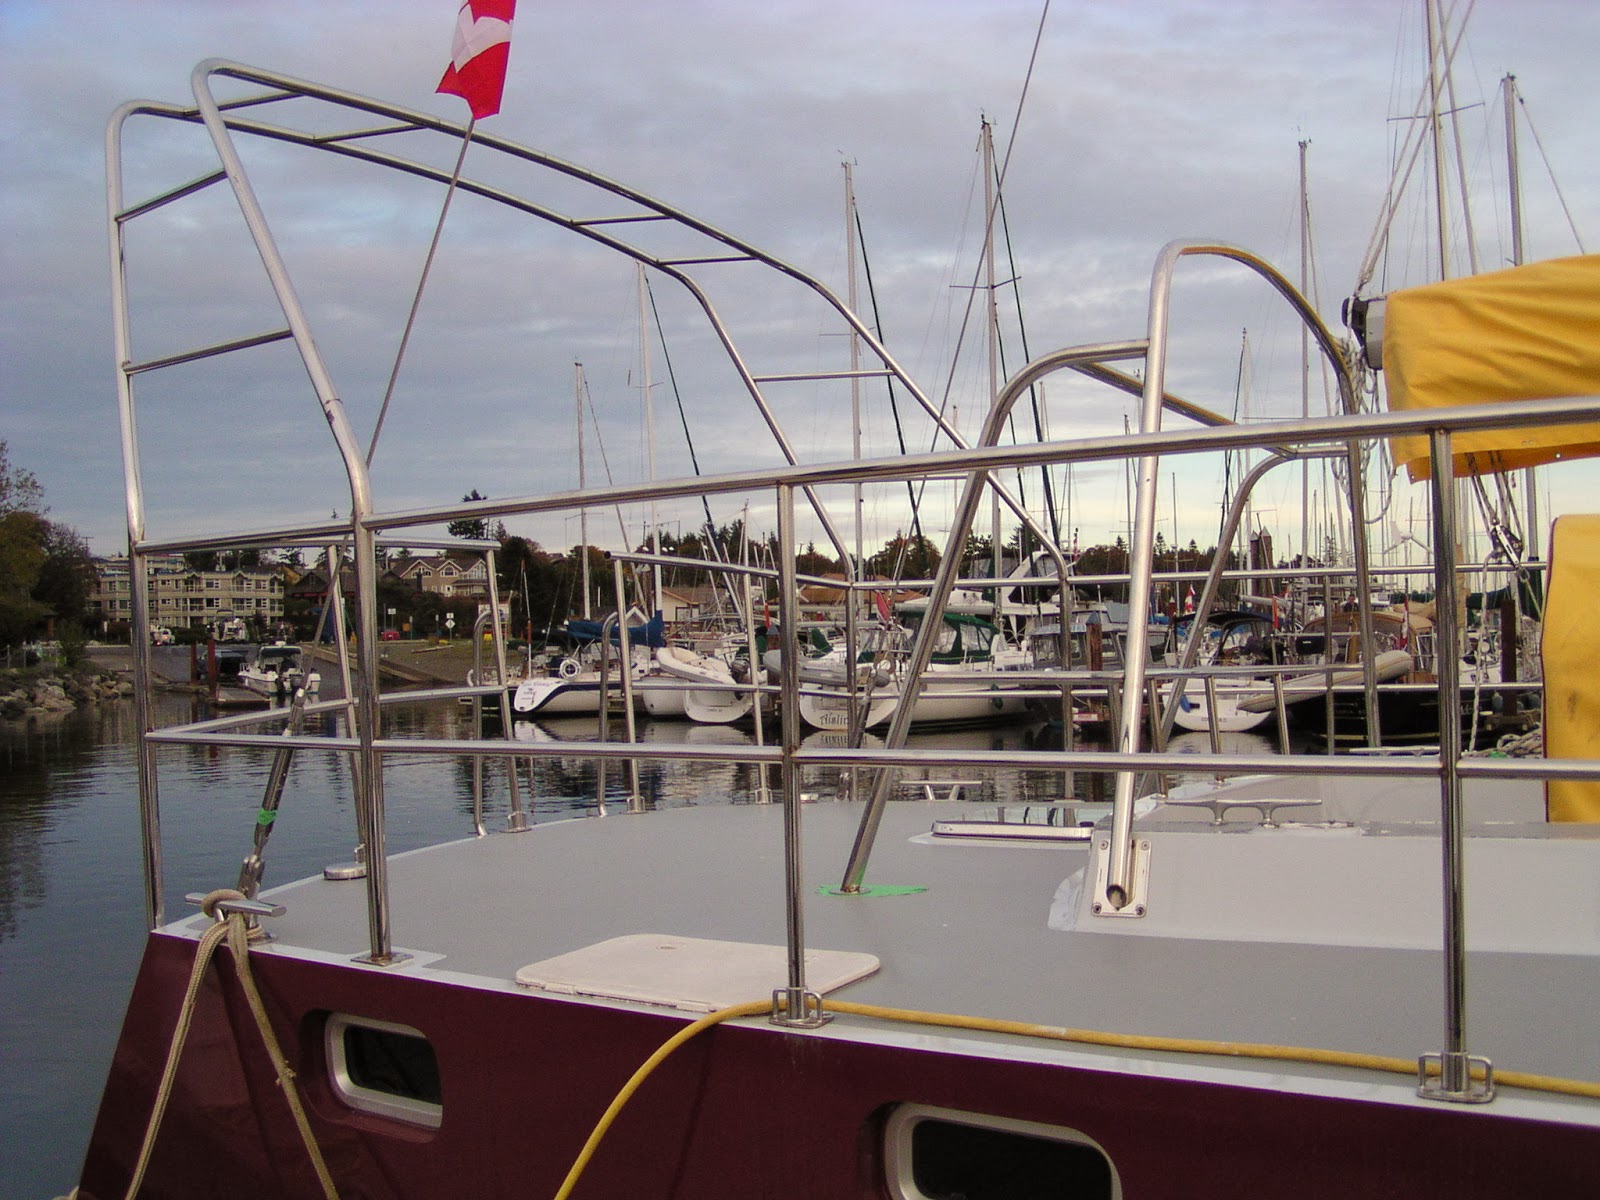 Had boat down in Comox for a couple weeks, having SS railings laid out & rough fitted by Nuno & Nico of Ocean Metals - artists in SS tube. Radar arch, traveller arch(which grew into a very neat cockpit coaming bench), aft railings, granny bars, handrails, dorade protectors and bowrail.....looked great for a little while tacked together... and then gone, back to their shop for welding & polishing. Aft deck seems bare without them! Scheduled for Dec install.

While in Comox we finished all fuel fill and vent runs, installed the inverter/charger, laid out the wiring raceway into the electrical center, pulled all the existing engine room wires into the electrical center - there is going to be one whack of wire runs coming together into that corner, and it looks like the beginnings of a rat's nest right now- but I figure we've laid out enough room and pathways for a professional looking install.
Had a bit of a sail back to Campbell R - felt great - then back to work.
Wanted to get teak toerail on (need to have in place before railings can land at base of stairs up onto aft deck) - found some beautiful teak toerail stock at Island Teak in Parksville - nice long straight lengths I thought we could bend in place. And we could bend most of it.....but couldn't keep a joint closed. Tried a couple times, and went to plan C..... will show pics if it turns out. Good news is that even failed tries provided a classy touch to the hull - it'll be worth it once done.
Wili rough fit the anchor locker chain divider, took it home to fiberglass, and then climbed up into the locker to install, glass and gelcoat (she fits into the tiniest places = so handy). She's now finishing the aft locker wall with a couple coats of epoxy paint. We also glassed and gelcoated the curve of the hull in what will become a locker beneath the aft bed - we'd lined it with plywood strips to fit the complex curve, but it just wasn't stiff/smooth enough - one layer of glass took care of it.
She also voiced the need for a working toilet before we did any more runs (funny, the bucket worked for Dad and I...) so the aft head has stepped up in priority.
Timing was good, as we've hired a shipwright to speed up the interior cabinetry - Hamish is both skilled & extremely nice, a wonderful combo for us. He helped secure the toilet platform (bit of an odd area) and has now taken patterns back to his shop to build the cabinets, while we're focusing on running the plumbing, installing fixtures and finishing up the holding tank install. Went with pex tubing (red for hot, blue for cold pressure water) and Sharkbite slip on fittings - a little heavier, but I'm more comfortable with metal fittings in places I don't ever expect to access again (eg behind tub). Ran the propane line from transom thru to galley while we were at it, using armored hose - then the bigger bore PVC waste pipe to and from the holding tank.
Using hard pipe where ever possible (basically only using foot long lengths of hose at final connections) in order to minimize odour issues in waste plumbing - there is virtually no smell permutation thru PVC pipe. Takes more joint work.
Also ran the tub drain, with tie-in point for head sink, all gravity feeding to a Gusher diaphragm pump that goes direct overboard via a manifold into the cockpit drain line. Yep it'll take electricity to drain the sink, but it will drain on all tacks, and can never back siphon.
Finishing the boat at the dock has it's downsides - everything now has to be carried a fair distance to the boat, and it's a long walk when blowing rain - but it's also now only one step up to get in, our neighbours are great......and the view at end of day awesome. Overall, launching the boat was a good move for us.

Sept 7
- back in the water(!). We pulled the boat after christening - needed to adjust the prop (over pitched) and adjust the aft end of the waterline ( I plain goofed - it dipped going aft). Went back to drawings, matched design waterline - and it looks good floating again - slightly high, but then we don't have the finish interior, full fuel or full water onboard yet either.
- also after looking at the paint/zinc activity, we added 1 more zinc, down on the stainless rudder bearing shoe at the bottom of the rudder. Prop zinc was very active, rest just obviously working.

 - finished building flip up engine cover/companion way stair base. Two part aluminum frame, with forward 2/3's hinged to flip up and allow us to access/service engine. Plus - separate bolt on cover for elevated exhaust elbow. Looks good, sits solid. Covered with prefinished flooring - all I really wanted was the bullnosed hardwood for the outer edge, but the flooring was a cheap/fast/strong way to get it all to the same level - going to hide 95% of this with rubber matting to provide a waterproof non-skid surface.
- working on stbd fuel fill manifold - fitted partial bulkhead, mounted manifold, run 2 of 3 filler hoses - and ran out of 2" hose. Will order tomorrow.
- setting up big bore cable runs below floor back and forth between breaker panel and isolation transformer/inverter/charger. Manual calls for 2/0 - biggest I have on hand is 2AWG - waiting for store to open for that too.
- switched to mast wiring - organized wires coming out of mast (tri/anchor lt, steaming Lt, deck light, masthead instruments, VHF, bored holes to bring up thru floor and begin runs back to power panel - lights will all feed up into the DC raceway running down the side of the boat, but we"ll keep the VHF and instrument cables separate, running them along the perimeter of the floor to the inside console - means we need to bore one more hole thru the partial steel bulkhead.....sigh....I hate the metal filings that creates inside our finish painted hull.
- mean while Wili has fabbed a new rubber mast boot and is gluing that up, plus she's made a Sunbrella over boot to protect the rubber from the sun, and two windlass covers to reduce water access via the hauser holes - she not only wrapped the windlasses, but went 4" up the chains - look good, should work well.
- Helm cover in planning, and she's shifted inside the chain locker to fiberglass up the hole we had to cut in the locker liner( to have enough clearance to fit the windlass motor gearbox) Will also pattern the divider between the port and stbd chain lockers to stop the chain from crossing over in heavy weather.
August 18th 2013 - Christening SV DreamCatcher

"I christen thee DreamCatcher - Safe Sailing and High Adventure"


August 14th - raising the rig
Good Ole Dad joined me for the 100 mi run down to Vancouver - we left the afternoon of launch day (!), stopped in Powell River overnight (we have no instrumentation and only jury rigged running lights - definitely not ready for a night run) and got up early to finish the trip to Steveston. Engine purred on demand.
It got just a little snotty on our way down

 Straight Marine was a great place to stay + work on the boat - showers, small restaurant, friendly people.
  First Class first mate.

Steve White worked as our rigger - very experienced, capable, patient - great man to have in charge. Here he has DreamCatcher positioned in the slip with a boom crane located to both lift the mast and spot it over top of the boat. The mast was already prepped with all rigging, ready to lift.
Lots of bodies - two of my good buddies were on hand to provide extra hands as required
 It was a very smooth process - up over down - 3 bodies on deck, another 3 below, one rigger in charge - mast was in and secure in minutes.
 Then a couple days at dock terminating stays, positioning jammers, mast winches, a couple old fashioned cleats, and rigging lazy jacks, rod kicker, boom, back stays, etc.
 We did get hung up over the weekend waiting for one tine roller furling piece - but persevered. Here"s pro rigger Steve White happily securing the last stay.
Main sail being raised for the first time ever....

 Headed back less than a week after launch with full rig & sails - and no wind!! It was a beautiful run.
Back in Campbell River, mast up, looking like a sailboat
August 12th 2013 - Launch day!
Anchors aboard, engine ready, bumpers, dock lines, handheld VHF/GPS charged, electronic and paper charts aboard....the Ocean Pacific crew handled her with care, and we were in the water early in the morning.


Floating slightly high on bow (which leveled off once mast & sails were added a few days later). Minor issue getting engine started (skipper needed to turn fuel on....) and all engine instruments hooked up - ran engine in gear tied to dock for an hour, purred away with zero signs of overheating - lots of waterflow thru exhaust.
Climbed onboard with Dad as first mate - and headed towards Vancouver to pick up mast.

Enjoyed a beautiful cruise to Powell River, pulling in with a picturesque setting sun for the end of launch day.

August 10th
Painter done!!

white marks are reflections of the lights on the inside of the paint shed. Definitely does not look like a patch job.
- flipped hydraulic steering lines, refilled helm pump, got system flowing again - with rudder going the right way this time...
- installed 3 bilge pumps - 25 gpm manual, small (500gph) main bilge pump (the unit that I expect to do 99.9% of the work), both in the main sump - and a large (3700gph) 24v High alarm pump - about 8" above others. Happy that we managed to fit all the hoses into reasonable runs up and out - still need to clean up the wiring.
- started putting together the legally required safety gear - fresh flares, horn, heaving line - and got a surprise when I asked for a Lifesling - no longer carried everywhere - only one dealer in BC!! I still think it's one of the best safety devices for MOB recovery around, so I'll go find one. Shame that it's not in every marine store - like it should be.
Aug 4th and still not launched
- Painter has finished filling, primed twice, sanding in between (he is an incredibly finicky fellow- exactly what I like in a painter). Believe we're ready to top coat, with boat headed into paint shed Tuesday (holiday Monday). Should be done end of this week.
- pulled 4 big bore (2 awg) windlass feeds - zigzagged down the starboard side, underneath bunks and settee. About 120ft of patient pulling and supporting (mostly by Luke) - all nicely up out of the bilge, and well away from the other DC runs.
- mounted windlass solenoids - one per windlass, power up/down
- terminated power cables & wired in deck switches for Stbd windlass (no motor yet - still waiting for extended studs from machine shop). Want to have one working windlass when we head to Vancouver.
- touched up bilge paint in main sump, beneath engine, and underneath the sugar scoop - places where it was abused in some recent phase of work. 5 coats in bilge, 2 elsewhere.
- have been charging 8D starter battery for most of the week......charger keeps shutting down on overheat, not sure if it's just too small for the job, or the battery is toast. We can make do with a couple 6v golf cart batteries, but I do like the big 8D for starter service.
- cleared and pulled pilothouse floor over Stbd fuel tanks - need to tidy up and close the area so we can add stbd fuel manifold - finishing the tank feeds.
Helped daughter and beau move back down to Victoria.....have enjoyed having them in Campbell R for past year; Sunday dinner is going to get quiet again.
July 27th
Went fishing - walls of fish, o-200ft, at Cape Mudge off Campbell River. Abundant wild coho (catch & release) feeding on herring, with some nice 20# Spring and keepable hatchery coho thrown in. Dolphins, cruise ships, lots of other sport fishing boats - interesting just sitting in the sun and watching everything - the fish were a bonus!
Anchored overnight at Rebecca Spit on Quadra Island - beautiful, quiet and very protected marine park. Blessed to live here.
July 20th
- finished up portside fuel manifold - filler line to port forward tank, added vents, secured all
- finally received and installed galley thruhull; also installed depthsounder transducer, complete with fairing that required trimming in 3D to fit...all hull holes now valved or permanently plugged - she'll float, given the chance!
- installed porthouse bank battery box and batteries (4x 6V golf cart batteries)
- wired up batteries to distribution bus bars at pilothouse console - where the electrical panels and all instrumentation will go
- wired fuel tank level sensors through to pilothouse console - needed to get the tank connection done before we fasten down the floors.
- ditto with low raw water flow sensor
- tidied up work of past couple weeks - secured hydraulic lines, control cables, and wiring harness in a nice relaxed pattern. Hooked up wiring harness to engine. Cleaned up postside bilge where we're about to secure floor.
- installed a small temporary fuse panel - to run electric fuel prime pump, bilge pumps - so we can start the motor and do the Vancouver run to rig the mast.

portside fuel manifold & vents. 5/8" Line that elbows into the cross from this side is the fuel transfer line - can pull from any tank thru a monster Racor and back into any tank - can polish one tank, cross feed for balance, or just top up the keel tank daily (the present fuel management plan)

portside house battery bank - 4x 6V golf cart batteries in a wood/epoxy box bolted down 3 ways to Sunday

shot of port battery box with top on - gives us a much appreciated step up out of the engine 'crawlspace'
Today I cracked the battery switch on for the first time, used the manual priming pump on the motor to pull a little fuel (the starboard forward fuel tank has been full for months) into one of the Racors - just so I knew the line was wet - then turned on the electric priming pump - and was amazed at the volume it put thru. Filled the Racor in seconds - nothing was leaking, so I flipped over, filled the second unit, and primed right thru the engine, till there was fuel coming back through the return line. Took me all of a minute. As much as I would love to, we cannot bleed/fire up engine right now due to the hoarding for paint repair (actually a temporary plastic shed built around boat) - the exhaust exits the hull inside the plastic and would likely foul the work in process. Arrg.

July 15th
- steering bled & connected to the rudder - we can steer!
- all engine control cables from cockpit helm completed
- finished up cockpit helm panel; wired same in (we could start/stop the motor - if we had batteries)
- portside fuel filler manifold started - we can fill the one tank that feeds nothing....except the transfer pump.
- bottomside painting - first of 4 antifouling coats on, will be complete tomorrow.
Some catch up on photos:

dry riser - the engine exhaust elbow was too close to the waterline for comfort, so we fabbed a dry riser, with an elevated injection point - now the highest point in the system. White panel is a fiber reinforced cement board - have yet to wrap the dry section with insulating tape.

wet exhaust goes thru bulkhead, then swoops down nicely to waterlift muffler
note helm control cables and gearbox transfer station on wall - once inside steering goes in, we only have to run control cable to the transfer staion

Waterlift exhaust jumps up, then runs downhill to rear mounted northsea exhaust - all nicely above waterline.

Hydraulic lines from cockpit helm down wall and aft to rudder rams....note Autopilot pump on wall (where it is tied into steel angle on main bulkhead - not going anywhere)
- the heavy cable running amok in the corner is the engine wiring harness running up to the helm control panel......not yet secured.

Rudder head with dual rams connected & bled - very nice smooth steering, with just over 5 revolutions of the wheel lock to lock

Raw water strainer - coarse strainer on exterior pick up, followed by Groco - feeds thru a low flow sensor and into saltwater side of engine cooling loop.
 2" filler, splash stop, manifold & ball valves feeding 2" hose into each fuel tank.
- wanted to be able to isolate each tank, and transfer from any tank thru a large Racor into any other tank - so we can fuel polish on the fly.
Or we can just open all the valves and mindlessly fill the tanks......240 usgal. Likely will not fill aft tanks till we need some real range.

Cockpit helm with control panel - sized console to fit cockpit and desired wheel & instrumentation - we can reach it comfortably sitting or standing in the cockpit, standing standing on the seats. I can sit ahead of the wheel, and brace my knees against the side of the helm (which I like to do in stormy conditions). Single lever control is easily reached over top of the wheel - as is engine shut-off on side.
Compass and protective grab bar yet to be added.

Helm panel provides full gauges plus alarm buzzer and idiot lights - switches for panel and compass lights (figure most everything else I want to control from the main panel - so we know what's on). Engine starts and stops from the cockpit. The Garmin head is a multifunction display - won't show charts, but does give heading, wind, depth etc. Gives us back up gps display if we lose the chart plotter.
I do plan on using our Ipad on deck to duplicate chartplotter
July 9th:
- exhaust complete
- cooling water complete
- steering hydraulics complete (but not yet bled)
- fuel system needs final connection from Racors, then we can pull from main tanks - one of which is full. Really should run hose/valves from Splash Stop to tanks, so we can refill...
- still awaiting new cockpit control panel (have run harness from engine to panel)
- need to install starter, 24v battery bank, and one windlass motor - just so we can ship an anchor for the run to Vancouver.
Bottom is being sanded prior to adding another 2 coats of primer, and 3 of antifouling
Sad bit is that there is a fault in the Awlgrip paint job (related to fairing workmanship, not paint itself) - good part is that Ocean Pacific is looking to do the fix right - Awlgrip rep and specialist incoming tomorrow. Won't be launching this week. RRRrrrr.
July 2nd: good day with Luke helping:
- popped a couple holes in the aft frames and braced up a plywood section that will become a longitudinal divider beneath the bunk - but is needed now to run both the last leg of the exhaust after the waterlift, and the steering hydraulic lines.
- Final installed dry riser/water injection elbow (with new metallic exhaust gaskets from Perkins-Sabre in England) & ran 3-1/2" exhaust line from there, thru 90 deg elbow, thru bulkhead, and out aft to waterlift. Secured long run to wall quite neatly, I think.
- made final raw water connection to engine, secured same to main bulkhead, mostly to ensure it can't make contact with the exhaust manifold. Backside of engine getting pretty congested with hoses - still okay, but I'm glad there no more that have to run thru there.
- Cleaned out behind aft most bulkhead, beneath sugar scoop - that area is soon never to see the light of day, and we want to ensure is ready.
- mounted gear cable combiner - Teleflex unit that brings cockpit and pilothouse control cables together, and outputs a single cable to the gearbox. No cables yet...
- Wili used her dremel to clean extra paint out of the deck chainplates, ensuring that the rigging pin(s) all fit.
Yard mechanic supposed to join us to run steering hydraulics and control cables tomorrow. Figure it'd be good to have someone who'd done that many time before - some of the cable runs will require pretty tight turns.
July 1st: No pics, okay progress.
- Primered, filled, primered (x3) sanded, surface primered (x3), and finished off with 3 coats of Perfection - single part polyurethane. Not thrilled with the end result - should be a 2 ft finish, instead it's about 10ft - and then I scratched it twice getting it up into the boat (paint is still very soft - very slow curing). It's okay, but just. Wouldn't use Perfection again, like the 2 parts better. Bolted pedestal in place, with a dozen glands thru the base for hydraulics, instrument cables, engine controls, each separately sealed. Installed single lever control and eng fuel shut-off - waiting for new control panel face to arrive, will hold off installing compass till last.
- put up teak ply wall between aft head and mechanical space below cockpit, installed ceiling in same area - all prepwork to being able to run control cables from pedestal to engine and steering hydraulics.
- bored 4" dia hole thru main bulkhead (including 1/4" steel core) to pass wet exhaust hose - using bi-metallic hole saw and a 1/2" drill - getting close to the limit of what I can do with hand tools (jammed the beast and whacked my hand good against the newly installed wall - it's tight)
- located and welded up SS base for waterlift muffler - inline with new wall and 4" hole thru bulkhead (as it all comes together)
- mounted steering rams
- installed stbd thruhull w/water strainer - and after the sealant had a chance to set, installed ballvalve and Groco raw water screen. Ran raw water line back to engine - using heavy wall PVC. Incorporated low water flow sensor in line - using Sanihose (as highest quality hose easily available here) as required till bulkhead behind engine - and there, due to potential heat issues, I've gone to wet exhaust hose - obtained a length of beautifully flexible silicone hose, with wire reinforcement - love it.
- bolted in dry riser, faced bulkhead area behind it with Greenie board - cement based heat shield.

- enjoyed a deck job in the good weather, and installed the bow rollers. Good Ole dad inbound Wed this week to do the rope to chain splices - 5/8" 8 strand braid to 3/8 HT chain - unusual splice, but Dad used to be a high rigger, extremely good at splicing. Figure we'll end up with the main anchor (80# CQR) line having 150ft each chain and rope - and 46# Bruce day hook with 100ft chain and rope.
- spent too much time goofing around with port thruhull (which will be the grey water drain - kitchen sink by gravity, head sinks/shower/tub by pump). I had welded in a threaded doughnut that the thruhull screws into (figure we can hit something and shear off the exterior head....and the seacock would still remain secure inside)BUT then, while pulling a stinger thru .....and not realizing it was live... I struck and arc on the threads. Not good. Tried tackling it with Dremel - and got the beast to thread 99% of the way thru - but we're really fighting that last couple turns - time to go get a tap, and chase it. Problem is, it's metric - totally unusual tap locally. 1-1/2" tap, no sweat; 32mm, well, I'm still looking. If we can clean those threads, It's a half hour install, and all the thruhulls will be water tight (still need to set sonar head - but that will be a last minute chore, as we use that hole for power, compressed air, etc.
June 19th: Final alignment, bolted prop shaft to the engine - and had our first survey!
I'd run out of patience getting the engine rough aligned and mid-ranged on mounts, so I hired a marine mechanic for 1/2 day - he measured and directed, I spun bolts - and everything fell in place. Lasdrop Dryseal (wanted something simple without bellows) and a R&D flexible coupling just slipped in place, rotates very smoothly by hand.

and Pat Patrick of PR Marine Surveyors came highly recommended - very experienced and capable, 3/4 of a day, a million questions and many pictures later, stated the boat was well constructed for heading offshore (yeah!). Now to insurance....
June 16th: Welded up cockpit helm, dry fit helm pump, engine controls, compass.


Also spent some time on the hull below the waterline, welding up a couple old drain holes, adding one last zinc bolt on location, and repairing the undercoat on those spots and anywhere else it'd been abused over past year.
Marine surveyor inbound Wednesday to do preliminary evaluation so we can set up hull insurance - want to ensure we have coverage before we splash.
June 5th: Cutlass bearing in, prop shaft in, prop secured, new motor mounts in, holding tank in and tied down (doesn't seem related, but we lose access when we bolt down the motor), motor in and rough aligned - re-shimmed and rough aligned - re-shimmed (again!) and rough aligned - we changed how we were running the exhaust, which pushed the motor forward - and up higher than I'd planned for. Mounts are now nice, solid, and mid ranged.
- Fuel feed system including dual Racors completed through to motor feed (want to do final alignment before we make any permanent engine connections). Also included a small electric fuel pump to prime the Racors.
 - splash stops installed at P&S fuel filler deck plates - need to install partial bulkheads P&S in order to have a solid mounting surface for the filler manifold (2" SS ball valves are weighty items)
- drilled one last hole below the waterline towards the bow - though we have enough pounds of zinc on the hull, it just looked like there wasn't enough up forward - will weld in a threaded fitting allowing us to add that last streamlined zinc. All our zincs are bolt on.
Decided to build our own helm for the cockpit - new units are just too pricey. Laid out a stylish looking unit that allows us to fit a 36" wheel, and has a decent sized head to accommodate the engine panel, Garmin multifunction instrument head, compass, VHF (separate units inside and out - total duplication, and cheaper than a RAM type mike for the cockpit. )
Cut & bent aluminum- fitting helm & engine controls - just awaiting a slow day for welding.
Oh....and somewhere in there, we moved the beast from the storage yard to a shipyard with marine lift - so we can hire some help to get 'er into the water. Interior won't be finished, but it's time. Mast & sails waiting in Vancouver.

- loading up - incredibly lucky to have James/Bowline Towing in town - he just backs up to our boat, and picks it up like she was 18ft vs 50. We were getting to the top end of his weight limit this time - figure she's well over 30,000lb by now

- that is a loaded logging truck coming the other direction....it's about this point that you start t worry about insurance....
May 5th : Nope, I have not died - just heavily involved with Son's campaign - very proud of him.
- while our own time building has been very limited, major components have been arriving, so we're aching to get back at it:
- propshaft/prop rework complete - the joys of fitting a European J-prop to an American standard prop shaft (taper & threads were all okay, but the length of thread is also critical on the J-prop). Got a great look at the internals of the prop - skookum construction vs competitors.
- Shaft seal - went with a Lasdrop Dryseal. Simple, compact, will carry spare seals on shaft ready to change if required.
- custom 316L engine exhaust elbow - our original engine exhaust elbow was right on the waterline, making it possible for heavy following seas to work their way into the motor - so we modified the exhaust run to come 18" up off the top of the engine and then go into a wet elbow, where we can attach exhaust hose and run nicely downhill to the waterlift muffler. The wet elbow is now the high point in the system.
- engine mounts+ - I really wanted a Perkins Sabre 4.236, (low reving tractor engine base that just runs forever, can get parts anywhere), and because they're discontinued, had to buy a used one & rebuild. Internals were suberb, changed bearings & rings just because I had it apart- but after stewing on it for a year, ultimately decided to change the engine heat exchanger (which had one questionable looking end seal), and the used engine mounts. Orca heat exchanger, R&D engine mounts (good looking units).
- Garmin autopilot and latest large volume pump to interface with Garmin chartplotter
- Magnum 4000w/24v inverter charger - highly reliable unit that has 105A 24v charging ability - to keep up with the eight 6 volt 230Ahr golf cart batteries. Good local boatshow deal.
- 90A 12v, 140A 24v alternators - kept engine & genset on 12v, as we need that for some electronics anyways, and it really ensures isolation from big house loads (like the inverter)
- Selden mast is in storage in Vancouver!! Sails should be there by the time we get the mast standing, so it'll be a short transition from floating hull to sailboat (yea!))
Feb 12th - 24 hours at 5 psi - exceeds ABYC standards :)
Feb 11th - finally had enough plumbing done to pressure test the port fuel tanks - glad I did, cause even after all the practice on the other side, I still had a very fine leak on the level sensor - those welded 1-1/2" bungs have been a pain on every tank! Left the tank holding 5 psi - 3 down, one to go.
Feb 9th - Boat Shows! Seattle, then Vancouver....Seattle was best for training, with well over 100 free seminars, plus Boat U, with World Class presenters putting on focused courses - truly benefited from our day with Jimmy Cornell, and his encyclopedia of passage data, enjoyed the trip down and back via the Victoria Clipper.
Vancouver was the place to buy (after getting prices from Seattle) - RO Watermaker, Winslow life raft and a Achilles RIB - Wili was all over the poor sales guys making the deals.
Got enough info that we're now looking for a Garmin autopilot too - they're finally making one big enough for DreamCatcher.
Back at the boat - still down in engine bay (when not at Boatshows)- built SS frames for battery boxes and drilled here there and everywhere to bolt them in (they are removable to get to the main fuel tanks); bored hole through bulkhead, welded in brackets and laid pipe to run raw water thru engine bay. Very concentrated area for tanks, lines and cables, but happy with how its' all going in cleanly.
Jan 21st - have spent bulk of time down in engine bay, prepping wall & mounting surfaces, starting cross ship wire raceways - these are the major feeds for both AC and DC from the starboard mounted panel to the portside raceway that runs the length of the boat - and getting into finish plumbing for the Stbd fuel tanks. Placed two battery boxes (four 6V each, for a total of 450 amp-hr at 24v), just to figure out exact location - floor space shrinking fast! Still three Racors to fit - dual 500's for engine, single 1000 for polishing via transfer pump.
 |
| Wire raceways to left - upper AC, lower DC; tank plumbing to selector valves upper right - 1 for return from engine, other for feed to motor - under normal conditions, they just both point the same direction, and life is good. Large bore brass line is the transfer pump suction - selective pick up from stbd tanks over to transfer pump on portside, more work to do on other side. |
 |
Trying to show impact of battery boxes in this shot - still reasonable engine access, and good standing space with frame separating you from engine - but it is getting snug. Plywood floor is just temporary - feet were getting sore standing on top of the keel tank top bolts. Not sure if we'll stick in a checker plate floor there or not - better for standing, but cuts down even further on maneuvering room - Wili can fit beneath the limbo bar created by the frame, but my longer legs jam - leaving the floor open gives me just enough space. Not needed for engine work, but the watermaker will be mounted on the bulkhead running across the bottom of the picture

And while I've been down in the engine bay, Wili has been fitting cedar strips and then plywood to the portside pilothouse hull. We're keeping electrical systems (panel, isolation transformer, inverter/charger) and nav systems to starboard, will be running ships plumbing systems (vacuflush, H&C freshwater lines, propane) along this portside wall - all will be hidden behind a settee.
Note the high class plastic bucket trim for the above waterline valve - that is the thru hull for the bilge pumps.
- J-Prop is at machine shop getting re-bored to match 1-1/2" shaft ( got a great deal on an inventory sell out a couple years ago, knowing it'd have to be re-worked to fit, waited till I knew there was no other shaft work happening)
- still waiting for steering cylinder rod ends
- propane lines also on order - no one making custom length propane lines this side of Vancouver anymore due to recent reg changes, and AYBC stds require one piece lines from propane locker to appliance (that would be 30ft by the time we do a little up and down getting to the galley)
-
News Flash! Jan 4, 2013 - received Vessel Registration Papers!
- DreamCatcher formally became 'Dream Catcher' of Vancouver BC on Dec 21, 2012. Took a bit for the papers to get here - but it's an awesome present.
Jan 3rd 2013 - Happy Launch Year! - another 12 months bite the dust - wow.
Good news is that we had a 'over subscribed' work party Dec 31st - Good Ole Dad (G.O.D.), Daughter's beau, Son and 4 friends turned out, along with a Hiab to help get the motor into the boat - got motor into place, and threw the genset up and in while we had the lift truck there. Motor looks good in place - not bolted down yet (still propshaft work to do) but is within 1" in any direction.
- All fuel, holding and water tanks in place beneath the pilothouse floor, still room for the battery boxes while leaving good working space. The engine box directly over the engine and the floor for 4ft in front of it will hinge up in two sections to give standing room in that area.


And I'm still proud of the removable engine room I-beam built into the pilothouse ceiling - this allows us to shuffle the engine and tranny about, including lifting it up to floor level for any truly serious work.
- Tillerhead painted and in place - waiting upon a steering cylinder rod end to finish set up; slow delivery and an ungodly price - not an exciting combo.
- G.O.D. back in action building the battery boxes - yeeeha, another body working steady really helps.
- starting on fuel system plumbing (lots of tanks is a pain that way) and PVC runs into pilothouse for two Vacuflush units that tie into holding tank - want to get those big bore pipe runs done to clear the way for pressure water/propane against the portside.
AND - my lovely daughter gave me the greatest gift for Xmas - Jimmy Cornell's 'World Cruising Routes' - directions for everywhere we dream of taking the boat once we get the beastie launched. I go to sleep hugging it.....
AND - my lovely daughter gave me the greatest gift for Xmas - Jimmy Cornell's 'World Cruising Routes' - directions for everywhere we dream of taking the boat once we get the beastie launched. I go to sleep hugging it.....
Dec 30th - Merry Christmas - interesting as we had our usual crew over on various days, thinking that this time next year we'll be cruising somewhere far warmer. On/off week (amazing how Christmas and all that family stuff slows everything else down - but then, maybe that's the idea?) - not much picture worthy. Slowly building up paint system on tillerhead, built and installed holding tank base, laid out battery boxes (two each holding 4 x 6V, to serve as 24v house bank, one to take 2 x 6v as 12v house bank - plus one 8D for starting service - I already owned it), and prepping lower portside pilothouse hull for permanent install of fuel and holding tanks - those areas will hopefully never see the light of day again for 25+ years.....
Dec 24th - I have been working on the beast, but ended up stalled on multiple fronts waiting for parts

- tiller head assembly was high in the list - just came out of the machine shop - really simple concentric hub, with a keyless hub lock - big machine shop savings due to not needing to key or split hub.

Here it is trial fit - slide tiller head over rudder shaft, temporarily shim to right height, add hub lock, tighten bolts - done. Have since pulled tillerhead for painting.
Holding Tank - as I finished up installing the frames for the last two fuel tanks, we could finally layout the holding tank - ended up being able to fit in a rectangular 32 gal poly tank - then had to wait two weeks for it to arrive.....it's here, framing is cut out, needs fitting and welding
Propshaft/Engine install is awaiting bolt down of fuel and holding tanks - everything fits thru the same hatchway in the pilothouse floor framing.
Dec 9th - we were off at a nephew's wedding in Mexico. Extremely nice young couple, a good group of 'lively' friends, a few couples with babes and a couple of us older members to round the party out (suspect we were mostly there in case bail was required...) Beautiful location just outside Cabo San Lucas - went into town, checked out the marina, found the marine hardware store.....better selection than I'd expected, and prices weren't too bad on a lot of parts. It's on the list when we eventually sail Mexico (hopefully after Hawaii/Australia/Tahiti!)
Before we left, I went to install the bottom rudder bearing/shoe - and discovered we didn't have enough clearance at the top of the rudder. Could have ground my way out, but then would have been trying to paint in the rain again - instead took rudder bearing shoe back to machine shop for 'adjustment'. Gave them final dwg for the tiller head machining while I was at it. Fill in work for them, but I should have all back before xmas.
Back inside the pilothouse, getting all the below floor tanks/systems in place
- securing port side fuel tanks - installed seacock for septic pump out - sized & ordered holding tank, just a heavy wall poly rectangle, will fab brackets to suit once it"s here.
Looking to install engine before New Years' - prop shaft needs to go in first, then have lots of cables to route before we block access with the motor - very busy area of the boat.
Also ordered the mast while we were in Mexico.....had been collecting quotes for past two months, big sticker shock! Going over 45ft took the mast and rigging up into big boys territory cost wise... but was also out getting sail quotes, and managed to reach a deal with the local North Sails loft for a Selden mast, rigging & sails that was reasonably close to my overall budget (thank-you Steve!)
And finally - there were some year end specials on the Garmin 4212 multifunction display that we've been keeping an eye on for the past year - sonar and radar modules being phased out (I'm very happy with only being able to measure 600ft depth, and the non-HD digital radar is many times better than the CRT R20X system on my last boat...) - even the VHF I was looking for (Standard Horizon GX2150 with AIS) was on sale, so I bit the bullet and committed to a package. Originally was a little concerned about everything being in one black box, but came up with a configuration that has a simple MFD at the cockpit helm for wind/bearing that can access the GPS data should the main inside display fail, and with a little rewiring, we should be able to get depth too, so there is already one level of redundancy built in - and we'll carry a battery powered gps - and we'll be picking up a Delorme InReach GPS/satellite communicator (those are both cheap and sexy) - and I still have my old sextant! 4 levels of redundancy will suffice.
All up, an expensive month, but definitely looking forward to bolting everything in place. Mast will be delivered to Vancouver March 1, 2013 - boat needs to be in water, powered and steerable by then, so we can pull up under the mast crane. Means we need to survey, register and insure by then too (wow).
Nov 1st - off campaign training for week - but that is a whole different story....

Doesn't look like much, but it was a far bit of work moving, prepping and getting rudder back up and in.
- had one seam across top of rudder that I never really liked - went back and re-did that with tig (I do love tig)
- rudder paint had suffered getting dragged around, so I touched up with a blaster and re-painted same spots
- had to rent a bobcat with forks to handle - too heavy to lift even with 3 strong guys, (which is how I damaged the paint...)
- you'll note the trench beneath the rudder - had to dig the hole so we had clearance to line it up with rudder tube. Early on I decided I did not like the concept of splitting the rudder shaft at it's highest stress point ( and I still don't) - in the water, or on the boat lift, it's no big deal - otherwise, start digging. Good news is that the water wasn't there when we dug...and Nick came to do the chain fall tugging while I levered and shoved the rudder around to fit the hole and minimize tube paint damage during the lift.
 Pics on the ground and installed 'cause there was no third body to take photos while the lift was happening!
Still have to bolt in base and rudder port, then fit all steering gear - but it's nice just to have the rudder back up and in.
It took a couple days to do the bottom bearing bolt up - 'cause when I laid down on the ground to line up the fitting, I discovered my lovely professional painter never did the bottom of the skeg, or the welds on the bolt block....rrrr
So I covered the sensitive areas up, pulled out the siphon sandblaster, and had at it - another two days of heating & painting, and I could finish the job. (trick to painting outside in cold weather is to heat the paint before mixing and heat the steel - just used halogen lamps & a plastic windshield)


Bottom bearing bolted on - 2 bolts in, waiting for 4 new to be delivered
Oct 16th - Got to the two aft deck lockers just in time!
Glassed inside the lockers the evening before the rain hit - and have not had a really dry day since. Note - this is BC Canada - once it starts raining in Oct, it might not stop for 2 weeks at a time - pretty limiting when you don't have a roof, and want to something water sensitive like fiberglassing.
- aft lockers have fabbed up v-bottom shelves about 3ft below the deck, in lockers built large enough to take three 5 gallon jerry cans side by side - concept is that in remote locations (with limited fuel/water access) we'll carry 3 jerries of freshwater on one side, 3 diesel on the other - with space leftover for rope/bumpers on top. This means the only containers on deck will be gas for the dinghy outboard; that and propane we don't carry below deck.
- I've been onboard an offshore boat where we encountered a containated FW tank - and the fallback jerry cans meant there was no panic, just a week of rationing. I wouldn't go without them.
- the 15 gallons of fuel will work the same way - we can use/lose everything in the onboard tanks, and still have an emergency supply for motoring or generating.
- this set-up means no jerry cans on deck.
As these two lockers could be open when raining, or a wave hits, or a jerry can could pop a hole, we're fiberglassing them top to bottom - they could be full of water (which would be a pretty significant weight), and there will be no water issues inside the boat. The v-bottoms are built with a low point fwd, into which I'll be adding a valved drain, with a hose running to the bilge - while coastal crusing, the jerry cans will be empty, and the drains will be left open. As soon as we have diesel in a locker, we'll close that drain - always want to know what is going to the bilge.
As an extra complication - we've had new aft locker hatches on order for 4 months - the old ones leaked. Looked good, but weren't up to the task - Bomar had an alternate style with double seals that fit the same cut out, but were a real joy to get made and delivered. They of course didn't arrive till two days after the rain started.....after one of the longest, dryest summers in the decade...... so we've already tested the fiberglass for water tightness. Good news is that the hatches did arrive, do fit, and my wonderful wife joined me in working like a dog in a short dry spell 2 days ago when we pulled the temporary covers, cleaned the deck, drilled and tapped new screw holes (the cut-out was the same, but the drilling pattern was not....) and continued fitting & sealing the new hatches in place under a tarp when the rain returned ahead of schedule. Had a lot of luck with the wind holding off overnight, giving the sealant time to set - helped by a couple of halogen lamps inside the lockers.
Today it rained cats'n dogs, blew 20 mph - and our lockers were dry. Life is good.
Oct 9th - Finally - 12 sheets of plywood, 10 gal of resin, acres of cloth and 2 liters of gelcoat later (all through a 24" hatch) - I'm out of the sail/anchor locker!
- the area behind the collision bulkhead in the bow of the boat is over 8ft long, about 5ft wide at the entry & just shy of 6ft high (meaning I was bent over through all this!!) giving us glorious space to work with for both chain and sail storage
What I wanted was two bullet proof chain storage bins that could take a beating as well as routine saltwater dousing (through two windlass openings) without water going to the main bilge, and without beating paint off the steel frames/rusting. So with the hull/frames already blasted/primed/painted/foamed, we lined the hull floor to ceiling with laminated ply sheets plus fiberglass (this allowed us to follow the complex bow shape), then overlaid with matt/roving/matt - added a divider to separate the chain locker from the sail locker - and another to split the chain area into two, to handle the rodes off each of the vertical anchor windlasses.

View through the bulkhead access hatch. The white elbow coming through the bottom of the bulkhead is the anchor locker drain.

Trying to show the chain bins - unfinished center divider will be extended up once we've installed the windlass motors

Poor quality overhead shot of the chain bins prior to gelcoat (which is drying as I type) - each should have more than enough space to handle 150ft line and 150ft 3/8" HT chain. Everything drains to one point - common drain that runs through the bulkhead to a Gusher diaphragm pump, and directly overboard via an above waterline through-hull
It's hard to show all the detail in the bow locker:
- the chain bins are 4" off the hull, so there's still a bilge run allowing any misc moisture/condensation/leakage to exit the area and make it's way to the central bilge.
- we've laid it out so any water coming in thru the chain pipes gets captured in the chain bins, hopefully keeping the main bilge dry even in heavy weather with green water coming over the bow (though I'm still scratching my head on how to set up a bilge switch inside a chain locker so the anchor locker pump deals with this automatically)
- there is an overhead hatch into the sail locker area that is too small (10" dia) for sails, but will be useful for ropes and the saltwater hose we'll use to get any muck off the rode before it goes below deck. Figure we'll set-up a ventilation cap for that hatch too, something we can use at the dock or even while coasting.
Still more to do in the bow locker (ceiling, wiring, anchor points for each rode, mounting the windlass motors) but we're to the point where any water that does get in can't hurt anything - so we're off to the last weather sensitive job - the aft storage lockers - two more fiberglass jobs, but with stand up access - what a joy!
Sept 27th - While I'm busy playing with fiberglass resin in confined spaces, Wili has finally declared the teak frames 'smooth enough' (they look and feel like silk) and started weaving in the ash strips. Awesome colour contrast, good ventilation, and amazingly strong/resilient. Here's her first door - one done, dozens to do!

Sept 21st - All sail locker walls laminated in place (3x 3/16" ply with fiberglass/roving), fwd ceiling, internal bow cone + forward divider (two anchor windlasses = two chain rodes that need to be kept separate) fitted and glassed 1 layer - two anchor chain tubs roughed in in the anchor locker portion - need to rough in floor in sail storage bay, then do a final clean up the bilge in the area that will never see the sun again, and finish glassing/gelcoat from bow out. Spent more time inside the locker than expected - but it's turning out not only bullet proof (necessary, given that chain will literally be bouncing off the walls), but also decent looking - curved corners, clean waterproof surfaces - going to hate putting a dirty chain into an area that purty!
Sept 1st - Finally achieved a 5 psi bubble tight leak on the level sensor bung - fellow MBB'r suggested using an obscene amount of tape + sealant - went to 10 wraps of thick (natural gas) tape and Locktite 565, and it did the job. I'm so gun shy on the fuel tanks that I'm going to fill the beasts with diesel next, just to proof everything before I lay the floor - it will also drive us to install and test the fuel transfer system, which needs to get done in any case. Good rain day jobs.
With nice dry warm weather still here, we got done with the bilge paint, and moved up to the sail locker (not exactly my favorite compartment), fitting the hull liner/chain locker. In order to take the abuse - both water and chain wise - we're building the liner up out of 3 layers of 3/16" ply and fiberglass - including fiberglassing the backside before installing the first layer. Getting tired of worming my way through the collision bulkhead hatch (6ft+ guy squirming through 24" hatch - it ain't a pretty process), but the first layer is glassed in place, and the locker looks better already - hopefully I can hand this one over to Wili pretty quick - she fits up there so much nicer.
August 23rd - sandblasted bilge beneath mast step, in a partial finished hull - making zero mess. Confident we could so the same in a fully finished boat. Two tricks were to a) build a tent of heavy plastic that contained the bilge area, yet was big enough for me to work inside. My loving wife was only slightly concerned as I crouched down in the bilge, and had her tape around me...... b) set up two shop vacs to pull from that same tent. I was using a relatively small sandblaster, and only a middling sized compressor - which turned out to be a great match for the two shop vacs. The tent was pretty well always under negative pressure, the air exchange was decent, keeping me relatively cool (and it was a nice hot day outside) and due to the blasting being beneath the mast step, the back blast was reasonably contained. I used a backpack 1/2 face respirator, along with a full face shield, and was reasonably comfortable through the exercise.
Had one other area that I wanted to touch up, and basically just set up two overlapping layers of plastic that I could slide my arm/sandblaster into, again with two shop vacs pulling from inside - blasted briefly but very effectively, and very cleanly with respect to the rest of the boat. If I had to do a larger area, I would likely still try to compartmentalize, but go to a larger sandblaster - and more shop vacs - whatever number were required to counter the size of the sandblaster.
- there were a couple other compartments where the original bilge paint had been damaged by welding/drilling - these areas had to be scuff sanded before recoating. Since blasting/sanding we've mixed up a couple batches of 2 part epoxy paint (Interguard 264) and given several bilge compartments recoats. Beneath the mast step looks great now, and rest of bilge looks clean again.
- installed new anchor locker hatch also - bedding not quite as neat as the first hatch, but the seal should be 200% better (hasn't rained since install to verify - or clean off the outline of the plastic box previously acting as a rain shield!)

- starboard fuel tank 1-1/2" bungs seal still eluding me - 2nd attempt better than first, but still had an exceptionally small bubbling leak when tested - so I've pulled and cleaned the level sensor/bungs, now trying to source a 1-1/2" NPT tap to chase the threads before we go round 3 - with a different sealant.
August 17th - We suspected the painter missed an area in the bilge because we have a rust stain coming from beneath the area hidden by the mast step - leaving me was trying to figure out how to cut two 4" access holes through 3/4" steel plate (I really didn't want the mast step flexing...). Didn't want to burn through using the plasma cutter - would make a real mess of the paint that is in the area - so I thought I'd try a 4" holesaw first. Went and rented a 2hp magdrill, put in a 1/4" pilot hole, lined up with a fresh hole saw - and it went through the first 1/2" like butter, then stopped cutting. Finally figured out that 1) I was probably using too much lubricant and 2)the saw was riding on a ring of filings. Vacuumed out the groove, gave just a little squirt of rapid tap, and was through in seconds. Backed off on lube for the second hole and lost a few holesaw teeth, but it did the job far easier and faster than I'd feared. Biggest challenge was carrying the monster magdrill up two stories into the boat, down into the bilge, and back out again - it was a manly load!


And sure enough, there was a strip with no paint beneath the mast step. My fault for building a area the painter couldn't spray into - but it should would have been nice if he'd said something.....now figuring out how we're going to blast and paint inside a half finished boat. I have found a blasting head that will just fit inside, with a siphon we can run from a bucket of sand... looks like we'll build a small tent and blast inside. It'll be interesting.
- fitted, drilled and blind tapped the new foredeck hatch, cleaned and touched up paint on deck opening, then etched and painted the new deck ring. Realized we couldn't just use the old screws - coming in from the bottom they were too long, and due to the different design of the ring, we can't get wrench around the head of a screw to tighten up a nut - so I spent some fussy time making 8-32 studs - cut off the screw heads, cleaned up the threads and then cut a screwdriver slot into one end. Will install hatch with headless studs in place, then add washers/nuts from below to gently suck down on the frame. Will be going with 3M5200 this time - Sikaflex has just not done the job too often, and I really want to be done with this hatch. Just waiting for last coat of epoxy paint to dry before install.
- plumbed new water tank to deck fill, now need to fill and let expand before we install the final chocks (2% expansion on a 30 inch long poly tank is over 1/2" potential growth - this I'll have to see)
- plumbed fuel tank openings with fittings through to the first valve on each opening then retested for pressure. All the hose barbs, 1/4 to 2" sealed on the hose with low effort, and the area I was worried about (2" threaded connection to the big hose barbs) sealed first try too - it was the 1-1/2" threaded bung level sensor that did not seal on either tank, despite using what I thought was a generous amount of sealant plus a pipe wrench. Pulled and cleaned bung, reset using more sealant and a crescent wrench that fit between the rails letting me get better leverage - crossing my fingers and letting the sealant set an extra day.
- cleaned around stbd fuel/water tanks, re-painted bilge/frames/rails in same area
August 11th - 2 stbd fuel tanks finally bolted down, with top braces added (wanted to ensure there was no movement due to fuel slosh when we bang into a big wave nose one), water tank strapped in, and beginning to install/seal fittings into tank so we can do one last pressure test prior to closing in the floor. Components for below floor wiring raceway outboard of tanks are placed, but not secured until we know we're not moving those tanks again.
Also pulled and resealed the fwd stbd porthole - another Sikaflex failure, this time not bonding well to stainless (which had been incredibly cleaned and degreased)
Great news on chain locker deck hatch - found a cast aluminum Freeman marine deck hatch that exactly fit the existing hole, with enough meat in the deck collar that we can blind drill and tap up through existing screw holes. Beefy 3 dog design that I should have gone with in the first place - only downside is our 10" dia opening shrinks to just over 8" - good for ropes/hoses, but the fenders won't be going down there now. Marked and drilled over weekend - but got stalled by lack of a 8-32 bottoming tap - need Fastenal to open up Monday.
Wili's is still busy oiling/polishing teak frames (they are starting to look superb) and doing some final work underneath the sugar scoop before we close that area up forever.
August 5th - finished drilling holes and fabbing bases for tanks/wires/cables/hoses around the port side fuel tanks (and tired of climbing around and under the pilothouse floor!). Painting steel with 2 part epoxy (interguard 264 - good stuff) and sealing the foam using decent latex - ready to started bolting everything in.

While I was waiting for the paint to dry between coats, I wired up the Port Forward sub-panel...

The grey channel running along the back of the cabinet is the dc wiring raceway (with cover off) - the white strip inside it is the 120vac raceway (only one 120vac cable coming out this far) - and the box is a Blue Seas fuse block, with positive and negative fused buses under one cover.
Why go to fused subpanels?
- had long planned to use feeders from the main breaker panel out to distribution buses just to keep the number of cables running around down, while still having all the lights/fans/accessories our hearts desired.
- realized while using a common feeder to feed multiple fans/lights was practical, the one breaker could not properly protected the individual fans (after I saw the picture of a melted fan p94 of 'Offshore Sailing - 200 Essential Passage making tips" - and then read about the author seeing more than 1 fan burn up..... we're going to have more than 6 fans, and having each one individually fused is suddenly a priority....)

The Blue Seas fuse blocks are a touch expensive - but they are the only ones that had every feature I was after right off the shelf. Using double crimped heat shrink/adhesive lined terminals, and the block comes with lock washers on the screws.
I'd probably skip the fused block if there were only lights coming off the feed - that could happen elsewhere.
And given some great local weather (we went over 30degC for the first time this year this week), I'm finally getting around to dealing with a couple leaky deck hatches. I went too cheap with plastic hatches for the stern deck lockers, and have regretted it from the first rain. Not sure if they leak through the actual door seal, because the leakage through the screws and deck fitting are so bad - they have been taped over for almost a year. I girded my loins for a real battle to get them off the deck, as I'd used the Sikaflex equivalent to 3m52000 - and the damned things came out at the first tug once I'd removed the screws. Lots of sealant attached to the deck, but it sure did not like the plastic. I now have multiple failures with Sikaflex (some plastic, some metal fittings) and zero with 3M5200 - Sikaflex is off my list of usable products.
July 26th - week off fishing with a couple good buddies - towed Jim's boat to Nootka Sound on the westcoast of Vancouver Island and stayed aboard, anchored in a sweet little secluded cove at night, caught 20lb salmon during the day, and laughed at each other the whole time. Healthy break!
July 21st - laying out other runs/raceways required beneath pilothouse floor, plumbing for questionable water tank (dedicated 25gal tank for desalinator/rain/low quality shore water). Will be able to transfer this water into main water tanks once we've checked it out - or just keep it to feed bath/washing machine/toilets.
Lots of steel frame/bulkhead drilling for pipe/wire runs - back to love/hate relationship with steel punch - love that it does not throw chips all over - hate it's awkward weight, and the fact it takes 3 hands to operate. Still amazed at how it will go through 1/4" plate with a few strokes.
July 15th - finding aluminum welders are popular people.....my buddy Jim over on Powell River has a project boat he's rebuilding, and needed a hand securing some non-critical aluminum parts (battery base, antenna mount, transom shim, fuel fills, etc). Headed over for a couple days with my mig & tig and wowed him with my abilities ( he was just happy to get some free welding!)

July 12th - still tanking away - installing the base frames after foaming has created a few extra challenges - like trying to weld within 1/2" of foam surfaces. Found we can do this safely by surrounding weld zone with wet rags, welding in very short sections, and cooling off the weld zone in between. Starboard framing in, tanks positioned and welded to aluminum rails that are in turn bolted to steel rails. Would have been a much shorter exercise if I'd figured this all out before foaming & painting... still have port side to go after cleaning up starboard.
Before I reseal the foam carved for the steel frame work, I figure I better deal with any other sub-floor drilling & mounts for hoses/wires - the starboard pilothouse side will be a real nexus with AC/DC panels, nav station, hydraulic steering on top of the 2" tank filler runs. Laid out a wood/epoxy race way just outboard of the tanks below the floor to handle the main AC feed - figure I'll keep the wiring center to starboard, plumbing center (2 vacuum toilet systems feeding into one holding tank and the bulk of the longitudinal hot/cold piping run) to port
Warm/dry weather FINALLY arrived on Vancouver island, so starting on the outside list too; dug hole to let us re-install the rudder - solid shaft improves strength and eliminates a potential joint failure, but also means we need to drop it well below the keel height to clear the shaft - hence a 20" deep, 40" wide trench now exists behind the skeg. Then started moving rudder around to clean it up before install - I forgot how much that puppy weighs! 3 men, and it was all we could do to slide it around and get the shafted end up onto a sawhorse. Looking forward to getting the rudder up in place, which basically determines the height of the master bed and influences routing of the main engine exhaust lines
July 2nd - Happy Canada Day/Independence day! Central US in week long heat wave, and we're seeing nothing but rain....need some dry weather!
- tanks - all done, tested, tested - and then helped by Nick to get the beasts up the stairs into the boat. Now to finish mounts inside the boat and bolt the suckers down.... I take the odd break by working on wiring/plumbing in the fwd head - all the runs that are better done prior to mounting the teak faces.
- Wili still busy sanding/oiling/polishing teak frames - starting to look pretty nice
June 26th New tig unit finally here + up and running. Everlast PowerPro 205 - stick/tig/plasma cutter all in one. All parts look decent, and everything is working out of the box so far.

- very happy with tig results so far - suspect largely due to unit having pulse. Don't think it's the actual pulse function (though it has an impact) - it's the pulse driving me to move/add filler in a more uniform manner than I'd otherwise achieve. Practice outside corner below


Used tig to go over mig welds in fuel tanks, fixing leaks plus looking to produce a more uniform final joint - really liked the ability to see the puddle in detail, floated a couple bits of slag/pinholes that may have become future issues - I'm going to sleep better running with full tanks in a storm now.
Genset finally arrived too - bought a slightly used NextGen 3.5kW diesel unit, complete with sound shield. Was exactly the model I'd decided upon, just tripped across on Ebay; took some extra effort to arrange transportation, but was worth it - looks to be in good shape. Just need to figure out where to mount it - biggest issue is the exhaust run, and getting the exhaust elbow to arch above the waterline - hate the sound of water coming out of the engine air intake.
I hate weekends - ran out of argon after going over first tank, and there is nowhere in town to get welding gas on a weekend. Back to sanding teak. Wili is doing this pretty well fulltime, and threw a drawer front back at me for belt sanding (extremely fine planer barring - she has high standards).
June 19th - filled first main tank with dyed water to cross check for leaks (not a very effective method vs 5 psi air - I know I had leakage on the plastic bungs with air, didn't see that with water), and then measured the water as I emptied it using 5 gal jerry cans. Had calculated 50 us gal with a slightly extended nose on the outboard end - dropped the nose after multiple more experienced tank builders mentioned it'd be a pain to build - measured volume came out at 48 us gal. Was debating dropping a tank or two, but will need at least 5 tanks in order to carry the volume I'll be comfortable with (250+ gal).
For those wondering about my math, that's 5 x 48 gal + 40 gal in the keel tank.
Headed out to pick up genset and tig tomorrow - couple US purchases where suppliers don't want to deal with extra border paperwork - can't blame 'em. Will go visit a friend in Vancouver and bounce across in Blaine to do the pick up.
June 16th - saga of the tanks continues - now awaiting the delivery of a Tig to go over all the external seams.
Using a pro showed the huge difference between tig and mig in this application - and I'm spending enough money on fixing the leaks to almost buy a new 205A tig/stick/plasma cutter - unit is small enough that once all is done, we'll carry it with us onboard. The tank leaks are all basically related to cold starts and in a couple areas not gouging the backside of the internal fillet welds enough - I'd be better off just welding the baffles and then only doing the perimeter welds one sided from the outside to avoid the contamination. Still two wing tanks to go.....3rd time right? We'll see.
I do have 2 good tanks now (1 main fuel tank, 1 header tank for the diesel stove) - sealing the ss bushings, and will then triple check for leaks before I start installing - I'm a little paranoid now.
Meanwhile, in other areas of the boat:
- Wili has been slowly progressing on lining the aft external lockers - fitting a plywood liner for me to fiberglass over - we'll end up with 2 deck accessible watertight lockers - with manual bilge drains
- I did get enough teak frames/drawer & door fronts rough sanded that Wili could start finish sanding prior to oiling - and they are coming out pretty nice - the photo doesn't come close to doing them justice:

Back at the boat, I've just fitted the frame for a chest of drawers in the Fwd cabin:

I'm particularly proud of the fit on the fwd bulkhead - turns out the bulkhead has a gentle curve, and I had to hand plane the edge of the teak frame; we ended up with a seam that requires no further trim - beautiful.
Conall suggested that I'd grow to love the Kreig fastener system - turns out he was dead right. I'm using it to both construct frames (mortise the corners and Krieg all intermediates) and in some locations secure the frames into the hull. Easy and everything stiffens up very quickly, though you have to ensure the two parts are tight together to ensure one part doesn't shift when you snug up the screws.
June 9th - still playing with tanks - lesson is clear - I will not be migging any more external seams; will assemble the last two tanks including welding up the interior baffles, prep the external seams, and take them to a pro - just losing too much time.
- took a break from playing around with tanks to do some wood work - sanded and routered all the drawer fronts and frames made to date, along with one face frame, which translates into a pile of teak ready for Wili to wet sand with teak oil - she was getting ichy for work.
June 2nd - spent week up in Trail with Wili for family stuff
May 29th 4 tanks done - did first leak test - humbling moment. Edge to edge welds good, likely due to being welded inside and out. Lid perimeter weld had a couple pinholes, as did plug welds (did last couple a bit different to solve that)..... but the real truth was in the threaded bosses. Thought I'd gotten good enough to do okay on those - not. Biggest one was good, all others leaked like sieves. Taking all to a tigger...sigh.
May 18th - well, speed demon I'm not - here's the second of 6 main fuel tanks. At least it has the lid welded on.
Find myself spending more time with the baffles than anything else.
None pressure tested yet.....

May 13th - Happy Mother's Day!
- it's been a awhile since the last post - fair amount has happened - mostly, I retired, and now boat build fulltime. Thought that would mean more progress, so far it's largely the opposite, as people haven't stopped visiting yet.....
What I have done is flip over to fuel tank building, which included learning how to weld aluminum. Kudos to Kevin M for having the knowledge (and patience!) to walk me through that transition. Clearly not up to his jewel like standard, but my aluminum welds are now functional enough to do the job.
- held off on doing tanks till now primarily due to cost - just didn't want to fork out $1,000 per tank for 6 tanks. I understand the cost - the baffled tanks take time to fit & weld out - but time I now have. Plan on getting the tanks done & in, then we can drop in the engine (which has already been in/out 2x) and get back to finishing the interior over top.
Fuel tank #1 - first of 6 fuel 50 gal tanks that will feed the main engine & genset. - Multiple tank set-up required to fit between frames and under the pilothouse floor. - Wanted aluminum because I've seen too many steel tanks rust out, and believe properly installed, the aluminum tanks will outlast me.
- 300 gal of fuel (plus day tank in keel) should give us our choice of a great crusing range, or lots of genset/cabin heat runtime. Reality will be somewhere in between - one thing I do know, if my wife is going to really enjoy time on the boat, I absolutely must keep her warm - and that can be a challenge in the winter on the BC coast.
If I was to do it again, I'd modify the pilothouse framing so I was just building two large tanks (say 150 gal each) that dropped in from the top - too much time and complexity required due to the number of tanks. Mind you, if anyone ever has to replace a tank, they'll be able to do it without taking the interior apart
- lots of welded interior baffles to carry the structural load - these tanks do not need to be set on a platform to support the bottom. Wanted to maintain an airspace all around the tanks, and avoid exterior tank corrosion due to contact with wet wood/steel. See Kevin Morin's topic 'Removable Tanks' under Tankage.
- end walls and top flange bent from a single piece common with the tank bottom - minimizes number of seal welds required, and means I don't have a stressed weld joint in the area most likely to collect water in my tank configuration. Top flange means I have lots of leeway in landing and welding the tank top, with it's one sided weld - all other seal welds are done inside and out.

Bent base + second tank with sides fitted

Baffles fitted, welding out exterior

welded out, awaiting top. Filler had to go thru end due to lack of top clearance for hose beneath floor framing - tanks are a tight fit. Waiting for top because I forgot to order that piece in the first lot.
- Dickinson diesel stove header tank - 7 gal gravity feed tank that mounts on wall in Fwd head, and feeds stove in galley on other side of bulkhead. 7 gal capacity lets us refill tank with 5 gal jerry can without running the stove dry. Filler tube runs down on a diagonal to opposite corner of tank so fuel won't flow back up filler line even heeled at 45 deg


March 28th - following being blown away by hurricane force winds, dodging trees falling in town, and living without power for a few days - my computer was corrupted, hence the break in updates - never fear, we braved wind, rain storm and snow (literally!) to keep working on Das Boot. - Wili is well into the swing of stripping the inside of overhead lockers/and the underside of the deck. Continues to look great, and drive me to stay ahead on pre-wiring and nailing strips for her to work to.
- in between, I've been roughing in the aft stbd lockers, and the last of the aft cabin - overhead and around master bed. Lots of complexities in curvature (every surface!) and clearances (having to layout exhaust and steering hydraulics as well as wiring - and think in a bit more detail on plumbing to boot. So far it's all working). Also overlaid last of the partial bulkheads with 1/8" teak ply.

Aft Stbd lockers, lined and roughed in


Bunk bed overhead locker with topside lined and the first almost fitted teak face frame


Finshed overhead on port and stbd side of foreberth. Note wire in ceiling - it's the one place I will not have access to after finishing, so I'm tending to wire tie a bit more to keep secure and avoid future issues.


Forward head counter - roughed in, with doorskin template (finding that is the best way to ensure a fine fit) and the rough fit teak face frames for the countertop

- Dad was down with the flu for a week, but is back to building the face frames to go beneath the foreberth, complete with teak door frames (a picture frame that we will weave 1" ash strips into - looks awesome)
- Nick templated a couple more partial bulkheads for teak overlay, and continues to chew away at planing the teak shorts (on 2nd set of blades...)
Finally bit the bullet on the aluminum fuel tanks too - we will be building them ourselves. - I've had the diesel stove day tank and the first two of 6 wing fuel tanks (@ 60 gal each) cut up and bent - stayed with simple square cuts and bends, and the price delivered to my door is less than 1/2 what I was quoted per tank. I'll have to put in hours to cut (though this sounds like a Nick job!) and weld, and undoubtly will go find a skilled TIG person to finish up the exterior welds, but at this point still believe we'll get good tanks for thousands less.

For those wondering what I've been mumbling about as a 'wiring raceway' - note the gray channel running behind the down coming hoses - this will run end to end of the hull on both sides, where the finished liner meets the deck. 120vac will be separated from 12vdc, and I'll be able to easily add or maintain most of the wiring without digging through the bilge or taking apart cabinetry.
March 10th - bit of everything with some real work work on top (love month ends)
Wili strippped up behind aft cabin dresser to about waist high - stopped there because I want to tie the dividers between the chest of drawers and hanging locker back into the hull frames - I'll bolt in a strap in between two strips, so she can continue on up to the ceiling rather than fit three different segments between the dividers. (confusing but trust me it's simpler).
Then she moved to a tough area - the 'ceiling' over the foreward berth that is actually the underside of the deck. Tough part here is establishing a line that ties together the inner corners of the frames then stepping that angle back to the hull, and chopping up a couple strips into the triangular wedges that fits this all together - actually got the first two pieces installed against the hull, so the rest should be straight forward - will get a pic next week.
Nick planed up some more teak boards boards to stay ahead of his grandad, who is finishing up the face frame to go beneath the bunk beds - and will be up next week to deliver same, and head back home with another stack of boards and the layout for the next frame.
I did a bit of everything - laid in nailing strips for multiple small sections (mostly internal to small lockers) to stay ahead of Wili, laid out the ceiling wire runs, and glued up some wire tie bases (which I also ran out of) so I can get the ceiling lights rough wired ahead of Wili (there is a common thread here...), reassembled the now varnished components for the storage locker over the bunk beds (likely next face frame for Dad to tackle), and played around a bit with how we'll be framing up the aft berth - going to add a small seat to the forward edge of that bunk, one to give me a place to tie my shoes - but also to break up the jump in height - the bed sits pretty high to clear the hydraulic steering gear & rudder post.
- it's been a awhile since the last post - fair amount has happened - mostly, I retired, and now boat build fulltime. Thought that would mean more progress, so far it's largely the opposite, as people haven't stopped visiting yet.....
What I have done is flip over to fuel tank building, which included learning how to weld aluminum. Kudos to Kevin M for having the knowledge (and patience!) to walk me through that transition. Clearly not up to his jewel like standard, but my aluminum welds are now functional enough to do the job.
- held off on doing tanks till now primarily due to cost - just didn't want to fork out $1,000 per tank for 6 tanks. I understand the cost - the baffled tanks take time to fit & weld out - but time I now have. Plan on getting the tanks done & in, then we can drop in the engine (which has already been in/out 2x) and get back to finishing the interior over top.
Fuel tank #1 - first of 6 fuel 50 gal tanks that will feed the main engine & genset. - Multiple tank set-up required to fit between frames and under the pilothouse floor. - Wanted aluminum because I've seen too many steel tanks rust out, and believe properly installed, the aluminum tanks will outlast me.
- 300 gal of fuel (plus day tank in keel) should give us our choice of a great crusing range, or lots of genset/cabin heat runtime. Reality will be somewhere in between - one thing I do know, if my wife is going to really enjoy time on the boat, I absolutely must keep her warm - and that can be a challenge in the winter on the BC coast.
If I was to do it again, I'd modify the pilothouse framing so I was just building two large tanks (say 150 gal each) that dropped in from the top - too much time and complexity required due to the number of tanks. Mind you, if anyone ever has to replace a tank, they'll be able to do it without taking the interior apart
- lots of welded interior baffles to carry the structural load - these tanks do not need to be set on a platform to support the bottom. Wanted to maintain an airspace all around the tanks, and avoid exterior tank corrosion due to contact with wet wood/steel. See Kevin Morin's topic 'Removable Tanks' under Tankage.
- end walls and top flange bent from a single piece common with the tank bottom - minimizes number of seal welds required, and means I don't have a stressed weld joint in the area most likely to collect water in my tank configuration. Top flange means I have lots of leeway in landing and welding the tank top, with it's one sided weld - all other seal welds are done inside and out.
Bent base + second tank with sides fitted
Baffles fitted, welding out exterior
welded out, awaiting top. Filler had to go thru end due to lack of top clearance for hose beneath floor framing - tanks are a tight fit. Waiting for top because I forgot to order that piece in the first lot.
- Dickinson diesel stove header tank - 7 gal gravity feed tank that mounts on wall in Fwd head, and feeds stove in galley on other side of bulkhead. 7 gal capacity lets us refill tank with 5 gal jerry can without running the stove dry. Filler tube runs down on a diagonal to opposite corner of tank so fuel won't flow back up filler line even heeled at 45 deg
March 28th - following being blown away by hurricane force winds, dodging trees falling in town, and living without power for a few days - my computer was corrupted, hence the break in updates - never fear, we braved wind, rain storm and snow (literally!) to keep working on Das Boot. - Wili is well into the swing of stripping the inside of overhead lockers/and the underside of the deck. Continues to look great, and drive me to stay ahead on pre-wiring and nailing strips for her to work to.
- in between, I've been roughing in the aft stbd lockers, and the last of the aft cabin - overhead and around master bed. Lots of complexities in curvature (every surface!) and clearances (having to layout exhaust and steering hydraulics as well as wiring - and think in a bit more detail on plumbing to boot. So far it's all working). Also overlaid last of the partial bulkheads with 1/8" teak ply.
Aft Stbd lockers, lined and roughed in
Bunk bed overhead locker with topside lined and the first almost fitted teak face frame
Finshed overhead on port and stbd side of foreberth. Note wire in ceiling - it's the one place I will not have access to after finishing, so I'm tending to wire tie a bit more to keep secure and avoid future issues.
Forward head counter - roughed in, with doorskin template (finding that is the best way to ensure a fine fit) and the rough fit teak face frames for the countertop
- Dad was down with the flu for a week, but is back to building the face frames to go beneath the foreberth, complete with teak door frames (a picture frame that we will weave 1" ash strips into - looks awesome)
- Nick templated a couple more partial bulkheads for teak overlay, and continues to chew away at planing the teak shorts (on 2nd set of blades...)
Finally bit the bullet on the aluminum fuel tanks too - we will be building them ourselves. - I've had the diesel stove day tank and the first two of 6 wing fuel tanks (@ 60 gal each) cut up and bent - stayed with simple square cuts and bends, and the price delivered to my door is less than 1/2 what I was quoted per tank. I'll have to put in hours to cut (though this sounds like a Nick job!) and weld, and undoubtly will go find a skilled TIG person to finish up the exterior welds, but at this point still believe we'll get good tanks for thousands less.
For those wondering what I've been mumbling about as a 'wiring raceway' - note the gray channel running behind the down coming hoses - this will run end to end of the hull on both sides, where the finished liner meets the deck. 120vac will be separated from 12vdc, and I'll be able to easily add or maintain most of the wiring without digging through the bilge or taking apart cabinetry.
March 10th - bit of everything with some real work work on top (love month ends)
Wili strippped up behind aft cabin dresser to about waist high - stopped there because I want to tie the dividers between the chest of drawers and hanging locker back into the hull frames - I'll bolt in a strap in between two strips, so she can continue on up to the ceiling rather than fit three different segments between the dividers. (confusing but trust me it's simpler).
Then she moved to a tough area - the 'ceiling' over the foreward berth that is actually the underside of the deck. Tough part here is establishing a line that ties together the inner corners of the frames then stepping that angle back to the hull, and chopping up a couple strips into the triangular wedges that fits this all together - actually got the first two pieces installed against the hull, so the rest should be straight forward - will get a pic next week.
Nick planed up some more teak boards boards to stay ahead of his grandad, who is finishing up the face frame to go beneath the bunk beds - and will be up next week to deliver same, and head back home with another stack of boards and the layout for the next frame.
I did a bit of everything - laid in nailing strips for multiple small sections (mostly internal to small lockers) to stay ahead of Wili, laid out the ceiling wire runs, and glued up some wire tie bases (which I also ran out of) so I can get the ceiling lights rough wired ahead of Wili (there is a common thread here...), reassembled the now varnished components for the storage locker over the bunk beds (likely next face frame for Dad to tackle), and played around a bit with how we'll be framing up the aft berth - going to add a small seat to the forward edge of that bunk, one to give me a place to tie my shoes - but also to break up the jump in height - the bed sits pretty high to clear the hydraulic steering gear & rudder post.
March 3rd - more of the same - Wili finished cedar striping over the tub, and started on the hull liner behind the aft cabin dresser, after I got the base rough framed. She was busy during the week too, varnishing the liner, base and bulkheads for the locker over top of the midship bunk.
Dad delivered the frames to go on top of the fwd head counter - and carried off another small bundle of teak Nick & I had planed, along with a sketch of the frame to face the bottom of the midship bunk - he's in the zone.
I managed to use an air nailer in my righthand to but a stainless steel brad through the tongue of a cedar strip, the 1/2" x 1-1/2" furring strip - and the pointer finger of my left hand. Darwin award material. No major damage, it only speared through the fleshy bit - a little swearing, a bandaid, and I laid out the step up in flooring required to accommadate the hull curvature at we approach the transom from inside the aft cabin - then started trimming down the new teak frames to fit in the fwd head.
Feb 25th - range of work in process - - I'm busy doing rough framing for what will become two chest of drawers and a hanging locker in the aft cabin, while Wili progressed to finishing part of the ceiling (more cedar strip) over the tub in the aft head.
- FINALLY got the right weather to finish installing the fwd cabin stbd portlight - sealing the outside was the critical portion, but it gives us the finished surround to start working off on the inside too.
- Dad is busy building teak face frames (to the right dimensions
Some pics:
Looking fwd in aft head - cedar strip hull liner done nicely, started on ceiling

Looking aft in aft head - cedar strip ceiling between frames, will cap frames in teak to finish


Feb 18th - work got in the way Saturday...
- couple steps ahead, one back - Wili finished cedar stripping to the ceiling in her bathroom (looks great) and also finished the port side chine curve in the aft cabin. She's been varnishing during the week, so all the soon to be hidden birch/hemlock ply surfaces that will become the back of a closet/chest of drawers/cupboard or bunk top look awesome.
- I chopped up some more teak ply, fitting two sided dividers on the forward head countertop, and beside the aft head bathtub, wired up for lights on the stbd side of the main bulkhead in the pilothouse, and templated around the bathtub (kinda of a fincky bit of work.)
- Dad also delivered the first teak face frame (here comes the step backwards) - and I screwed up in providing him the dimensions. Drew it square when I KNEW it wasn't so, because I have a template, and of course I squared it off from the small end, not the big (the counter top it goes on is level, while the deck overhead goes up slightly). I thought about using trim - it just would have been a second class job - so I sent him a new drawing, the old frame - and some more wood. Other than the fact it didn't fit, it looked great!
Was also planing more teak for the above frames - and my knifes went dull. New planer, new knifes, about 10 boards (out of about 60). Ouch. The planer knifes are two sided, so I just flipped them, and am back in business - but the blades are intended to be disposable; due to the mounting configuration, they cannot be resharpened. Sounds like I'll be going thru 3 sets of knifes.
- did perfect my shaving collector - large garbage can with a sealed lid, 4" line going in off the planer, and two 1-1/4" vacuum lines hooked to two shop vacs pulling out (one cannot keep up to the 4" line). Does a good job of separating the shavings, looks like I can run about 6-8 boards down to size before needing to dump.
Feb 11th - lots 'o rain - good weekend for interior work
- Wili sanded and varnished yet again - foreberth, stbd bunk tops and the plywood behind the helm station and stbd electronics backplane all nicely sealed (a bit too nice for areas that will seldom see the light of day, but it does look good). - Nick picked away at getting the planer set up during the weekend - fastened down the planer to a steel base, started in on our custom garbage can shavings separator....
- Good Ole Dad showed up with another load of clear cedar strips (we've cleared out the Island, so he was working the Vancouver lumber yards this round), and we finished off the shavings separator, then trial ran 3 teak boards - planer did great, separator not so good - leaking too much around rim. We then headed off to the boat, trimmed up a couple of the inspection floorboards (aft center sections that I'm keeping loose so we can see critical areas), chopped up a teak ply apron for the tub, armoured the 120VAC cables for the run from the AC deck plug through to the isolation transformer, installed same, and then glued and screwed the teak ply sheath over that same run (aft stbd main bulkhead), glued and screwed the sheathing on the inside port face of the cockpit (which is one of the aft head walls), and started templating the detail around the tub - small curved shelf that runs between the backside of the tub & the hull liner, teak ply end plate for one end of the tub that will become the inner face of a cabinet at the head of the tub, while Wili started cedar stripping the hull along side the bulkhead we secured.

We're into a pretty rewarding phase - most everything we do creates a finished surface (even if most of it's the future inside of a cabinet) - and looks a LOT better than the foamed surface it goes over.
I also managed to fit in a trip to the Vancouver Boast Show on their opening evening, aimed totally at getting good prices on some major purchases - Force 10 4 burner propane stove, Dickenson Adriatic Diesel stove (first is all about cooking, second is primarily main cabin heat), Nova Kool fridge/freezer - ended up commiting to the Vacuflush system too - one toilet, one vacuum generator - and a Charles Isolation Transformer - all at huge discounts. There's a hole in the bank balance, but I have the components needed to frame and fit the galley cabinetry, start the major plumbing runs, and anchor the electrical distribution wiring.
Feb 4th - Clear dry weekend - perfect for chopping up sheets of plywood outside.
- Wili finished cedar stripping the chine area on the stbd pilothouse hullside, we then templated, cut fit and secured 3/8" hemlock ply above, and Wili cleaned it up and varnished - somewhere in there I also fit a Vetus Fuelstop (filler overflow tank) on the diesel deck fill coming through the same area - tight fit to deck and wall. We were happy to just use hemlock ply in this area, as it's basically going to become a large hidden wiring backplane for the 12v/24v/120v panels that will run beneath the stbd deck beside the helmstation.
- while she was varnishing there, I carved up a 1/8" teak overlay for a partial aft bulkhead (Wili had already templated the area), fit and glued same in place. I then shifted to teak ply sheathing for the port pilothouse side of the main bulkhead, while Wili moved to the foreberth, to clean it up and prep the plywood berth top for varnishing (actually urathane).

Mid week I also picked up enough 3/16" plate to build a gravity header tank for the diesel stove - looking to fabricate something about 7 gals, so I can top up with a 5 gal jerry can. Will be my first real venture into alum welding - this'll be interesting.
Jan 28th - more of the same - Wili cedar stripped behind toilet in aft cabin (a very finicky narrow space), I set up stbd pilothouse hull to the stripped next, secured teak ply sheathing to stbd side of cockpit in aft cabin, set up for ceiling liner in that area, pulled dc cables for future electrical primaries (one day...). Also wired and secured another section of teak sheathing for pilothouse side of main bulkhead - had to mount the indirect lighting (upward facing gold shell with a 3/4" threaded conduit base) complete with DC wiring connections, and run cable that will feed the lighted handrail that goes on the stbd side of the main hatch. Easy path to the DC panel that will also be on the stbd side - wiring the pilothouse port side will get a bit more interesting.
Thinking I might end up with a ceiling raceway too.
After some advice on 120vac wiring, decided that the incoming 120VAC feed running inside the sheathing on the main bulkhead needs physical protection - will run conduit inside the wall, thru the bulkhead below floor level, then under the floor till I can bring it up and feed it into the isolation tranformer - thx Conall.
Jan 21st - wild weather (blowing over 100km/hr & raining in sheets), good time to be working inside.
Wili is up to her 3rd coat on the bunk, starting to look kinda nice (given that it's forever going to be under a cushion...), and got the area up behind her bathtub stripped - I put more teak plywood on more walls, and set up more areas for Wili to strip.

Jan 14th - another 1 dayer! Drat.
Wili tided up the top of the bunk bed and starting varanishing (actually Varathane) the plywood top, to seal it.
I templated cut and fit the stbd side pilothouse aft bulkhead both sides of the cabin door with teak ply, and the same again for the aft wall of the aft head (going d'aft today!). Great news was that Good Old Dad had picked up 4 extra sheets of teak ply for me - and they were good two sides - so the aft head wall has a exposed portion inside the aft cabin that I thought I'd have to veneer, but is now finished. Love the shortcut.

Jan 7th 2012 - One day weekend - Wili finished the section of cedar striping she could access by the tub, and moved over to some detail sanding on the bunk bed top. I glued and screwed up what will become the back of the inside helm - actually the load bearing back board that will also be the main wiring/connector area, then moved back to the aft head, sheathed both sides of the partial bulkhead for the tub in teak, and started the rough framing for the tub base.

Boat was getting messy inside so we did a bit of a clean up to boot.
Found an Ebay supplier for the drilltaps too, at about 1/2 the price of my local supplier. Bought 4 - should get me close to finished.
Jan 1, 2012. The year of the launch. New Year's resolution - We're launching this Sept.
- means we need to pull the rag out!
Worked multiple 1/2 days thru the holidays:
- Wili finished templating the forward berth portlight for the teak surround, cleaned up and oiled the lockers beneath the bunkbeds and started cedar striping the wall up beside her tub.
- Buddy Jeff laid out & cut out 3 access openings in the bottom bunk (giving access to storage compartments), and secured the supports to hold the covers up.
- Nick templated another couple bulkheads
- Luke cutout the bottom of the suspended cupboards that go over the bunk beds, along with the central supports/dividers, and helped me temporarily position and hang the works.
- I bounced around getting the others set up, drank coffee and worked the aft cabin - sheathing bulkhead and perimeter of the cockpit, building up a 1/2 wall in the aft head to serve as a divider/support for Wili's tub, and preparing the walls for cedar striping. Sheathed stbd 1/2 wall in the pilothouse with baltic birch ply - going to be building the inside helm console over that, figured going with light coloured (and cheaper) plywood would be good for the extensive wiring/plumbing we'll be doing inside that area.
All the above means the interior is starting to look less like a foam igloo, and more like a boat!
Started building the base/framing for the planer too - going to need to get some of that teak ready to build frames, and secure/join the sheathing in process.
Dec 24rd - Holly Molly, it's almost Christmas
- Wili found a couple drill taps for me, and I finished screwing/gluing the ready aft bulkhead sheathing in. Obviously stretched out the last one too long - the new one is working with a fraction of the effort.
Caught up with Nick's templates, starting laying out the rough framing for the port side aft head - and Wili's tub. Should have made the partial bulkhead bigger on that side, as I'm having to expand it to reach the head doorframe now - haven't found a plywood stretcher yet....
Dec 16th - Got in two part days - finished screwing and gluing the port side sheathing to the aft cabin bulkhead, carved & fitted the next one that Nick got templated in - got all the positions drilled and tapped till the last - and broke my last drilltap. It's been my last for about 4 months - having a heck of a time getting resupplied locally. Anyways I'd run out of all my short SStl fittings too, needed screws, bolts and disassembly to do it right - so shifted off to another area....
Pulled the starboard port in the foreward cabin - only temporarily installed till we were ready to teak sheath the inner face - lots of clean up (used mastic to install) followed by foam carving inside - just started to template, then taped up outside with gorilla tape (super stuff) till we're ready inside. Gonna need another beautiful sunny winter day .....might be a while.
Dec 9th - more xmas stuff, plus budget stuff - and another 1/2 day weekend. Nick and I did start fastening the port aft bulkhead sheathing into place, so he could template the adjoining section - and we got tired of having to walk a tight rope at the cabin entry (floorboards not down in the pilothouse area) so we cleaned it out, and finished fitting the floors. Still need to do some extra work for what will become the engine access hatch right under the companion way stairs - but it's nice having a solid floor everywhere again.
Picked up a 2hp portable planer for the teak this week to boot - heck of a sale on at Home Depot for a unit with a lifetime warranty - gotta get lucky once in a while!
Dec 3rd - xmas parties - only got 1/2 day in on Sunday - but did manage to carve up 3 teak ply bulkhead sheaths for the aft cabin from the templates Nick made. Nice fits, no trimming. He's going to pattern the last two middle sections next (5 pieces to cover that big bulkhead)
And.... Wili's bathtub finally arrived - fiberglass, nicely finished and proportioned, 2ft wide x 3ft long. Fits her like a glove. Just need some boat buildin' time to start fitting everything in the garage into the boat!
Nov 26th - lost a weekend for family stuff, then 1/2 the next to catch up at work (yeehhaa). - getting pretty cool around here, so we improved the pilothouse window insulation by taping clear plastic inside - will eventually have curtains, but this'll do for now. Actually still had the masking paper on the side windows, going to clear plastic made a phenominal difference to the light inside the pilothouse - love it.
- Wili did a bit more cedar striping in the pilothouse bunk (decided on plan B for that layout - more high cabinets, and leaving the back of the settee going in totally open to make this a very large single bunk on the bottom - and I'm hoping to sneak in a flip up single up high
- Nick had cut doorskin templates for the teak sheathing on the backside of the aft bulkhead he did well getting them in - tweaked those up a touch with a templating finger. Now we just need a dry day so we can match the panels and carve some teak ply.
Picked up 200bdft of teak shorts too - will need to plane, then we can start in on the teak cabinet frames.
Nov 12th - slow long weekend.
- finished fitting, gluing & screwing the various partitions beneath the lower bunk bed. Laid plywood for lower bunk and templated upper bunk - then tried it out = No Go! Clearance we had between bunks is just plain too tight. Plan B = keep lower bunk open through to hull liner, makes a narrow double, install cabinets up high - and we might still be able to figure out a flip up berth over top of all - but now have to watch interference with the forward cabin door....
- first day without rain for a while, so we finally got to install and seal the starboard forward porthole - messy job on outside to get sealed right, but that was the priority, and I think we got it right. Looks good inside, but it's there's very limited room to work with for finish carpentry to the ceiling. Knew that during layout, finally got to see it for real today.
Finally came up with a supply of teak shorts at an almost reasonable cost, with a Vancouver supplier that delivers right to your door - next need a thickness planer..... buying nice tools is an upside of building your own houses and boats.

Nov 5th - Fitting curved partions everywhere - ugh.
- Wili is sub-dividing the space beneath the bottom bunk into 6 sections - two will be good sized 2 high heavy duty drawers, one a front accessed cubbyhole with drawer above, and the last three top accessed storage - this'll be fun to map once we start really loading up for cruising. It's about now that you begin to realize how much more potential storage there in in a 50 ft vs a 40 ft - if you're willing to spend the time making it all accessible in useful form.
- I'm still working in the foreberth, fitting the dividers and rough framing for what will become one hanging locker and two chest of drawers.
- Nick (son) is getting more into the game, and is taking on templating the entire aft cabin side of the main bulkhead - which we can then turn into matched teak ply paneling - that'll begin the transformation of the aft cavern into some that looks more like a boat interior.

Good Ole Dad took off on a trip - touring New Zealand & Australia with Mom. What some folks won't do to get out of a little boat building....
Oct 29th - Wili cedar stripping (got that lady on a roll!) the bunk bed area now.
I'm working on the starboard side of the foreberth - fitted one plywood sheet to the area to both a solid back to secure the cabinetry to, and started fitting the dividers - roughing in one hanging locker and two chest of drawers. Birch ply - nice fine grained light look for the inside of lockers.

Wili got to the height of the second bunk - and while we were waiting for the glue to set on those strips, took the first bunk base off, and finished up the floor beneath. Same as other seat locker areas - extra layer of 1/2" ply to span the joints in the floor and cover the gap to the hull liner, then floor lino overtop. Tough, water resistant, decent colour and pattern that coordinates with the cedar strip - good looking lockers.
Remembered to bore a hole to access the depth sounder sensor too!
Oct 21st - Cedar stripping port foreberth done to ceiling - and despite being the 'lower grade' of the pile of clear cedar strips recieved - looks great. We saved the high grade pieces for the main cabin. Opposite side of the forward cabin will be plywood backed, to give a solid mounting surface for the cabinetry going over top.

Had to pull the SStl 30amp 110VAC recepticle too - knew it was grounded to the hull when I installed it, put as I developed the AC wiring plan, decided to incorporate an isolation transformer - and discovered that I didn't want the recepticle grounded. Thought we might have to convert to a plastic recepticle - but took a good look at the SStl unit (which is built significantly better) and found that removal of the grounding strap eliminated the issue.
Picked up a Fein Multimaster this week - terrific sale on for the basic unit, and I knew there were several cabinet/flooring cuts that it would make much easier - it comes with a scraping blade, so I thought I'd try it out on an area of spray foam that needed a bit more clean up - and discovered it is the best foam trimming tool we've found so far. Almost effortless, dust free cutting, and it scrapes the foam very cleanly without damaging the epoxy paint underneath (kept flat on low speed) = magic.
Wili is now busy templating the two foreberth portholes for the teak finishing surround, and the day looked great at noon, so we pulled the portside porthole. Took her a while to template and cut, and I was busy cleaning off the mastic we used for the temporary seal, so it was several hours before we ready to remount and seal the porthole - by which time it had juuusst started to rain - so we aborted the install, sealed off the opening with duct tape, and went home for a drink.
Oct 15th - Wili is focusing on finishing the cedar stripping up forward - bulk of one side completed this weekend. I'm off starting the rough framing in the aft cabin - kinda wrestling with a base for the washer/dryer - it's rather high off the floor, in order to clear the radius chine & get enough depth to be out of the way - so when I think about the hull a rockin' and a rolling in a quick violent side sea, I'm not confident anything I can build will take the shock loads - think I'll have to add another shallow bulkhead to be comfortable.
I noticed condensation happening inside the propane lockers at the back - so I masked off the surrounding area and sprayed both locker lids with automotive undercoating - figure that will reduce the condensation and add another layer of corrosion protection where it counts.
And FINALLY got a good day for finishing up the Lizard Skin spraying on the last of the exposed interior steel framing, including the pilothouse over head hatch - hussled Wili out early, masked off the pilothouse, and sprayed the last of my 4 gallons of insulating paint. 3/4 hour of masking, 1/4 hour of prepping paint/sprayer & loading up - 15 minutes of spraying, and an hour of clean up.....
Oct 8th - Thanksgiving weekend - Kids + Mom & Dad up for a couple days, Wili mostly cooking, so Good Ole Dad helpng on boat. - Wili did finish all the aft cabin porthole surrounds before she went.
- G.O.D. and I focused on the foreberth - now that we had bunks tops cut out, pulled them and finished up underneath - added inset edge support, decided underlying compartment was too big, so we split it into two, finished floor beneath bunk, added inspection port into the bilge, and finally oiled all surfaces prior to gluing and screwing down the bunk tops. Had to describe all that, because I can't show you - forgot to take a pic before we screwed down the tops. It looked great!
- then we templated and fitted matched teak sheathing for the forward bulkhead, and glued and screwed that securely in place. Needs to be very secure, as a number of cabinets will be hung off the starboard side.
Oct 1 - More of the same - Wili working in aft cabin while I continue to chew away in the Foreberth.
- Wili finshed up 4 of the 6 aft porthole surrounds, we oiled them, chaulked and clamped in place. First finished surface in the aft cabin - they look great.
- I've been cutting in framing to land the plywood joints on (2x3 with 1/2 lap joints thru the intermediate bulkhead), and finally fitted the 3/4 plywood berth & cupboard surface.
From here I sheath the anchor locker bulkhead in teak, and then Wili will start fitting the T&G cedar strip up the port side, for another finished surface.
Tried capturing the feeling of the fwd cabin from the anchor locker face - couldn't do it on one shot, camera angle just is not wide enough. It's a big spacious bunk with nice light.

Sept 24th - Wili finished the head cabinet patterns, and switched over to doing patterns and cut outs for the 1/8" teak panels around each of the aft cabin portholes - of course they are all slightly different, so each is a custom fit. First one looks great.

I'm continuing the rough in up in the forward berth - fitted and installed the partial bulkhead beneath the bed in teak ply, then started the supports where I'll be mating the 3/4" plywood together for the bed - 52" wide, and angled to boot - can't get the base in in one piece. I'm landing the joint on a 2x3 - did a couple 1/2 lap joints to inset that 2x3 into the partial bulkhead and the perimeter framing. Made a heck of a mess cutting them in - but they look good, and it's producing a rock solid base.
And Good Ole Dad finally found a batch of teak ply he liked - delivered 12 matched sheets of 1/2" yesterday - nice looking wood. I'll start carving into them once we have the plywood on the bedframe - first two will go into facing the anchor locker bulkhead. Then Wili can go back to installing the cedar liner up the side over the bed - reminds me, I need more T&G cedar - we bought out the limited local supply of really nice clear.
Sept 17th - 1 day off for a wedding - and a bunch of detail Sunday. We installed the last cedar strip piece in the galley settee (had to wait for the glue to dry on a broken tongue last week), then Wili started patterning the head counter cabinets, while I leveled off and fastened down one forward floorboard, cleaned and prepped under the other for an extra top coat, vacuum sand blasted a weld zone touched up earlier this summer, and then epoxy painted the freshly cleaned and blasted areas.
First pounding rain of the year while we were in the boat to boot - got to see a couple areas of concern I'd worked on this summer. Forward hatch had a seal leak on the glazing itself - that checked out, as did the new screw down plate I fitted inside the Bomar circular access plate into the chain locker - but the real issue there is now obviously the the fit between the mounting ring and the deck. Every where I used a plastic deck fitting and Sikaflex, the deck seal is almost non-existent. Didn't think that was possible, but I'll get to see for sure when I pull the ring. Thought the plastic access hatches would be cheap and simple - obviously got what I paid for.
Sept 10th - there's been enough change that a photo update is due - still roughing in, but some finished surfaces are started. What we've been doing is cedar stripping basically from the waterline down to the floor in the forward compartments - then roughing in the first level of cabinetry - and either cedar stripping the finshed wall up to the deck, or installing a backing of cabinet plywood (finely veneered birch) that we'll be securing finished cabinets to.
Fwd bunk - finished lower bulkhead screwed and glued in place - secound lower bulkhead yet to be teak faced

Galley settee - seat roughed in, finish cedar stripping all but done to deck level (looks great!)

In the back ground you can see the first of two bunks being roughed in.
Thought I'd show you my work bench - roughed in galley countertop

AND my favourite new tool - an automotive panel template - great for rapid profiling of hull curves

Sept 3rd - Wili's continuing with cedar strips in chine area, I patterned and fitted the wall behind the counter in the fwd head, installed wire anchors and pulled the ceiling wiring for head (have to start watching that - we'll have a wire race way up either side, but need the rough wiring behind the finished surfaces we're now starting to install - another milestone!), then patterned/fitted the plywood finish bulkhead inside anchor locker. Pattern for fwd cabin side of same bulkhead is next - slapping up ceiling strapping whenever I'm waiting for space/materials.
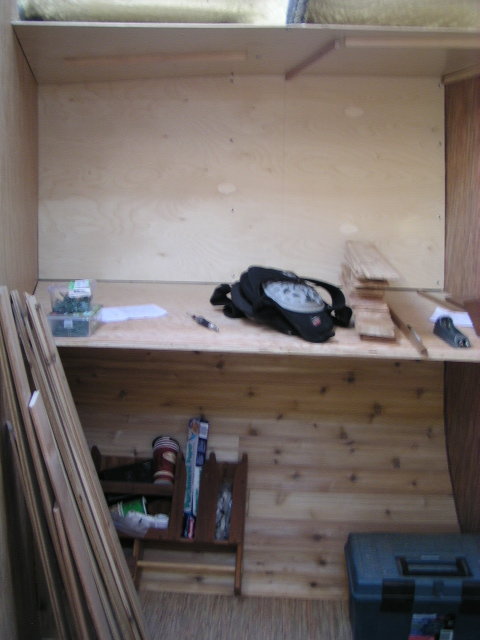
Dad out hunting for more teak ply - he's picky, sounds like he's accepting one sheet out every 200 he looks at - does show up with beautiful stuff! We both like darker teak with heavy grain structure.
August 20th - Great recovery weekend, with Wili, Dad and Nick (son) all showing up. Dad and I set up a second chop saw, and 2 vacuum systems to simplify fitting the cedar strip for hull liner
- Wili took on the task of fitting the finiky strips to the inside of the radius chine
- Dad started fitting the nailing strips on the hard points over the foam for the transom
- I got to start the rough cabinetry over the cedar strip in the fwd head
- Nick helped his Mom fit the last couple strips and then glue/screw/nail the bunk bed chine section into one solid, good looking, form fitting mass.
We were dancing around one another - but it was a couple good days for overall progress.
Forum was great, and did come up with another option for the chine using 'bendy ply'. In the end we stuck with cedar strip as it's cheaper, and with the new saw set up, about as fast as we'd be if you include making the pattern required for the compound curved sections.
August 13th - well that was a wasted building day - should have stayed in bed. - finished up trimming out the last bit of the cedar strip area, then went to the opposite side of the hull to try the birch plywood approach. BAD IDEA. Came up with a decent pattern that took into account the curvature of the hull as it rode down the flat bulkhead, chopped up the best part of a good looking sheet of finished 3/16" birch ply (sure seemed flexible when I was cutting it!) Despite trimming that piece to fit perfectly, Wili & I together, even with 2x4 props, could not get that plywood to follow the radius chine curve tightly. Just started cracking. Made a giant mess, and had to abort and clean off the glue before it set and we had an even bigger mess. Searching for a better technique.
August 12th - Well, I spent way too much time cedar striping the curve of the hull underneath what will become the head countertop - won't be doing any more of that. Compound curves change angle as you come down the hull between bulkheads - spent hours fussing away, and it'll still need edge trim. Looks great, just not worth the time. Going to try birch ply under the next area - bunk across from the head - should take 1/2 the time and still look good.
Still planning to try cedar strip up the inside of the hull where it'll be visible - but on the flat areas, the angles should stay constant, and I can hack off 6 strips at a time, then spent more time installing than playing with angles on the saw.
gust 6th - Good Ole Dad picked up some thin teak ply for me - he's choosy and it showed, they're gorgeous pieces - so we spent the weekend sheathing the plywood bulkheads in the Fwd cabin and galley. G.O.D. was helping both days, Nick came out on Sunday, and was a great help.
The 1/8" ply was much much easier than veneer, cut wonderfully with a jig saw, and there wasn't much difference in price for the area required. Also found the right glue - we were avoiding contact cement due to the need to be able to slide into position (these are big akward pieces) - but the PL premium wasn't grabbing and holding, leaving us fighting to keep it braced - went to PL premium plus (4x the grabbing power) - and it worked! Was more work to shift after contact - but it can still be done, and for 95% of the sheet that glue grabbed and held. Still had to clamp edges.
Finished bulkheads look great. 8 Down, 1 to go in the front half of the boat. G.O.D. now on a mission to find 10 pieces of matched 1/2" teak ply to sheath the pilot house and aft cabin bulkheads.

Also started the cedar hull liner in the Fwd head - now that is going to be a pain - compound cuts up against the bulkheads, and they change as we work down the hull.....no doubt we'll get into a rythm, but not there yet.
Ordered the PYI floorboard hold downs too - there's 4-5 large floorboards I'm not permenately fastening, and I'm figuring those'll take care of the bulk of them.
August 1st - when we're working on it all the time, you forget how big the boat really is - one of Wili's visting friends sent back a picture, and they look like midgets standing beneath the hull.... - unfortuneately I'm wrestling to scan it in...trust me! it is a neat picture.
Over weekend installed the stbd wing water tanks, screwd down the floorboards in that area, fit & glued up lino to main head walls - idea was to install a single piece of waterproof sheeting on each of the bulkheads, so I can shower away and never worry wbout water intrusion. Wili picked the pattern - looks great on the wall.
Wili seal painted the sprayfoam in the engine room - I started cleaning up the area behind the very last partial bulkhead beneath the sugar scoop transom - (very restricted access - one of the few real design flaws in the boat). I'm ensuring a clear waterflow for any condensation/leakage in the area - again all to center of bilge.
July 22nd - off salmon fishing with 2 old buddies - Nootka Sound on the west coast of Vancouver Island. Great time - lots of coho on the surface (most of the time we had a coho every 15 minutes) and some nice 20 odd pound spring below them - if you could just get thru the coho to find a spring....
July 15th - Wili's birthday, so off to Vegas with a couple close friends for the weekend - perfect break - but I could not find a single marine hardware store....
July 8th - more floorboard work, another coat of epoxy for the galley bilge, plus filled screw holes/joints cracks/surface defects in the main head bulkheads - prepping to surface. Trimmed, fit, screwed & glued 2x2 for counter top support to hullside. Figure I'll do as much of that area's finishing before I install the final wall.
July 1st. 2011 - and another month bites the dust...
Drilling & threading floorboard stringers - drilltap is great tool for this job. Tap holes, ensure bolt goes in cleanly, vacuum top, unbolt, shift floorboard, vacuum twice to get filings, last check, goop stringers (using a weak LifeChaulk compound to bond boards to stringers and kill any squeaks), lay and bolt down floorboard. Repeat. Fastening the floorboards just didn't have this time component in my head. Each one we do does make the next section easier, as we have more flat space to work off (and shuffle stuff between!)
Meanwile Wili is working in front of me, cleaning & sealing the bilge one more time. It does look good when we finish a section.
Secured the 2 port side wing water tanks, & set up anchors for stbd. Once we bolt down the floorboards, those beasts are in for good.
June 25th - drilled & threaded hold down bolts for floorboards in head, sanded and epoxied bilge & stringers in fwd head and galley - then off to Good Ole Dad's 80th on the Mainland.
June 18th - used space in fwd and aft cabins to clear fwd head and galley - sealing those areas and securing the floorboards. Not much worth a pic.
June 11th - sealed foam with latex up past waterline, then took a look at the bare bilge area - no longer pretty with a little each of black, dark grey and foam over spray - so we gave it a scrape, sand and a fresh epoxy top coat in the fwd and aft cabins - much better. Now starting to secure the floorboards - drilled and tapped fwd cabin.
June 4th - Back in aft cabin, foam all prepped, masked off ports and hatch, sprayed lizard skin on any exposed metal - sealing foam below waterline with the acrylic latex is next. Wili will do that while I get the floorboads down in the Fwd cabin, and clear the galley/pilothouse to do a good job of spraying there.
May 28th - sealing all the foam below the waterline with an exterior latex - Wili was busy masking and painting away up forward, while I finished carving/shaping the aft cabin

May 21st - lost a couple weeks to work and life - still working the foam below the waterline to ensure everything is well sealed and will drain properly. Good for insulation, but damn I've spent a lot of time cleaning up below the waterline - don't think I'd do that again, it's just too much work. One side of aft cabin to go.
May 1st - Wow, 1/3 of the year gone. Finally got to spray some Lizard Skin CI - automotive version of Mascoat ceramic insulating paint. Went with this version bcause there is a stocking dealer in Vancouver, and I wasn't confident that going with the powder additives would match the performance of the factory mixed paints. Came in 2 gal bucket, has a tar like consistency going into the special spray gun, goes on with no overspray, dries to a slightly pebbled finish. I'm very much a spray gun rookie, and this was a dead simple process. We're spraying all the exposed metal sufaces left after foaming - edges of frames where the furring strips are exposed, metal flats brought through the foam to mount plywood sheaths on, interior exposed metal bases for the hatches - just to ensure there are no condensation issues once everything is buried behind woodwork. Keeping it out of the bilge proper, because we have established a very solid sand blasted/epoxy primer/tough epoxy topcoat paint system throughout the bilge, and don't want a layer of latex interefering with future maintenace.
April 23rd - slow weekend - spring clean up in the storage container, cleaning up down in bilge, masking before spraying the insulating paint (sure is a pain having the ports/windows/hatches installed when you want to pull out a bigbore spray gun).
April 15th - lots' o work work - and off to fishing buddy Jimbo's 60th (don't know when all my friends got old!!) - so no great gains on sailboat this weekend. Did add a union to the 1-1/2" freshwater tank feed header, so we can get it apart to pull the tanks and maintain the bilge in future years. Sourced fittings at local plumbing supplier - the ball valves are to let us isolate tanks as they're being filled - might be a time when we're collecting rain water or inputting from a questionable supply that we want to keep isolated to a one tank. At $7 each (and they are NICE valves) I figured I could afford as many as I wanted. The 1-1/2" reinforced hose connecting the deck fitting to this header cost more than the header complete with union, valves, end fittings - now know I'll be using as much pvc piping as I can neatly fit.

April 9th - Lizard skin heat insulating paint arrived, along with special spray gun, so there's the task for the weekend: mask, figure out the gun, and spray insulate what exposed metal surfaces I have left. - Update - opened paint, it was dry = bad batch. Go to plan B for weekend....
April 1st - away for the weekend, in Calgary, in snow, not a lot of marine supply stores in sight. Did prompt Lizard Skin supplier - special sprayer back ordered. Need to get some areas coated before we lose access due to tanks/woodwork.
- Good Ole Dad is also searching for fuel tank manufacturers down in Nanaimo. Might have found one at 1/2 the cost!
March 26th - need to get the floorboards secured - which means the tank work has to be completed. Lifted the galley floorboards, worked on securing all the tanks - drilling and tapping anchor points for the tank strapping, laying out hose runs, realized I was missing vents on the two main tanks - no big deal, a shop in town did the fittings, will go back to them to cut in one more in each tank.
- decided to run 1-1/2" poly hose from deck to centerline - then switch to white PVC pipe for what is basically a large bore distribution header. Way cheaper than going with marine fittings - 1-1/2" good quality ball valve was only $7! I'll be going back to these same supplier for my pressure water system....
Am also planning to use an insulating paint in a few key areas, awaiting delivery - want to spray the area before installing the tanks.
March 19th - Good weekend for boat work
- rented boomtruck, picked up rudder, welder, and some other bulky staff that had spent the winter elsewhere, and stacked it up by the boat.
- built second set of stairs up onto stern of boat - not bad when you're just climbing up by yourself, but bringing in sheets of plywood has been a true pain - now it's just another set of stairs. Used stanchion bases to keep stairs off hull.

- templated and fit yet another teak partial bulkhead, this one to form the forward wall for the galley settee. Good Old Dad and I then templated cut and fitted a one piece rough counter top to the galley (liked the mocked up galley) and galley seettee seat (don't like the comprimise I've made so far - this is a tight settee). My center pilothouse window cum hatch is invaluable - dropped the 88" x 48" countertop, right thru. With all the structural connections completed to the galley farmes, we can start lining the hull in this area - picked up some nice looking clear cedar tongue and groove strips - 5/16" x 3" - to do that with.
Fuel tanks - got a perfectly silly quote for my aluminum fuel tanks locally - twice the price of having them fabbed at a tank shop in the states. There's supposed to be a good tank shop in Vancouver, will see if that makes any difference. Could end up doing them myself - but it means I have to start by making a large sheet break - two steps back.
Insulating paint - doesn't appear to be a stocking dealer for Mascoat this side of the border - but they make an automotive version of Delta T called Lizard Skin - and that I found stocked in Vancouver. Price is still high, but everyone I've talked to is amazed at it's effectiveness, and it is clearly different than putting powder into a normal paint - this material cannot be sprayed by normal equipment - does not pour. 4 Gal on order with special gun. Would be interesting to come up with a standard test and compare samples - might be something to propose to Practical Sailor.
March 12th - another milestone - first interior finished surface occurs as the teak bulkheads for the galley are glued/screwed in place. Lots more to do on these surfaces, but they look much nicer than the foam!!
- followed up by gluing/screwing 2x2 for counter perimeter and galley settee in place, and templating the counter top. Wind blasting and rain pounding outside, toasty warm inside. Love it.

Feb 27th - Hobbled up into boat - Wili did most of work while we laid out the galley counters and settee. Built mock fuel tank from cardboard, made sure it fit - interesting exercise because it turns out there is only one way in and out for the 6 diesel fuel tanks - and they need to be placed before the engine blocks the route!
Wili also carved foam where fuel tanks go, while I organized the temporary tool wall
Mocked up fuel tank - there'll be 6 of these 55 gal tanks in aluminum

Feb 19th - Big snow, big melt, big freeze, big fall. Crutches. Stay off ladders, off knees, off boat.
Galley rough in. As we get ready to line the hull, there are some locations where we want very strong anchoring of heavy components - like the pivot mounted galley stove - that I wasn't comfortable going thru the liner for - so we're roughing in the counter top, and where required, installing the finished bulkheads (1/2" teak ply over a steel bulkhead) so we have a very sound connection to work from. Will then install liner flush to the anchor points - will trim out well.
Feb.11 - Tanks. Fitting the main water and fuel tanks = carving more foam to get clearance and ensure a smooth path for any water that does get inside, without pooling. We're pretty good at it now.

 Fresh water tanks - there 'll be about 150 gal Mocked up diesel tank - 55 gal x 6 plus 40 gal
in 7 tanks - 2 main, 4 wing, plus 1 just for desalinator day tank in keel ~ 370 gal fuel
Glad we mocked it up the fuel tank and did a triaI fit as the path I'd thought we'd slip it in thru didn't work - we ended up having to go thru the engine bay - and I had to shuffle a couple fitting locations to avoid framing.


Diesel day tank in keel - this one turned into a bit of a pain as I could not seal it to pressure test earlier - but when I finally got around to it, there were two pinholes that required weld repair (after painting =ugh), and I had to use a gasket sealant to get all the cover bolts air tight. My own fault on one of the welds - I should have used a mirror on the bottom of the SS drain pipe that runs thru the tank. Other one had a skilled professional chasing it quite a distance - didn't feel half bad after I watched him wrestle too.
Does make me question weither I'm going to weld the 6 aluminum diesel tanks myself - or just go to a pro for them and focus on other stuff myself. Will all come down to price - not cheap either way.
Jan, 2011 - New Year, and still carving foam... our foamer was very generous with the application, and much of the hull has 4" of foam - which is fabulous from an insulation perspective, but means we had to go over the entire interior and knock down any high spots. Not a tough job - couple small heaters, and we're working in shirt sleeves inside a steel hull - with snow and up to 16 below outside - big smiles from Wili, happy to work on the boat now that it doesn't mean getting rusty or freezing.
Dec/10 - Carving Foam! Well after you spray the stuff all over, you need to spend time getting it off the spots you don't want it on..
Fortunately we'd masked the nailing strips, and getting it off is not that big a chore - but knocking down the areas where it's too deep is. Can't complain that much, the depth is pretty good most locations - and I'd rather have a bit too much and carve it out, than not enough - and have condensation.


Fortunately we'd masked the nailing strips, and getting it off is not that big a chore - but knocking down the areas where it's too deep is. Can't complain that much, the depth is pretty good most locations - and I'd rather have a bit too much and carve it out, than not enough - and have condensation.


Nov/10 - Foaming. Massive area to cover 2-3" deep, so we brought in a pro, and spray foamed the interior over what had already been sandblasted and painted. Huge difference in interior temps, and comfort level while working inside.
Fwd bulkhead before foam....... and after


Anchor locker foamed

 Head ceiling foamed
Oct/10 - Installing the furing (interior wooden nailing strips that are attached to the steel frames) prior to spray foaming the interior. Used 2" cypress rough cut into 5/8" strips - great rot/bug resistance with decent nail holding power. Glued & screwed to frames - I'd pre-drilled 1/4" holes into frames, making adding the strips pretty straight forward.


Sept/10 - beautiful warm summer weather was great for top coating interior. Used Interguard 264 - recommeded by Interlux commercial rep, and he was dead right - went on nicely with brush/roller, good body, great finish for bilge.
August 21st - All exterior fittings installed/bedded/sealed. Moved boat out of expensive yard into less expensive :) storage yard - with great power, adjacent container for parts/workspace - and hopefully, a steel shed to go over top of all before winter.
Now top coating interior primer through bilge and wherever wood will touch while the weather is hot & dry.


June 20th - still picking away at bedding deck fittings


June 14th - Set back - interior paint job isn't meeting spec - lucky we caught it while the boat is still in the paint shed. Means going back inside with a sand blaster and reblasting down center, and redoing bilge. Have to protect great exterior job - painful, but again, heck of a lot easier to deal with when the boat is still here.
We have started re-installing deck fittings that won't be harmed by blasting - using Sikaflex 291 as beeding compound. Medium strength, quick cure.....and it's the only one that I can find in grey. Will go to 3M5200 for a few critical applications.
June 6th - all exterior paint done above the waterline - though some touch up required on the hull itself - crud in airline in a couple places needs cut polish. Deck/non-skid came out beautifully. All Awlgrip - Hull = Claret, Transom/deckhouse/deck = Whisper Grey, Non-skid = Medium Grey


May 23rd - dry paint darkened up just right. Not all is perfect - the dark colour does highlight every little defect - interesting how the eye can pick up what the fingers can't feel.
Mostly we need to deal with a couple places where something got in the paint.

May 22nd afternoon - Hull is not totally dry yet in these photos - expect it to go just a touch darker yet. Awlgrip "Claret"
May 22nd morning - big day - the hull is ready to paint, finish coats should go on this weekend - then deck & transom, then non-skid, so still a week away from being done - but the sanding is finished! The gentleman sitting and masking the waterline is Ko, master Awlgrip painter - and boat finishing artist.
Deck masked off - Ko will spray hull colour first, then come back and do hull stripes/deck/transom colour in another pass.

May 17th - Final (final final) sanding. The pros that are doing this sprayed the awlgrip prime coat, then wiped on bluing to show ANY defect - they long board/hand sand till there is no blue. Picture doesn't do colour justice - the hull area that isn't blue is bright white, and silky soft to the touch.
May 14th - 1st colour! Just a teaser for us - inside aft propane lockers and on bowsprit, just to doublecheck colour choice - it's "Claret" - think red wine.
May 5th - another milestone - Final prime coat going on deck. Hull prime coat apparently needs to be tinted, or our hull colour of choice (Claret) will take 6 coats to achieve 100% hide over the standard white base coat - hmmm, pay few bucks and wait a 2 days for the tinted primer, or buy 3 extra coats of Awlgrip.... think we'll wait.
May 2nd - spray, spot fill, longboard, longboard. Cut in waterline too. 1st overcoat on keel
April 25th - spray sand sand - getting closer!
April 18th - sand sand sand


March 26th - inside sandblasted and primered - 3 coats Interlux epoxy - Looks great! Of course going over everything I've found two small areas that need some more work before finish painting outside....
March 18th - prepwork done, boat stripped, and handed over to sandblaster - yeeeha!

March 16th - saved by my son's buddies - Wili & I were struggling to get all the last minute details done and flapper the seams we couldn't do out in the yard (those fiberglass guys get strange when you shower their plastic boats with steel dust :) - out of town son heard, and had a couple buddies drop in - 2 young guys for a day pulled us ahead of the yard crew - flappered what remained of the upper sides of the hull and almost the entire deck - beautiful.
March 14th - prepping for paint, drying out the hull - and doing the million and one things that I just hadn't quite finished yet.
- vent holes, windshield wiper holes, tacking the acorn nuts (every where), tabs for planking on bow spirit, for center divider in anchor well, stripping deck fittings, welding in mast base (yea, I know that's a biggy), radar arch base, cutting in dorade holes (2 fwd, 2 aft) - and flappering the hull every where we welded inside, 'cause it all shows. Have two big infrared heaters inside shed, shirt sleeve temps - and it was snowing outside Friday! Love being under cover.

Wili spent the entire day vacuuming every nook and cranny to get any free standing water (and a bunch of other stuff) out - gotta love a great wife. Bought her dinner at a greasy spoon as a reward, then dragged her back to help me pull all the windows. :)
I have a couple helpers lined up for tomorrow - bits' and pieces to weld, grind, fit and then remove now that it's out of the weather. Have two big infrared heaters on the hull plus 4 lamps inside - but still want a couple days to ensure the hull is really dry. Sand blaster is just a waitin' in the wings. YEEHA!
March 6th - Started to empty boat - wife, Son Nick and a couple of his buddies showed up to grab at ruck load of misc loose stuff - G.O.D. and my buddy Jeff helped with the heavy stuff last week. Lotta room in that boat!!


Still working up in anchor locker - Wili templated center board for me, now need to carve out of plywood, and weld in tabs to really secure. Fitted/drilled tapped flanges for bolt on top on the 2nd integral fuel tank. Cut out the engine room exhaust outlet on stbd side of pilothouse, covered opening with louvered Sstl plate. refitted modified rudder tube top bearing/seal - went to a double lip seal at the top. Pain to get on, but clearly a better seal arrangement. Tacked in under deck Sstl acorn nuts on the deck fittings.
Feb 27th another decent week - welded in second integral tank top with fittings for pick-up, vent, return, level indicator and fill, another 1-1/2" thru hull with doubler for septic pump (almost forgot that one!), located and drilled aft deck railing bases (yeah Bruce, I'm not welding those either). Rented boom truck Saturday and removed motor (REAALLLY tight now that door lip was added) and a couple other heavy lifts - getting boat ready to blast. Also ordered Dive'n Dog 6 step dual tube telescoping ladder - looks like it will just fit, and yet get deep enough to actually easily access from water - that sugar scoop transom is a long way up.


Finished up pilothouse floor longnitudinals, figuring out how engine hatch will be integrated with main hatch stairs, finishing up keel tank tops (had porosity in some welds, had to redo)
Feb 14 - Happy Valentine's Day! - had to work Saturday, but today, I spent the day doing what I love - and remembered to bring something to home to the one I love to boot = a great day. - no huge visible progress - moved motor, more holes (couldn't get to frames behind motor before) welded in a few more floor longnitudinals, positioned engine room exhaust & exterior louvers for same, cleaned up bits n'pieces in aft cabin, figured out some tricky wood work framing in aft, punched holes to suit - MORE HOLES - wonder when that stops??
Jan 30 - Finally finished punching the frame holes!! Well ..... there might be a couple left to do behind the motor (stored inside the pilothouse right now), but hundreds are done, and I can picture how I'm going to secure the cabinetry pretty well every where. Working on frames beneath pilothouse floor, stiffening, setting up for fuel tanks. I know there's more details, but the end of the list is definitely in sight - feels great.
Jan 28, 2010 - Belated Happy New Year!!
The Blog bug held off updates till now - not alot to show photowise - welded in forward floor longnitudinals, fitted forward floors, punched hundreds of holes in forward frames - forward 1/2 of boat is ready to blast, center bit needs some sub-floor work, back half needs more holes. Also discovered SS Tek screws - really simplified securing plywood floors and panels.
Dec 10th - missed week - but no great work. Inside doing details - stiffeners, tabs for bulkheads, holes for mounting furring strips, holes for raw water piping, holes to mount strainers, holes to secure floorboards - you get the idea. Have switched from titanium nitride drill bits to cobalt - the titainum coated bits were bending too easily.
Should mention that the rainwater that snuck into the bilge was frozen this weekend......
Nov 21st - wind and rain has been pretty well continuous for the past week - quiets down for a few hours, then 50 mph and pounding again. Flooding, power outages, things flying. Can't open up tarp on boat, so crawled in on my belly - vacuumed water out of bilge, and worked on installing large door on forward collision bulkhead. Hull is too wet to work on integral tanks - unlikely to get a good seal weld.
Also looking for a piece of land to stick a Quonset hut on so I have someplace dry to finish the boat in. Should have done that when I got it here.


Nov 14th - finished up fitting water tanks (nice to have 60 gal down in the keel), tacking the deck T-bar nuts in place beneath the deck, started in on the bottom plate of the cockpit cubby hole (using a curved section of SS pipe) - and ran out of SS wire. Switched back to mild steel, started top of 2nd integral diesel tank in the keel - not a lot of room left to work in down there!
Got blown out on Sunday - steady rain & winds gusting past 50 made opening the tarp up an impossible task, so I wormed in under the tarp, just to find power out - worm back out into the storm, down the ladder, reset the power, back up, ran shopvac (+lots of halogen lights) and kicked out the breaker...fortunately it was the inline breaker at my power bar, so I stopped vacuming and tweaked a few other items before calling it a lost day - everything including me cold and wet.
Back to lesson 1 - build the boat undercover someplace where you won't have to move the beast till you're ready - I have wasted more time wrestling tarps/water......
Nov 7th - new tarp worked, very little new water inside - phew! Back to doing more, pumping out less. Picked up a length of used SStl pipe - about 30" dia - and hacked into it - curved SS bottoms for two deck lockers and one cockpit locker. Figure I'll add a valved drain off the bottom of the deck lockers so I can deal with any water that gets in. Both deck lockers will be big enough to handle about 4 jerry cans each. Welded up the 2nd water tank base down in the keel.
Oct 31st - Happy Halloween! Beautiful clear day today - pulled old leaking tarp back, and slid newer tarp beneath - primarily to keep the pilothouse (whose unsealed windows leak like shieves) area dry. Kept old tarp because it's well secured at the bow (all around the bowspirit) and everything will survive the incredible wind storms that rip up the coast this time of year.

Finally had a chance to get a decent shot of a primary winch base too - done up in stainless 'cause I figured it'll get chaffed by loaded lines.
Rest of time - I'm inside working on water tanks bases inside keel, tabs every where for bulkhead mounts, dual raw water strainers (1 for main engine, other as back-up and all else - genset, salt water handpump in galley, etc)
Oct 25th - 1 good day, 1 bad - Sat was okay weather wise, and I tided up some SStl welding outside, prepped the water tank brackets inside, generally cleaned up - and pumped a whack of rain water out . Sunday I got to see how the rain was getting in - my old tarp just isn't cutting it anymore, a rip is allowing the cabin top to get very wet, and that in turn is coming thru the big windows - which can't be sealed until we blast and paint...then after pumping out the hull (I use a shop vac with a built in water pump - works great), my wet foot slipped climbing out of the bilge, and I had a good tumble - caught myself 1/2 on a frame and 1/2 on one leg - picked up the pieces and took some shop work home. Need to get this beast inside the sand blast shed, where it was supposed to be last month. Boat infront of me being faired is now on it's 3 rd coat - something like 1/2" thick most surfaces, and still not winding up. Nice mess I'm in.....guess I'm going to have to slurge on a new tarp.
Oct 18th - Only got one day in this weekend - positioning new 30 gal water tanks inside keel - bought two, nice fits. Laid out SStl angle as tank base, but am wrestling with maintaining access to the nipple I installed into the sealed lid over the lead - want to pour some tar like material in there after I sand blast and paint.

Oct 11th - Stole a page out of the Ovenden's blog, and rented a manlift for the longweekend - oohhh this is nice on the knees! Cleaned up aft port holes, flappered up stbd side of aft cabin, tried one more time to deal with wow in deck beside vertical seam - better, but still not perfect.
Oct 3rd - Damn, I'm getting old - knee froze up and I'm hobbling on the ladders, can't kneel on the SOB - which is a heck of a limitation when you're boatbuilding! Doctor tomorrow - worked more small stuff this weekend - still fitting bulwhark stiffeners, 2nd integral fuel tank top, sized up & ordered two plastic water tanks (30 usgal each) that will also fit down in the keel.
Fairing crew arrived and is working OT on the boat ahead of me - peeking in, appears that they have one side done deck to waterline, other plastered up (the boat needs ALOT of fairing) - looks like they're taking 3x12 hour days per side, which is way faster than I expected. Will wait to see how fine it comes out. Mine will be way easier :)
Sept 27th - took the time to go visit a couple friends - one wrestling with cancer, the other a 'good bye' for a fellow that left the company - both providing more motivation to get the beast finished.
So Sunday - a year older and STILL have not painted my boat - heard from the yard that the boat in front of me has decided to be faired, and it'll add another month to the shed time - so that's another month before mine can be blasted......rrrrgh. Not that I can't use the time to get more detail done, I just do not want to be painting when it's cold.
So I took down the filmsy summer tent I had rigged over the cockpit, and put my tarp back into 'winter high wind' mode - it'll be nice for another week, but 50 knot winds will hit before the delay is up.
Spent rest of day detailing aft cabin - going back over welds, added a couple tacks, found a pin hole in a late cockpit addition, added a vertical stiffener to the bulkhead behind my steering gear, added a few tabs to aid in wood work framing - still need to cut & weld in the engine exhaust thru-hull, but need to go scrounge the SS pipe - week day job. Going for North Sea exhaust - a exhaust thru hull in either side of the hull, about 3 ft forward of the transom, cross connnected - does away with concerns about following seas backing up the wet exhaust system - will also let me tie the generator in to the same header, so there's no net increase in thru hulls.
Sept 20th - finished steering gear base - mostly just fab & welding the cylinder mount surface out of a 6" heavy channel, then cleaning everything up with a little grinding. Followed by more of the never ending hull flappering - you think you're done below the waterline, then scanning one last time, you find another spot that just needs a touch up...

Sept 14th - Ran center bar (trimmed to facilitate fitting transom, and never did put it back in...), then fitted and welded in base for steering gear. Bit finicky due to angles and matching cut-out for circular flange that I built in to the top of the rudder post - but it is skookum! Had to cut slots into partial bulhead to provide clearance for the rods coming ou the backside of my hydraulic steering rams. Glove just helps protect the rudder shaft from welding/grinding. Began fabbing deck bulwhark stiffeners.
Sept 6 - More small stuff inside (cleaning up, misc welds, laying out steering gear & base) and cutting/fitting/welding in 3 starboard aft porthole insets - and as always - more hull flappering....
August 29 Geez, another month flies by!!
I thought with the skeg nose & prop strut done I was finished below the waterline (except for the never ending weld hump flappering) - and when I stood back, I realized I still have a couple zinc locations to add. Going with a 6 zinc layout, (+ rudder and prop) 2 big main bars on keel, 2x 4" round zincs up forward, 2x 4" aft (on skeg), all bolt on - there is no way in h... that I'm welding on the hull to replace zincs after all the effort I'll be putting into white sand blasting/priming within the day, and adding 5 odd coats of paint - main zincs are on 2 nice big SS bolts seal welded to the hull - all rest are bolt ins via SS acorn nuts inset & seal welded. Anyways - I need to weld in 4 acorn nuts, 2 forward, 2 on the skeg. Then I'll find one other 'last' detail - but it feels good getting this close to blasting.

August 22 Had to work Saturday - small stuff Sunday. Boat yard relocated me, so I spent 1/2 the day re-running power lines, air lines, re-organizing all the stuff around the boat - then fit skeg nose piece, finished off profiling prop shaft strut & fit that, and did another round of hull grinding - flapper work under the waterline port aft up to the transom.
Gett'n there, but it's a good thing the boat in the blasting shed right now is going slow - 'cause so am I. Figure I need to wrangle another week off to get the beast ready.
August 15th Re-work - I didn't like how it was tough to open the side window sliders, and that was due to the curvature to match the pilothouse side - so we pulled the two side windows, and I split the pilothouse side where the window sits in a horizontal strip 1" above and below the opening, with a short vertical split at the midpoint - then clamped an length of angle iron that covered the length of the window along the strip, flatening those surfaces. Zip disc left a nice mig welding clearance, welded it back up - 1/4" inset at mid point, flush at ends - few minutes with a flapper disc, and it looks decent, more importantly, the window now sits flat. Only one done, gotta leave town on business for a couple days.

Bits n' pieces - picked up the prop strut today - started with a chunk of 5"x5/8" mild steel from junk yard, laid out angles to get it to fit where I wanted - and just could not see myslf getting any sort of decent looking profile in a reasonable amount oftime with a grinder - so took it to a local machine shop, and had them mill the leading and trailing edges into a nice profile - came out looking right.


Later same week - well I didn't get everything I wanted done, but did make decent progress - SS cap rail in both sides, and bulwark edges nicely straightened - fitted conical fairings to SS primary winch bases, they look awesome - set up SS angle inside aft deck hatches so I can now fit the water tight interior boxes to match - now working SS bulwark braces, to allow me to set stanchions on top of the bulwark without bending/breaking some component.
Main side cleat came back sans bent bolt, refit to deck - laid out prop tube strut, started with a chunk of 5" wide x 5/8" thick mild steel - now into machine shop to get the profile roughed in - need to finish up 3 starboard side porthole frames (ran out of 2" SS strip, but that came in yesterday) and fit my sail tracks - and then - aside from some clean up flappering - the exterior is done, and ready to blast!!!
Week of August 3rd managed a week off - boat work week!

I started by pulling out the trusted stick welder, and going at the stainless bulwark lip - and straightening out the bulwark edge in the process. Slow work, but it's great to see the bulwark straightening up again (got pushed in a couple crane lifts/boat moves, so there were some big wows up by the bow).
Then my sister and her Beau surprised us with a visit - her first ever view of the boat - and they celebrated with the first ever beer in the cockpit (damn that was fine - an icey cold one after 6 hours on a scorcher day - hope she comes back!) - yeah I know, 1 sprained wrist and a couple pops in the cockpit - it was a relatively slow day, but it felt great.
August 1st Fishing break - G.O.D. and I went off the west coast of Vancouver Island to an incredibly isolated location - with phenominal fishing. We limited out on any species we cared to - beautiful big chinook, huge halibut - and so many coho flying around snapping at everything in the water that it was truly hard to get down to the other fish! Of course those were the ones we're not allowed to keep right now.....also great to see lots of feed everywhere.
Good fishing in BC everywhere up and down the coast this year, nice to see.
July 25th - Lots of small stuff. Welded up a mis-placed hole in deck, top framing of integral fuel tank #1, couple of deck gear braces, cleaned up bilge mouse holes, cut & fit 2nd aft deck hatch, laid out interior box for same (steel frame & bottom, likely wooden sides). Unfortunately one of the main side deck cleats bolt seized (SS on SS galling??) Anyways, after trying an impact wrench then a 4 ft bar, bent bolt, but got enough exposed threads to plasma off 1/2 the bolt (3/4" SStl beauty), and the 4ft bar torqued off the rest. At least we got it off the deck so I deal with the rest in the workshop.
Deadline time - booked sandblasting & painting slot - should be in the shed in two weeks, blasted and primed inside and out before the end of August. Looks like I'll get a week off in there - wish me luck!!
G.O.D. (good old dad) has taken a shine to grinding the exterior weld bumps - and I tell ya, for an 79 year old, he puts me to shame - he ground for 2 days steady, and wants to come back for more.
July 18th - out of town wedding, staying with some very good old friends - guess ya gotta spend time or lose'em, right? - good weekend, but little boat work. picked up matching aft deck hatch, and the special short winch base screws - plasma cutter trigger finger is a-twichin'
Lined up for sandblasting - figure I have leass than 1 month to be ready.....it'll be close.
July 11th - Lots of small stuff - finished drilling & tapping the SStl base plates that will act as winch pads (did you know the older winches don't have their anchor holes on consistent angles around the diameter of the base? always one offset to fit between gears). Last deck cleat mounted and reinforced. Main side cleat reinforced belows decks ( and anchor bolt is now truly stuck - !) Burned drain holes thru bulkheads inside keel. Moved passageway from pilothouse area into galley sideways 1 ft (more galley counterspace) - which meant burning and rewelding a section of bulkhead. Positioned and installed manual bilgepump into main bilge sump. And good old Dad ground pretty well all the bottom of the hull's weld 'bumps' - the small humps that result on the exterior of a steel plate when you get a good weld on the inside.
Not a lot to take pics of - but trust me, it's pretty :)
July 4th - it is so easy to lose mometum - so I picked easy tasks to get moving again. Drilled holes - lots and lots of holes......pretty well all for deck hardware. Secured deck hatch, positioned cockpit winches (not bolted down - SS sub-plates will be welded to deck, but I needed those placed so I could line up all else), cleats, footblocks, rope clutches. Had one last main cleat midships that I'd never got around to, one seat drain modification - all now done. Feels good.
June 21st - Zippo - the world intrudes as work & life combine to thwart my therapy again....

June 14th - 3 portside portholes in - these are actually the inset SStl frames I made up last week, portholes will mount inside the frame. Really opens up the aft cabin for both light & ventilation.
Also added a deckhatch to access what will become a water tight jerry can++ storage locker. Was wrestling with where to position this- everything was getting jammed up on the aft corners - cleats, pulpit mounts, radar arch - finally figured out moving the locker forward between the two aft portholes will allow me to get it away from the crowded corners - inside, I'll blend it in with the internal clothes lockers - won't know it's there.
June 6th - Time to get the aft porthole frames in - 6 SStl frames that inset the Lewmar Ocean portholes in 1-1/2". Looks good, protects portholes from physical damage, and allows the portholes to stay open in most weather.
I'm setting these relatively high in the flush decked aft cabin - will have to be in significant weather to submerge the ports, so hopefully that will have triggered me to close them.
Backing plates might look a little rough - tried having a local machine shop fab them, and clearance around porthole was mis-read - I torched them apart and re-used the nicely NC machined mounting plates.

Was too hot inside boat Sunday, so I did a little clean up on the inserts, then installed a deck plate to allow direct access to the chain locker. Sails will have to go in thru the large foredeck hatch and the the watertight sail locker bulkhead hatch - but at least I can grab lines and some bumpers without going inside now.


May 30th - Good weather again, so more outside window work - this time the port and starboard pilothouse windows. Incredible difference from inside boat.
Rectangular side windows are sliders, so we have 3 opening windows, the entry doors and sliding hatch, and one 16"x16" hinged hatch (over interior steering station so we can see main sail from inside) - so lots of glass, but with lots of ventilation too.
trimmed and fit interior wood spacers. Bit's n' pieces afterwards - Ground stbd midships deck seam (long over due) - fitted foraward stbd midships deck cleat (2 to go) - trimmed aft cabin deck beams for 6'6" passage way (okay 6'-1", but I have a taller buddy)


While I was plasma cutting Dad grabbed the drill and finished up the anchor windlass base, then finished the 20 odd holes required to secure the propane locker cum transom step lids - SStl piano hinges use lots of screws.
May 17th - the clouds parted, sun came out - and I enjoyed working out on the deck - actually on the propane lockers cum sugar scoop seats/steps. Never quite finished those, and I did have stainless trim on the lids, so I cut, braced, trimmed, trimmed, welded, trimmed - and finally drilled to secure the SStl piano hinge. Repeat all for other side. Face looks like I got some sun today
Looks pretty good, strong like bull ( I KNOW my 6 ft son and his buddies will be bouncing up and down these) - but camera battery dead so no photos today.
Also got tired of having to do all welding at the boat - can't weld in garage for cars/smoke etc - so I picked up a fabric garage (10' x 20') that just fits down the least used/viewed side of the house - figure I'll use my stick machine here, fitting up the SStl porthole frames (all fitted, just need to be tacked then seal welded), and also practice my aluminum techniques on main hatch & steering pedestal - so I'll pick up some welding time after dinner a couple nights a week. That'll help me hit this year's goal - sandblast and paint inside and out when it's hot this summer.
May 16th - loaded SStl wire in the mig and starting catching up on the backlog
Got back down under the pilothouse floor and welded up a stainless flange backside of my bilge shelf, tacked in the MS side flanges for the tank top, and seal welded in the SStl pipe that runs thru the tank to the central bilge sump.
May 9th - another new job and busy studying thru weekend for Monday review - sometimes seems like life conspires to keep me away from the boat!
Did get back under the pilothouse floor to work on the tank - here you can see hole thru floor and welded in vee'd shelf - this will serve as bilge for both flow from aft and drain this section. Pipe to main bilge sump will run thru fuel tank from this point.
May 2nd - fighting set up of aft integral fuel tank - laid out everything using 1-1/4" angle iron - found that I couldn't see top corner to weld - so I knocked everything apart & started again. Flange has to face inwards to be able to weld properly. Did cut/bore 2" SStl angle to serve as aft face of tank, and allow SStl pipe to run from that point thru to central bilge.
Cut/die ground good path for bilge water on aft keel floor/bulkhead
Short Sunday - had to take wife to play bridge - ( her hobby - definitely cheaper than mine!)
April 25th - working a couple projects

Engine raw water intakes - had two threaded doughnuts made up out of 316 SS to match the strange metric thread that came on the Vetus 1-1/4" SS intake scoops. Cut holes in hull where I'll be able to reach the shut-off valves without having to open up the pilothouse floor (that the engine and generator will live beneath) - and with a little helping hand to hold the doughnut in place, will weld the doughnut to the hull inside & out - will then have a wonderfully strong base to thread my scooped thruhull into, with great support for the ball valve that will be threaded on from the inside - and if something ever does manage to smash off the exterior scoop, the doughnut & valve will stay with the boat. The larger unthreaded doughnut is an insert I plan on welding into the hull parallel to the waterline, then insert the depthsounder sensor thru - will give me a better clamping surface while aligning the sensor vertically.
April 18th - no pics - worked forward floors, fitting floor stringers, straightening frames, basically tidying everything up prior to fitting floors. Also did some more fitting on the aft integral fuel tanks; fitted SS drain pipe running from engine bay thru to main sump, thru the fuel tank, plasma cut drain holes thru frames to allow what ever does drip in to work it's way around the sides of the tank to the sump.
April 11th - Up in bow fabricating the internal base for our two anchour windlasses - one frame just under the leading edge of the windlasses (where the highest down force will be) with the lengthwise members tied back to the next frame.
Also beginning set up of 2 aft keel compartments as an integral diesel fuel tank
April 4th - wanted a couple easy projects - install opening ports in deckhouse; set-up main sump bilge pump; install bilge pump thru-hull; install engine and generator raw water pick-ups.

March 26th - all keel floor sections in place, and incorporated a SStl sump at the lowest point.
Also decided that I will turn the aft two compartments into one internal diesel tank (project for later)
March 19th - still cutting & capping

March 12th - Keel Floors - not quite the right term - I'm adding a steel plate to cap off the top of the lead poured inside the keel. Painful area to work in - confined quarters with nothing square, compounded by my desire for these caps to be angled both towards the center line and to one deep compartment where the bilge pump will pull from. First compartment had the most complex shape - made an undersized rough template, used a templating finger to develop accurate plywood templates (I like using doorskin - thin & stiff), finally transfered to steel plate, cut, fitted, & welded in place. Pipe nipple in starboard side is so I can pressure test after welding to ensure I have a good seal, and then it gives me the option of pouring a sealing layer of tar or oil over top of the lead as a secondary seal.

Exterior photo of keel shows bilge floor weld lines - profile of drainage within bilge, leading down from either end to the central sump. 7 tons of lead fits beneath that line!
Will be turning the last two aft compartments into internal fuel tanks - figure about 30 gals total. Compartments forward of the sump will fit two plastic water tanks, then I'll be looking at a plastic shower sump - steel is good for diesel, want non-corrosive tankage otherwise.
Boat: V495
Designer: Bruce Roberts


for more boat photos go to: http://community.webshots.com/user/normfacey